Il PowerPoint (34 slide)
Le slide della guida, una per riquadro.
fonti/Mihawk Guide.pptx (34 slide)Why is 10c Shanks So Broken? Srsly
A Mihawk Guide in OP17 By: Josh “Impact” Graham
Part 1: An Intro to Deck
Slide 3 — What The Deck Is
- Midrange Deck
- Rush Finisher
- Builds Board by developing sticky characters quickly.
- Finds follow-up plays consistently due to the immense amount of card draw.
- Aggressive leaning.
- Really fundamentals heavy deck. Requires good understanding of how to play midrange decks well. Requires good understanding of how to play One Piece well.
Slide 4 — What The Deck Isn’t
- Not a control deck.
- Though it is able to control the board and win resource battles if it has to, your primary win condition is dealing damage, not grinding people out of the game.
- The deck uses freezes to push tempo, not extend the game.
- This isn’t OP14 style Mihawk where Law and Bepo was used to extend games multiple turns and use boss monsters like Mihawk and Shanks to control the opponent. It is meant to end games quickly.
Slide 5 — Deck’s Strengths
- Very consistent. Key pieces are searchable with Otama and Perona.
- Lots of card draw means you will be able to filter towards unsearchable pieces (Vander Decken, Yasopp, Coffin Boat)
- Deck cheats an unbelievable amount of DON every turn. 4 extra DON between leader and stage.
- Deck is strong at racing because of Shanks and Luna.
- Deck is strong at ending games quickly because the excess DON from leader skill lets you develop attackers while attacking for more damage.
Slide 6 — Decks Weaknesses
- Deck can be weak to early aggression or explosive starts.
- The deck has a higher than normal brick count (It is a GREEN deck so it is to be expected) so it requires a little bit more micro managing than most decks.
- Deck can be weak to large characters that are outside of Luna range if you don’t have Vander Decken early.
- Other than that - no real weaknesses. This is an incredibly overtuned deck.
Part 2: The Deck
Slide 8 — The Decklist - Standard Decklist
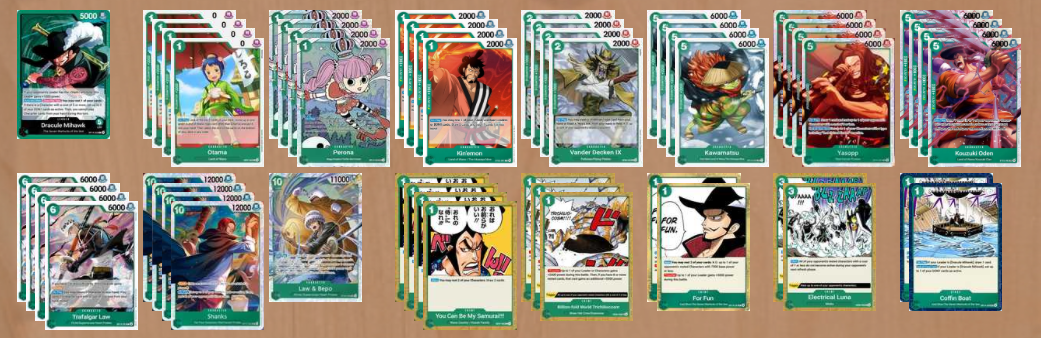
Trascrizione dell'immagine
img/decklist-impact-law-yasopp.png. Carte e copie: Leader Dracule Mihawk OP14-020; 4 Otama OP07-022; 4 Perona OP12-034; 4 Kin'emon ST32-001; 4 Vander Decken IX OP06-033; 4 Kawamatsu OP12-023; 4 Yasopp OP17-031; 4 Kouzuki Oden ST32-002; 4 Trafalgar Law OP13-031; 4 Shanks OP17-022; 1 Law & Bepo ST24-004; 4 You Can Be My Samurai!! OP01-055; 3 The Billion-fold World Trichiliocosm OP06-038; 2 For Fun OP14-037; 2 Electrical Luna OP08-036; 2 Coffin Boat OP14-039 — totale 50Slide 9 — Possible Techs
- Hody Jones
- Mihawk 6c + Perona
- Smoker
- Dead Mans Game
- OP07 Jewelry Bonney
- Law and Bepo
MulliganSlide 10 — Mulligans
- Going first
- Perona, Kinemon, Stage, Otama, YCBMSamurai, Yasopp
- Going second
- Perona, Kinemon, Stage, Otama, YCBMSamurai, Yasopp / Oden + Law
- Cards you are generally looking for:
- You’re looking for the card draw pieces so you can structure your hand to play the game.
- You’re often trying to find with your searches / card draw a play for T3 (5 or 6 DON Turn) T4 (7 or 8 DON turn) and T5-6 (Shanks)
- Because what you need is so wide to play throughout the game, you need to make sure you mulligan for your cards that give you extra cards / looks in the early game.
- Perona is REALLY Important!! You want to bounce her with Law to continue to find follow up.
Slide 11 — Key Cards
- Perona, she finds everything
- Kinemon - helps filter bricks, Law / Samurai target, helps draw towards unsearchable pieces.
- Shanks. This card DOES EVERYTHING. It’s a finisher, it’s removal, it sets up removal, it sets up Luna. Broken card. Will eventually be pair banned with this leader. Super broken to have a 5 cost 12000 rusher.
- Law, allows you to double develop. Putting in Yasopp rested doesn’t matter as Yasopp will restand itself.
- Yasopp is broken. Board control tool in the early game. Very difficult to deal with without hard removal. Also restands your Shanks (important vs Purple or Rocks)
TurnoSlide 12 — Going First Curve
- Turn 1: Kinemon ideally. Any searcher works but Kinemon costs 1 DON on turn 1 whereas it costs 2 DON on future turns.
- Turn 2: Perona / Otama -> Samurai. Good turn to Samurai
- Turn 3: Oden / Yasopp. Develop a 5 that draws a card. Convert additional Samurais / Stage using free DON from your leader skill.
- Turn 4: Law -> Oden / Yasopp. Double develop. Hand neutral play. Replay Perona if you have it. Find a play for next turn.
- Turn 5: Law - Yasopp -> Vander Decken if you’re playing a matchup with important 7-8 DON characters (8c Kata/Teach is a big one vs Robin), Law + Oden if you aren’t. This is the ideal turn to cycle searchers and Samurais to find pieces for 10 DON turn.
- Turn 6: Shanks + Decken and/or Luna, depending on the matchup what you need, but no matter what you need Shanks. You can also use the free DON here to play searchers etc to find more plays if you don’t need to Decken.
TurnoSlide 13 — Going Second Curve
- Turn 1: Double 1 cost. Be sure to use ones that draw before you search to know what pieces you need.
- Turn 2: Continue using searchers. This is the first Samurai turn. Make sure to leave a character active for Law if they can actually clear your characters.
- Turn 3: Law + Yasopp ideally. You can use your leader skill to then rest something, and then pressure the rested character creating a 2 to 0 board lead.
- Turn 4: Another Law, ideally with Oden on this turn so you can stun a relevant attacker while pushing with your other 6k bodies and excess DON to make good attacks.
- Turn 5: Shanks. From here on out you’re playing Shanks. Recognize when it is your last turn, then you can play the single Law and Bepo to extend the game 1 more turn if necessary. Make sure to count how many turns you need to actually end the game.
Part 3: Understanding Fundamentals and Deck
Slide 15 — How to Play Deck
- Use early game to dig for pieces and find more continuing card draw and follow up plays.
- Use mid game to establish attackers. Use free DON to convert more card draw spells / stages. Try to push a damage every turn with the leader skill.
- Use the later turns to develop Shanks. Try to time your Lunas with however many turns you think the game will last. Shanks + push a bunch of 7s is also an incredible turn. Why is Shanks a 5 cost 12000 rusher in Mihawk? Unreal.
- Set up wins by aggressively pushing 7s and getting your opponent into Shanks kill ranges. Without a board you can play Shanks, tap down your stage / searcher and send a 10+12 swing. If it takes multiple Shanks to win, plan towards closing out games via multiple turns with multiple Shanks. This card is so broken lol.
Slide 16 — Pitfalls Playing Deck
- Not playing aggressively enough. You get three free DON a turn. Use them to push damage.
- Not cycling bricks. Samurais and Coffin Boats need to get out of your hand aggressively. Kinemon in the later stages of the game can filter bricks on the 8/9 DON Turn or in combination with Shanks. Make sure you don’t stuck on million bricks.
- Not bouncing Perona with Law. You want to use Perona to find continuation or critical pieces (Billions, Luna) as Perona hits most of the deck.
- Undervaluing board control. Yasopp their guy and jam it down is a very strong play in the early game.
- Not getting event counter out of your hand. You will end up spending most of your DON. Make sure to use 1 a turn in the later stages of the game if you have Coffin Boat. If not, look for turns where they’re likely to attack you for damage, and weave them in.
Slide 17 — How to Defend Life as Deck
- In most matchups you can take fairly aggressively. You need combo pieces and you have the ability to stabilize games at 1-2 life fairly easily when you combine Luna / Billions / Bepo etc.
- In the mirror - try to counter smaller hits as Shanks will swing too big to counter.
- Make sure you don’t set yourself up for losses. Don’t take damage you don’t plan on accounting for in future turns. If you think defending a 5 or 6 on this turn means you can take an 8 the next turn (like when they drop Linlin and attack with their triggers) then you should do it if it doesn’t cripple your resources. Think about the whole game, not just this one turn.
Slide 18 — Defending Characters as Deck
- For the most part - your 6K bodies sticking in the mid game is how you convert wins. Make sure to protect them. Most of the time they’re bigger than your leader. Most of the time - Billion will keep them alive. Make sure to protect your board.
- You can start letting pieces of your board die when you’re scaling into Shanks, etc in the late game. Calculate if you’re going to need the counter to stay alive vs having an extra 6k body to swing. Ask yourself if that body’s necessary to win. Often times you’ll win by dropping back to back Shanks anyway.
EarlySlide 19 — Early Game Plan
- Draw cards and find pieces.
- Search for 5-6, 7-8, 9-10 DON Turns. Make sure you don’t take excess pieces. Make sure you spend card draw and searches to find and complete your curve.
- Take early damage to draw additional cards as you are a combo heavy deck and are looking for pieces as you have many moving parts.
MidSlide 20 — Mid Game Plan
- Establish your attackers across 5-9 DON turns. These 6K bodies will convert to 7K swings with the free DON from your leader ability.
- Cycle any additional searchers with extra DON on the 7-8-9 DON turns. Make sure you’re set up for the late game.
- Cycle towards Shanks combos and counter events to survive.
- Pressure your opponent. Make it so you need as few Lunas / Shanks as possible if you can’t find all of them to close the game out. Try to prepare for 1 extra turn than you think you’ll need.
LateSlide 21 — Late Game Plan
- Use Shanks combo to disable opponent’s boards while pushing damage.
- Try to end the game in 1 to 2 turns. Shanks is the best finisher the game has ever seen. Use it wisely.
- Law and Bepo can extend the game an extra turn while developing 1 additional attacker. Good way to punish people who are playing around Shanks (swinging with everything). Law and Bepo cannot extend the game forever anymore due to Shanks + Decken stuff in the mirror so that’s why we don’t build our deck around it anymore, however I’ve really liked the 1 copy.
Slide 22 — How to Filter With Leader
- As a rule of thumb, try to think at least what you are going to use within the next 2 turns. Don’t try and hold onto non-counter you don’t see yourself playing within the next two turns.
- When you are playing towards a specific gameplan - try to filter out cards that don’t contribute to this gameplan.
- When in doubt, discard non-counter before discarding counter. The deck plays a lot of bricks and it can be easy to get stuck on a lot of non-counter.
- Try to make sure to not get stuck on plenty of events. Make sure you weave them in from time to time to avoid getting clogged up in the late game.
Slide 23 — Using the Leader Skill
- Important to use the leader skill to push damage. As we are an aggressive leaning midrange deck, it is important to use those extra DON to convert damage since we don’t want to play forever games with our opponents.
- We also need to make sure we cycle Samurais and Coffin Boats with those extra DON so we don’t get stuck on nothing but non-counter.
- Calculate how many DON exactly you’ll need for counter events. On average you want to spend 1 a turn, but think about how much damage they can actually do. Count their swings.
- On the last turn, leave up as many defensive events as you can. Try to end on 3 if you don’t need to Luna.
Slide 24 — How Does Deck End The Game
- Ends the game with a Shanks + 5 extra DON to swing out.
- Work your way backwards from there - how do we get in a position to win?
- We Shanks + Luna / Decken to extend the game while also pushing a damage with a Shanks.
- Before that - we need them in range of a 2 turn lethal with back to back Shanks.
- We convert our board in the middle of the game into attacks into the leader to get additional life and cards.
- Which means we need to build a board while pushing damage.
- Use leader skill to push damage to get your opponent in 2 turn lethal range with leader swings / your board. End games quickly. Games should end on the 2nd 10 DON Turn. Can extend the game 1 more turn with Law and Bepo if necessary.
Slide 25 — Navigating Towards Win Con
- Map out the damage you’re dealing each turn.
- Think about the game as a whole. Which turns you’re dealing which damage. In Pokemon they call it Prize Mapping. In Riftbound they call it Point Mapping. In One Piece we just call it dealing damage.
- Think about how you’re getting that damage. T2 you’re getting a damage. T3 you’re using free DON from leader skill to push a damage. T4 you’re doing the same thing. Maybe getting cards while doing so. Etc etc.
- Take an extra turn than you think you’ll need as you’ll often need a turn to get the cards out of their hand once you’ve gotten all or most of their life. It isn’t as easy as get them to 0 and win.
- Don’t go for risky lethals, most of the time Mihawk can survive their clapback as they have the “free” Rad Beams and Lunas etc every turn. Just use a turn to extract value and force them to go all in against you. Just make sure to put them in those positions when you actually have their attacks covered (count!)
Slide 26 — Turn Around Losing Scenarios
- Losing scenarios are always winnable because of Shanks.
- Use Shanks + Luna to get additional turns. Use Shanks to put you closer to the win condition.
- No matter what, this deck’s win condition is killing the opponent while they’re at 0 with an unblockable swing (Shanks taps down all the blockers) so make sure you’re pushing damage.
- Try to extend the game additional turns with Law and Bepo, Law + Oden, etc. to get that extra damage with your leader swings.
- Counter aggressively to buy yourself more time to push more damage.
Part 4: Matchups
Slide 28 — Vs Mihawk - Go 2nd
- This matchup is about damage. Understanding how to deal damage and how to map damage across multiple turns is going to be the key to victory.
- Drawing multiple cards in the early game will give you ammo to counter swings while also ensuring you have your curve. Resolving Samurais is very important in making sure you actually can win.
- This matchup is very different to how it used to be played prior.
- We play less overall stuns than before. Less Peronas means attacks will go through. When characters get to attack - you need to size the attacks with the goal of dealing damage, not extracting cards.
- Good numbers to attack - 7000, the deck plays only 8 2000 counters and often puts Otama on the table. 8000 if they don’t have a DON up to get a life or 2 cards. 9000 if they don’t have 8 rested cards. 10000 to attack past Billionfold. 6000 attacks are OK but it is easy for the deck to produce 1000 counters. It is easy for this deck to fail 2K checks.
- Follow the curve and gameplay instructions listed as this matchup doesn’t deviate much from the plan. Get your opponent to 1 life to set them to 0 with Shanks and freeze their attackers with Luna, then you can do a huge swing with Shanks when they’re at 0 and should kill them.
- Try to counter smaller swings early. Don’t get stuck on too many events as your free DON from leader can’t always be held up in the late game, especially if you have to freeze their characters with Luna.
- Luna is very important in the mirror. Try to find the copies with Perona / drawing for them, as the extra turns from Luna save you a lot of counter in the mid-to-late game. Games are won or lost by how many turns you can stall the game with Luna. That’s why we included a Bepo to protect ourselves 1 turn from the 6000 power bodies by becoming an 8000 leader and disabling their Shanks.
Slide 29 — VS Rocks - Go 2nd
- Rocks is a Slash Leader. Mihawk naturally defends for free, and extracts more counter just on character select. This is not auto-win by itself, but it is the difference of several cards throughout a game.
- Rocks major weakness is that all of its primary attackers are 7 cost or less, so it is extremely weak to Luna. If Luna + Shanks combo didn’t exist, this matchup wouldn’t be so lopsided.
- Rocks wins by dealing damage to you really aggressively and trying to “stall out” your Lunas with Captain John. Even if you get them to 0, Captain John can keep them alive. Shanks does tap down the Kyo, but Captain John protects it, so you can’t get to it and Vander Decken. Combined with the “Usopp event” - it can guarantee another turn for the Rocks player. Even just a single Captain John can buy them an extra turn. Account for these extra turns and don’t go “all in” with Luna too early. Bepo is great to buy you an extra turn if they are stalling with John without having to burn a Luna. If you realistically can’t kill them through a Captain John - remove some of their attackers with either Vander Decken or just board control them with the Shanks. For the most part - extra turns benefit Rocks but if you remove all their attackers / their defensive units then they will die anyway.
- Other than that - you get a lot of free damage because of the fact that your leader is 6000. When you refresh, you will be able to attack them for 7-9000 easily and push through their defenses with your leader.
- Play around Shiki by not attacking with just 1 6000 power body at a time. Remove Shikis on sight with Vander Decken if they’re not protected by a Kyo. Removing Kyos with Yasopps in the early game is also worth it a fair amount of the time to prevent the snowball. Yasopp does a good job of also being an attacker that “plays around” Shiki by restanding itself.
- Attack Rocks for 7s when they don’t have Newgate up. Attack them with your leader for 7 if they have Shiki up. Attack for 8s with characters or base numbers if they have Shiki up.
Slide 30 — VS Sabo - Go 2nd
- Sabo is another type of midrange deck that revolves around planting a lot of 2/5000 power units that provide some sort of value. It punishes you for attacking with individual bodies because of Robin the amount of stats it can put into play can be overwhelming.
- Yasopp was one of the cards put into the deck originally to help deal with the early characters from Sabo while not losing value. It is meant to board control the 2000 power characters before they have Giants in play. This reduces the amount of pressure coming back at you and gives you more time to extend to your Shanks + Vander combo to deal with their big characters.
- Try to not put Otama on the table if you can help it, they’re going to 2K check you often with their 6000 power weenies so I don’t want to get caught without. Try to use other searchers, etc to resolve your Samurais.
- Play for board control so that your Odens are more impactful, stalling their Lokis is ideal as you’re getting the most value stunning 9000 power units that way.
- For Fun was another inclusion to help deal with Sauls as it is very costly to deal with 7000 power units otherwise. All these tools are here just to buy you extra time as this is one of our worst matchups (still 45-55 btw, and with the techs I think it’s at worst 50-50)
- Use Yasopps to deal with Zoro ideally so that Vander Decken can land on important characters like Luffy / Loki.
- If you can remove their only Giant then all their weenies fall immediately after.
- The Sabo curve is fairly obvious what they’re going to play. Try to leave up DON if possible on certain turns to protect yourself from 7000 power attacks with 1 card. It will be hard to block the 9000 power attacks later so making sure we can stop the 6000s and 7000s while we can is important. Be careful about bleeding life.
- Very important to make sure you have a reasonable strategy to counterpunch them. You won’t be able to fully stabilize but their defenses are weak so you are often able to 2 turn with Shanks back to back if you can get them to 2. If you aren’t in range of dying (count lethals) - then do your best to set up a 2 turn kill.
Slide 31 — VS Kaido - Go 1st
- Prior to the Fishman build, Purple ramp decks like Kaido (last set it was Katakuri) were favored as Law and Bepo wasn’t really good enough at stalling out Kaido’s bombs and a Big Mom swing turn was enough to put you far behind.
- Now with Shanks + Vander Decken combo, your opponents are investing a lot into getting to higher DON totals while you’re pressuring and you’re able to remove their investment while generating tempo. It is similar to Red Roc while you already have a board, except the board is a 12K rush + everything else!
- Vs Kaido - it is important to understand how to attack to play around their leader skill. Make sure your 6000 power characters attack for 7000. It is a better investment to put the DON on the characters than the leader when trying to get cards. When trying to push for lethal, it is a better investment to put the DON on the leader since the leader doesn’t come with a theoretical -2000 power.
- Getting Kaido to 0 isn’t that easy as they have multiple heals. Luckily the deck is very bricky and if you’re able to pressure multiple 7000 power swings throughout the game they will fall to low life totals and be forced to heal.
- Yasopp is very important vs Kaido. It allows you to push with a character without being afraid of them attacking back into it. Later in the game, you also use it to restand Shanks after attacking with him to play around 10-Mom.
- Take their first so you can develop an extra attacker and slow down their ramp. Ramp decks typically want to go first as they want more turns to use their extra DON.
- Once you get the Kaido low in life - it is easy to close out the game with a Shanks Vander Decken combo removing a body and setting up lethal. Once they are low in hand, it is easy to use Shanks + all the free DON between the leader and Shanks to attack big into their rested bombs as well. Just make sure to fish out the leader skill with your 6000 power attacks from other units first.
Slide 32 — VS Robin - Go 1st
- Robin tries to starve you and board control your characters with 3 Sweet Generals. They try to attack you and get you to counter. Best way to counteract this is take the first couple of leader swings while focusing your energy on drawing a lot of cards with Samurai so you can easily get around their leader skill starving you.
- Use Yasopp to remove their 4000 power bodies so that they don’t have a huge board once they ramp to 10 DON and play Charlotte Linlin.
- Shanks + Vander Decken and Luna the 4K Bodies is the win condition.
- Yasopp is very key as it is an attacker they can’t easily remove with 3 Sweet Generals.
- Pressuring Robin is very key. You can’t let them comfortably play 2 Big Moms as it’ll create a lot of trouble for you if you can’t remove the “buff their team” effect.
- They don’t really play KO triggers outside of maybe 1-2 Teach so pressuring them with your bodies is good, and go as wide as possible to make sure you have an efficient clock as well.
- Once you comfortably are in B2B Shanks turns, the opponent will lose. The matchup is not good for Robin with Yasopp controlling them in the early game and Shanks removing all their attackers while setting up counter pressure. Just do what you can to make sure their Moms aren’t getting enough advantage before then that you’re left in a gamestate that isn’t recoverable.
- Don’t really need to “play around” Gum Gum Giant. Just attack 7s and force it out when possible. Most of the time be prepared for Robin to live a turn longer than you think she will. She is very tanky with Borsa + Giant turns. Make sure that they don’t have established attackers going into their defensive turns and all those turns will do is extend the game that you will inevitably win. If they have attackers and begin to stall is when it becomes a big problem for you.
Slide 33 — VS Enel - Go 1st
- Establish searchers to remove their 1 cost units without having to invest much in doing so.
- Use your leader to try and pressure a life every turn ideally. Don’t really expect your board to stick / not be frozen. If something sticks, use it to swing 7000.
- Oden is great at stalling out big Enels, Save them to try and do so. Yasopp is great at removing their 4 cost units to prevent them from snowballing into you with stuff sticking into another 4c + removal turn.
- Shanks is great at removing their board or dealing damage. If you can get an Enel to 1 life, back to back Shanks is an easy win. If they are still at high enough life, then using Shanks to deal with a Reiju and using your weenies to clear their 1 costs is a strong turn as well.
- Make sure to avoid taking too much damage from Enel. Try to counter at least 1 of their swings per turn so that you don’t lose more than 1 life a turn. You’ll need a life buffer to resolve back to back Shanks as Enel is one of the decks that can pressure you efficiently.
- Shanks + Luna and then putting the Shanks into the Reiju while pushing 7 with lead is a big swing turn. Try to save the pieces, as it is a 4 card combo, but it’ll be expensive and hard to pull off the combo multiple times so try to make sure the turn you do the combo that the Shanks is actually setting up a win on the following turn. Assume your Shanks dies and then you’re sending lethal with your leader and another Shanks.
- Getting Enel to 0 is basically game over as Shanks send 5 17 is basically always game since they have no +3-4k Event counters.
Slide 34 — Final Thoughts!
- Decks broken
- Needs nerf
- Play it until it’s banned
Appunti della video-lezione
Gli appunti ordinati della lezione.
impact-lezione-video-trascrizione.md). Contenuto verbatim dagli appunti forniti; solo i titoli sono stati convertiti in heading markdown. Fonte originale: fonti/Impact lezione video della guida.txt.Deck Identity
LateMidrange With a Rush Finish
Impact defines Mihawk as a midrange deck with a rush finisher.
Against slower control decks, Mihawk is the aggressor:
- It develops board quickly.
- It pressures life with repeated 6k and 7k attacks.
- It forces the opponent to answer several bodies.
- It uses Shanks to finish before the opponent can stabilize.
Against aggressive decks, Mihawk is more controlling:
- It uses Yasopp, Oden, Perona, Vander Decken, and Luna to reduce attack count.
- It clears or freezes the body that makes the opponent’s board dangerous.
- It creates a board lead, then uses that lead to begin attacking life.
The key distinction is that Mihawk is not trying to do both jobs at once. It changes roles depending on the matchup and current board.
What Mihawk Is Not
Impact is clear that OP17 Mihawk is not the old long-game Mihawk deck.
It is not:
- A pure control deck.
- A deck trying to play endless slow Law/Bepo turns.
- A deck that wants to stall every game indefinitely.
- A deck that should ignore life pressure just because it plays Luna.
The deck uses stuns to create tempo, not simply to extend the game. It wants to get four or five bodies in play, attack repeatedly with 6k and 7k numbers, and force the opponent to respond to its pressure.
Core Curve
Baseline Curve
Impact’s default curve is:
- Early one-drops and searchers.
- 5-DON!! development.
- 6-cost plus 5-cost development.
- Another 6-cost plus 5-cost development.
- Shanks on 10 DON!!.
- Vander Decken and Luna lines as needed.
- Law/Bepo as a secondary bomb or turn-extension tool.
- He describes the core sequence as: One-drops, draw and search, 5, 6 plus 5, 6 plus 5, then 10.
This is not a rigid script. The actual point is to establish enough bodies that your free DON!! can create repeated 7k attacks while you are still developing.
TurnoGoing First
Impact’s preferred going-first early pattern:
- Play Kin’emon when possible on turn one because it costs only one DON!! then and costs more later.
- Continue with searchers and one-drops.
- Use Samurai on the early turns when it converts bodies into more pieces.
- Develop Yasopp or Oden on the important midgame turn.
- Use free DON!! to turn 6k bodies into 7k attacks.
- Use Law plus Yasopp, Law plus Oden, or Vander Decken lines to remove a meaningful opposing character.
- Spend the later turns on Shanks, Decken, Luna, and follow-up bombs.
TurnoGoing Second
Going second provides a particularly efficient curve:
- Play two one-drops early.
- Resolve draws before searches when possible.
- Keep an active character available for Law if the opponent can clear your board.
- Develop Law plus a meaningful body.
- Use leader effect and board attacks to remove the opponent’s first important character.
- Push 7k attacks on the next turn while the opponent is behind on board.
- Transition into Shanks turns once the opponent is in one- or two-turn lethal range.
Impact’s central going-second objective is to reach Shanks while the opponent is already under enough pressure that Shanks either puts them to zero or forces them into an impossible defense turn.
Key Cards
Yasopp
Yasopp is the deck’s main sticky attacker and one of its strongest cards.
It provides:
- A body that is difficult to remove cleanly.
- Board control against early 2-cost and 5k bodies.
- A free leader-effect rest target because it stands again.
- Card draw.
- Pressure without leaving itself vulnerable in the same way as ordinary characters.
- A way to attack or remove targets while still enabling future Samurai, search, and leader lines.
Impact is especially high on Yasopp because it can convert a leader effect without the normal downside. It can rest for leader skill, then stand again, giving Mihawk additional flexibility.
Oden
Oden is sticky because it freezes the character most likely to remove or pressure it.
Its strengths:
- Stops an important attack.
- Draws into follow-up.
- Helps keep a body alive by disabling its most natural answer.
- Is a key stabilizer against decks with one large threat, especially King and Loki lines.
- Lets Mihawk develop while reducing the opponent’s turn.
Impact identifies Oden as a major priority into Kaido. If Mihawk can freeze King on the relevant 7-DON!! and 9-DON!! turns, Kaido’s pressure collapses quickly.
Perona
Perona is one of the deck’s most important consistency cards.
It:
- Searches more broadly than Otama.
- Connects to many continuation pieces.
- Can be bounced with Law and replayed.
- Finds Samurais, Lunas, Shanks support, stage, and curve pieces.
- Gives Mihawk a way to keep cycling through the deck until it has the exact pieces needed.
Impact repeatedly emphasizes that Perona should often be bounced with Law. Replaying Perona is how the deck finds its continuation pieces, especially Lunas and other late-game requirements.
Kin’emon
Kin’emon:
- Is the most mana-efficient turn-one searcher.
- Filters bricks.
- Helps build a board for Samurai.
- Helps find the non-searchable cards after the searchable Wano core has been removed from the deck.
Impact is clear that Kin’emon is not simply a turn-one body. It is part of the deck’s brick-management engine. When the hand contains cards you do not expect to play, Kin’emon should help convert them into new resources.
Otama
Otama searches a narrower range than Perona.
Impact’s search-order rule: Use the narrowest search first, then use the broader search.
If you have Otama and Perona:
- Use Otama first.
- See what the narrow search finds.
- Use Perona afterward with more information.
- Take the card that now fits the curve and game plan.
- Otama is usually more constrained, so resolving it first prevents the broader Perona search from accidentally taking a card that makes Otama worse.
Samurai
Samurai is one of the deck’s core card-advantage pieces.
It:
- Draws cards.
- Helps find Shanks, Luna, and other unsearchable pieces.
- Converts small bodies into hand velocity.
- Lets Mihawk remove bricks before the late-game combo turns.
- Helps maintain card quantity in mirrors and longer games.
- Impact recommends four copies.
He also stresses that Samurai needs board planning:
- Do not Samurai away all your one-drops if Law needs an active body later.
- Do not leave yourself without a body for Law.
- Use draw effects before search effects when possible.
- If a body is not going to attack, Samurai can be an excellent conversion tool.
Stage / Boat
Stage provides extra DON!! and is an important consistency card.
Impact would like to play more stages if space allowed.
Its functions:
- Gives additional DON!! for attacks.
- Lets Mihawk play board and attack for meaningful numbers in the same turn.
- Helps convert events.
- Supports 7k attack patterns.
- Makes Shanks turns even larger.
- Helps prevent late hands from becoming clogged with events.
The deck’s free DON!! is one of its defining strengths:
- Leader effect plus stage creates roughly four additional usable DON!! per turn.
- Shanks can add even more available DON!!.
- Mihawk can attack for 7k while still developing bodies, something many decks cannot do.
Shanks
Shanks is the deck’s best finisher.
Impact describes Shanks as unusually efficient because playing the rush body and attacking with it can ask for more counter than simply investing all available DON!! into leader.
When the opponent is at zero, Shanks can create an enormous unblockable attack spread.
Shanks does three jobs:
- Immediate rush pressure.
- Board control.
- A setup for Luna.
The standard Shanks goal is:
- Push the opponent to one or zero.
- Use Shanks to create a 10k to 12k attack.
- Freeze the opponent’s board with Luna.
- Prevent the opponent’s next turn from converting.
- Play the second Shanks or follow-up bomb to finish.
Vander Decken
Vander Decken is a central OP17 addition.
It helps Mihawk:
- Remove important midrange threats.
- Answer 8-cost or larger targets when paired correctly.
- Kill Shiki, Teach, midrange Katakuri bodies, and similar problem cards.
- Punish Kaido’s expensive boss turns.
- Break Big Mom and other large-body lines.
- Improve the Sabo matchup by removing key Giant bodies.
- Impact considers Decken a major reason Mihawk’s matchup versus Kaido flipped from difficult to favorable now.
Luna
Luna is one of Mihawk’s main tempo cards.
Luna:
- Freezes opposing board.
- Prevents large groups of 6k or 7k bodies from attacking.
- Makes Shanks turns far more punishing.
- Creates a pseudo-turn skip when the opponent’s board is rested.
- Helps Mihawk survive when it is behind.
- Is valuable in the mirror, Rocks, Enel, and board-based matchups.
- Impact’s key Luna rule: Use Luna based on how many turns the game has left.
If the game will end in one or two turns:
- Use Luna aggressively.
- Freeze the board.
- Prevent the opponent’s final chance to attack.
- Finish immediately.
If the game will last longer:
- A first Shanks can be used more for board control.
- Save Luna for the turn that actually decides the game.
- Do not spend all turn-skip tools before you have a lethal clock.
Law and Law/Bepo
Impact likes at least one Law/Bepo.
Law helps:
- Double-develop.
- Bounce and replay Perona.
- Reuse searchers.
- Deploy Yasopp without leaving it exposed.
- Create blockers.
- Extend the game by one turn.
- Turn a Law/Bepo turn into an 8k leader turn.
- Punish opponents who are playing around Shanks by attacking with their full board.
- Law/Bepo is not as important as Shanks plus Luna, but it is an excellent second bomb.
In the mirror, Law/Bepo is better than before because many players now attack with their whole board to play around Shanks. Once they turn their board sideways:
- Law/Bepo raises Mihawk to 8k.
- Their 6k bodies lose ability to pressure life.
- Mihawk can push damage while the opponent’s board cannot convert.
- Law/Bepo buys the extra turn needed for a second Shanks or a safer lethal.
Rad Beam (Billion Fold)
Rad Beam is a core defensive card.
Impact values Rad Beam because it can defend both:
- Life.
- Key board bodies.
- The correct use is often in the middle game when an opponent tries to clear an important character.
Rad Beam is better than many other events because keeping a 6k or 7k body alive can create repeated attacks and force the opponent to spend another full turn answering it.
Deck Strengths
Consistency
Mihawk has:
- Otama.
- Perona.
- Kin’emon.
- Samurai.
- Oden.
- Yasopp.
- Stage.
- Law recycling.
- Multiple drawing and filtering effects.
The deck often sees a huge percentage of itself over a game. This means it can search for its specific pieces instead of hoping to topdeck them.
Board Reload
Mihawk does not fall behind easily after removal.
For example:
- Law plus Yasopp generates value.
- Both cards can replace themselves or create value.
- If the opponent removes them with a two-for-one effect, Mihawk has still created cards and board value.
- Perona can be replayed.
- Oden can draw into a continuation.
- Samurai turns weak bodies into more cards.
The deck is not invulnerable to removal. It simply makes removal less efficient than it appears.
Free DON!!
Mihawk often gets to both develop and attack.
The deck can:
- Play a midrange body.
- Use stage and leader skill.
- Turn 6k bodies into 7k bodies.
- Play Samurai or another searcher.
- Still leave a DON!! for a defensive event.
- That creates attack patterns other decks cannot match without giving up development.
Flexible Role Assignment
Mihawk can become:
- Aggro against Teach, slower control, and decks with low counter.
- Board control against Sabo, Rocks, or wide aggro.
- Tempo-control against Kaido and yellow Big Mom decks.
- A race deck when Shanks gives it a one- or two-turn lethal clock.
Deck Weaknesses
EarlyEarly Explosive Starts
Mihawk can lose to unusually strong early starts from:
- Blue-Green.
- Sabo.
- Black Luffy.
- Other decks that establish several meaningful attackers early.
The key point is that the opponent needs a genuinely strong opening. Ordinary starts are not enough because Mihawk’s stuns, board development, and card draw will usually stabilize.
High Brick Count
Mihawk plays more bricks than many decks, roughly 18 according to Impact.
This is a real weakness. The deck needs disciplined filtering:
- Use Kin’emon to discard unplayable cards.
- Use Samurai to draw into active pieces.
- Play Coffin Boat or stage when appropriate.
- Do not take redundant bombs from searches.
- Do not retain a third Law, third Shanks, or extra high-cost card if it will not be played.
- The deck has enough draw to fix bricks, but only if the player actively manages the hand.
Large Threats Outside Luna Range
Mihawk can struggle if the opponent establishes large characters that cannot be frozen by Luna and Mihawk does not find Decken early.
This is most relevant against:
- Strong Robin ramp starts.
- Early Teach into Big Mom progression.
- Kaido and other large ramp shells.
- Oversized bosses that arrive before Mihawk has its normal response.
Mihawk can still answer many 8-cost bodies with Yasopp plus Vander Decken and can reuse Decken through Law. But it needs to identify those threats early and search accordingly.
Mulligan Guide
TurnoGoing First
Impact looks for a hand that can actually play the game.
Key keeps include:
- Kin’emon.
- Otama.
- Perona.
- Stage.
- Samurai.
- Yasopp.
- A functional 5-cost body.
- A coherent curve with at least two key engine pieces.
- A hand with Yasopp plus one or two searchers is often a keep as Yasopp itself is unsearchable.
Avoid hands that contain only powerful late-game cards but no early action. A hand full of Shanks, Law, Samurai, and events is not automatically good if it cannot develop bodies or make a functional curve.
TurnoGoing Second
The same searcher and draw priorities apply, but Impact is more willing to keep:
- A 5-cost body.
- Law.
- Two engine pieces plus a path to Oden.
- Perona hands because Perona can find nearly everything.
- Law is stronger going second because it can create efficient double-development turns and allows the player to search toward Oden.
MulliganMulligan Rule
The correct mulligan is not based on how many individually strong cards you have.
It is based on whether the hand:
- Develops early.
- Finds more cards.
- Supports Samurai.
- Has a 5-DON!! play.
- Has an actual 6-to-10 DON!! curve.
- Contains enough pieces to execute the plan.
- Impact’s phrasing is essentially: A hand full of good cards that does nothing is still a bad hand.
Search and Filter Order
Preferred Order
When all options are available:
- Resolve simple draw effects first.
- Resolve individual draws before discard-and-draw effects.
- Use the narrowest search first.
- Use broader searches after gaining information.
- Use Samurai after you have maximized information, if board requirements allow.
A standard ideal sequence may look like:
- Stage first.
- Kin’emon draw/filter.
- Samurai draw.
- Otama search.
- Perona search.
The exact sequence changes when Samurai needs specific bodies or Law needs a character. However, the principle remains: More information before a major search produces better decisions.
Search Priorities
Search for the card that completes the next two turns.
Do not take:
- A third 5-cost.
- A third Law.
- A redundant Shanks.
- A brick you do not plan to play.
- An event that will be stuck in hand later.
Take:
- The first body that creates your next development turn.
- Samurai if card velocity is the limiting resource.
- Perona when you need broad access.
- Oden when the matchup requires a freeze.
- Yasopp when early board control is the win condition.
- Luna when the next two turns are likely the finish.
Midgame Play
Establish Attackers
From 5 to 9 DON!!, Mihawk should focus on getting attackers into play.
The purpose of 6k bodies is to become 7k attackers through free DON!!. Do not waste the deck’s free DON!!.
Impact’s core rule: If one DON!! turns a 6k body into a 7k attack and that attack demands two cards worth of defense, use it.
Mihawk has an advantage because it can make these attacks while still developing board.
Cycle Bricks Before Combo Turns
Mihawk’s 10-DON!! and later turns often consume all available DON!!.
This means the 7-DON!! and 9-DON!! turns are vital for:
- Playing Samurai.
- Playing Boat.
- Replaying Perona.
- Using Kin’emon.
- Converting events.
- Removing bricks.
- Finding Shanks, Decken, Luna, and defensive resources.
- If the player holds too many events or bricks until the late game, those cards can become unusable because Shanks plus Decken plus Luna consumes the entire turn.
LateBoard Control Before Lethal
Mihawk should not blindly send every attack face just because it is a Luna deck.
Early board control creates the attack advantage that later makes Shanks lethal.
Example:
- Law plus Yasopp removes an opposing Yasopp.
- The opponent must develop into your existing board.
- Their new body cannot attack immediately.
- You retain a multi-character board.
- You freeze another body.
- You now attack four or five times while they attack once or twice.
This is the foundation of Mihawk’s pressure. You may sacrifice one attack to kill a body, but you permanently deny that body’s future attacks and create a superior board state.
Late Game and Lethal Planning
Work Backward From Shanks
Mihawk’s endgame is usually:
- Shanks creates a huge rush attack.
- Luna removes the opponent’s ability to counterattack.
- The opponent is put at zero or one.
- A second Shanks, Law/Bepo, or board attack finishes.
- Impact recommends damage mapping across the entire game.
Ask:
- How will I take their first life?
- How will I take their second and third life?
- What attack puts them into Shanks range?
- Does the first Shanks put them at zero?
- If not, can I survive one more turn?
- Does the second Shanks kill?
- Do I need Law/Bepo, Bonney, or Luna to buy that extra turn?
LateDo Not Ship Bad Lethals
Mihawk is unusually good at playing one additional turn.
If the lethal is uncertain and you are not dead next turn:
- Do not all-in.
- Use Rad Beam, Luna, Law plus Bonney, Law plus Oden, or Law/Bepo to survive.
- Force cards from the opponent’s hand.
- Preserve board.
- Set up a cleaner lethal next turn.
Impact’s rule:
- If you can afford one more turn, take one more turn.
- This deck has enough draw, counter, stuns, and defensive options that it frequently wins by forcing the opponent to attempt an all-in first.
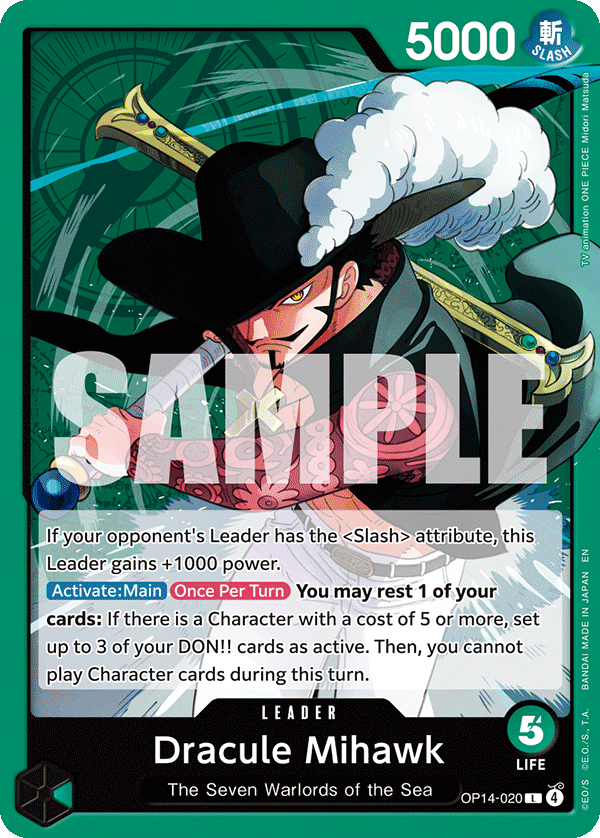
Mihawk Mirror
Matchup Identity
The OP17 mirror is primarily a damage-mapping and tempo matchup.
The old mirror was more directly about Law/Bepo chains and prolonged leader-size wars. The current mirror is more midrange-focused:
- Develop bodies.
- Attack for real numbers.
- Use Shanks and Luna to skip the opponent’s turn.
- Put the opponent to zero before they can do the same.
- Preserve enough life and counter to survive the first major Shanks turn.
- Impact prefers going second.
TurnoWhy Going Second Is Strong
Going second gives:
- Better development curve.
- Earlier access to the first major Shanks turn.
- Better ability to use Luna first.
- Natural initiative in the bomb exchange.
- More consistent ability to convert the board before the opponent’s bomb turn.
Attack Numbers
Impact’s key mirror attack thresholds:
- 7k: Important because the deck plays fewer 2ks than it appears to.
- 8k: Strong when the opponent has no open DON!!, often forcing life or two cards.
- 9k: Useful when the opponent cannot efficiently use Billion Fold or equivalent defense.
- 10k+: Usually less efficient than splitting into 7k and 8k attacks unless specifically attacking past an event threshold.
- He prefers spreading DON!! into multiple 7k and 8k swings instead of one giant attack in most mirror spots.
Life Management
Unlike older Mihawk mirrors, players should counter more of the smaller attacks.
Why:
- Shanks creates a 12k attack on the bomb turn.
- Mihawk at zero has limited reliable survival.
- Law can be answered.
- Blockers are not dependable.
- A player needs a life buffer before the Shanks turn.
- Impact’s general mirror goal is to defend enough 6k to 8k attacks in the midgame that Shanks does not put you to zero too early.
However, do not counter with the only card that makes your next turn work. The player must consider the entire game, not merely the current attack.
Stun Bonney
Stun Bonney is a major mirror tech.
It can:
- Prevent the opponent’s Shanks turn.
- Buy an entire tempo turn.
- Let the player going first become the first Shanks player instead.
- Be reused with Law.
- Stop the opponent from reaching its full 10-DON!! line.
Impact views Bonney as especially valuable because it can be replayed with Law. One Bonney can potentially deny multiple Shanks turns if the player has enough Law access.
Law/Bepo in the Mirror
Law/Bepo is still good as a secondary bomb.
Use it when:
- The opponent has attacked with its full board to play around Shanks.
- You need to become an 8k leader.
- You need to deny several 6k bodies.
- You need one extra turn before the second Shanks.
- You need to prevent the opponent’s board from converting.
The goal is not to build the deck around Law/Bepo. Shanks plus Luna is the primary endgame. Law/Bepo is the flexible follow-up that can buy time or force a final damage sequence.
Mirror Mistakes
Common errors:
- Attacking for numbers that only extract 1ks rather than force life or 2ks.
- Taking too many small hits and entering Shanks range at zero life.
- Saving too much DON!! for events instead of pushing 7k attacks.
- Failing to cycle Perona and Samurai to find Luna.
- Playing the bomb turn too early before the opponent is in one- or two-turn lethal range.
- Holding Rad Beam until it becomes unusable because Shanks plus Luna consumes all DON!!.
- Ignoring Stun Bonney timing.
- Losing to a stronger player’s tempo plan because you did not map the opponent’s Shanks turn.
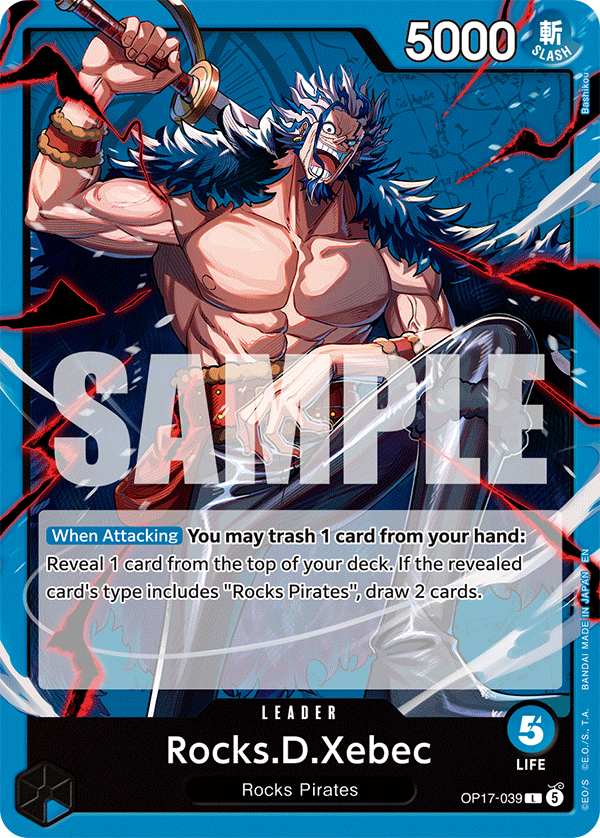
Mihawk vs Rocks
Matchup Assessment
Impact considers Mihawk very strong into Rocks.
Rocks is a Slash leader, which gives Mihawk a major mechanical advantage. Mihawk naturally handles 5k leader swings efficiently and can use its own leader power and defensive events to reduce Rocks’ pressure.
Why Mihawk Is Favored
Rocks’ core attackers are often 7-cost or lower, making them vulnerable to Luna.
Mihawk can:
- Freeze Rocks’ board.
- Use Shanks to disable key attackers.
- Use Vander Decken on unprotected Shikis.
- Use Yasopp to remove Kyo early.
- Attack Rocks’ life with 7k leader swings.
- Prevent Newgate and Shiki from converting hand into defensive value.
- Keep Rocks from using Captain John as a real comeback plan.
Rocks Threats to Respect
Newgate
Newgate does more than provide 3k counter conversion.
It also allows the Rocks leader to attack for 8k without normal DON!! investment.
Removing Newgate:
- Removes a defensive engine.
- Removes a large attack modifier.
- Prevents Rocks from turning extra hand cards into pressure.
- Makes future attacks much easier to defend.
Shiki
Remove Shiki whenever possible, especially when it is not protected by Kyo.
Shiki:
- Controls board.
- Removes key Mihawk attackers.
- Turns Rocks’ hand into meaningful defense.
- Can snowball if left alive.
Captain John Plus Usopp Event
This is the key surprise line.
Rocks can use Captain John plus the Usopp event to gain an extra turn and potentially threaten an unblockable finish.
Mihawk should:
- Do not overcommit Luna too early.
- Track whether Rocks can protect Captain John.
- Remove Rocks’ other attackers so Captain John cannot become a real win condition.
- Use board control when Rocks is at zero but still has Captain John potential.
How to Play the Matchup
Go second.
Develop efficiently.
Use Yasopp to remove Kyo early when possible.
Use Decken on Shiki if Kyo is absent.
Attack Rocks for 7k when Newgate is not active.
Attack with 8k or baseline character numbers when Shiki is active.
Prioritize board control over a reckless all-in.
Remove Newgate and Shiki when the opportunity is efficient.
Use Luna to freeze the 7-cost board.
Do not allow Captain John to create an extra-turn win condition.
Impact compares this to old Kid-style board control: Captain John may keep a unit alive, but if Rocks has no other attackers, it cannot actually make progress.
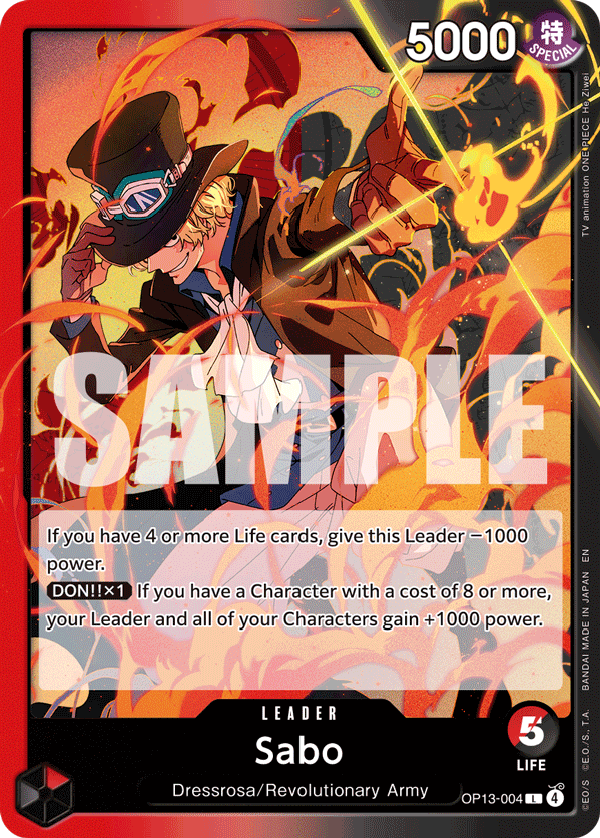
Mihawk vs Sabo
Matchup Identity
Sabo is a midrange deck that:
- Develops multiple 2-cost and 5-cost utility bodies.
- Uses Giant effects to make those bodies attack as 6ks.
- Creates early board pressure.
- Transitions into Luffy rushes and larger boss turns.
- Uses graveyard resources for continued value.
Mihawk would normally struggle against a wide midrange board. Yasopp changes the matchup.
Key Strategy
Mihawk should control Sabo’s early utility bodies before they become 6k attackers.
Use Yasopp to:
- Remove early 2-cost bodies.
- Kill Zoro.
- Deny the body that makes the Sabo board work.
- Create time to find Shanks, Decken, and Luna.
Use Oden to:
- Freeze Loki.
- Stop the biggest attacker.
- Reduce the opponent’s attack count.
- Buy a turn for Mihawk to develop or push life.
Use Vander Decken to:
- Remove Giants.
- Kill Saul or other important 12-cost-enabling bodies.
- Stop Sabo from converting its board.
- Deal with larger characters after Yasopp handles smaller threats.
Attack and Defense
Sabo is weak defensively. Mihawk can frequently two-turn it with back-to-back Shanks if Sabo is at two life.
The key question is whether Mihawk can die this turn.
If Mihawk is not in lethal range:
- Send as much damage to life as possible.
- Force Sabo low.
- Use Shanks next turn to finish.
- Do not overfocus on clearing every body.
If Mihawk is in danger:
- Leave a DON!! for Billion Fold or another defensive event.
- Use Oden to stop the largest attacker.
- Use Yasopp to remove a smaller threat.
- Keep Otama in hand when possible because Sabo frequently 2k-checks Mihawk and Otama may be needed as counter.
When to Starve
Mihawk can starve Sabo at four life if it wins board early.
A board-control line might look like:
- Yasopp removes their first character.
- Law plus Yasopp removes the next.
- Mihawk has three bodies to their one.
- Oden freezes their remaining attacker.
- Mihawk attacks face because Sabo can no longer rebuild or race.
If Mihawk is still fighting for board, it should keep fighting for board. If it wins board clearly, it should kill Sabo.
Important Sabo Rule
If Mihawk removes Sabo’s Giants, its smaller units lose much of their value.
This is often the simplest route:
- Yasopp handles Zoro and early utility bodies.
- Vander Decken handles the Giant.
- Oden stalls Loki.
- Luna skips the board’s conversion turn.
- Mihawk pushes the now-weak board out of the game.
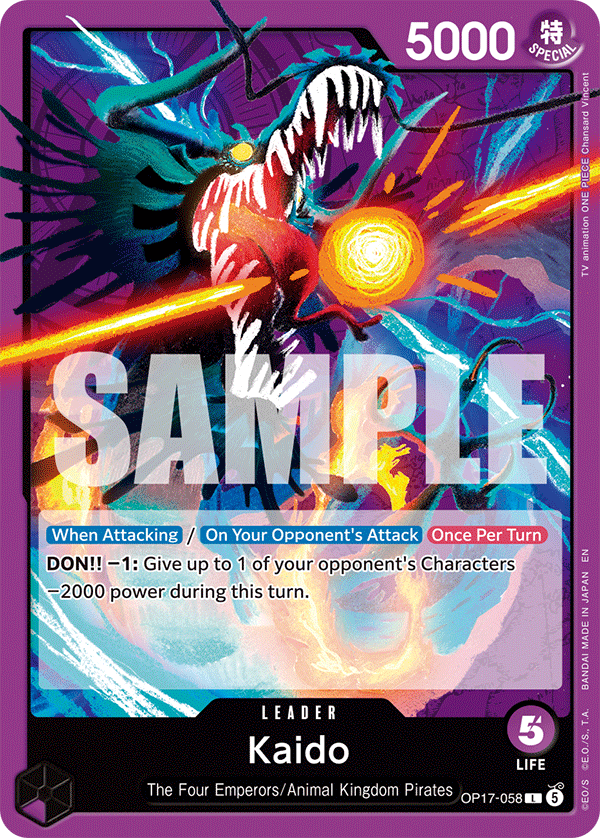
Mihawk vs Kaido
Matchup Assessment
Impact sees Kaido as much more manageable now because Vander Decken answers its expensive boss turns.
In previous formats, purple ramp decks could outscale Mihawk. Law/Bepo was not enough to stall the large bodies, and Big Mom-style cards could answer Mihawk’s bomb.
Now, Mihawk can often answer a 10-DON!! Kaido body with a much cheaper Decken-based interaction line.
TurnoGoing First
Impact recommends going first into Kaido.
The goal is to disrupt Kaido’s preferred curve:
- Prevent or delay the easy King ramp line.
- Establish an extra attacker.
- Make Kaido spend its DON!! responding rather than ramping.
- Keep it from reaching the point where it has more bosses than Mihawk has answers.
Ramp decks want extra turns to exploit extra DON!!. Taking first denies them some of that time.
Game Plan
Establish board early.
Pressure Kaido before it gets several boss turns.
Use Shanks plus Vander Decken to answer major threats.
Use Oden to freeze King.
Force Kaido to choose between developing, healing, and removing your board.
Attack in numbers that overload Kaido’s available DON!!.
Expect an extra turn because Kaido can heal.
Continue pushing board plus life rather than waiting indefinitely.
Fishing for Kaido Leader Effect
When Kaido has leader defense available, attack sizing can manipulate its choices.
Swing 6k if you want Kaido to use leader effect or take the hit.
Swing 7k if you want Kaido to use leader effect and still give a card.
Use a sequence of smaller attacks to force the leader effect before committing Shanks.
Once the leader effect is spent, Shanks can attack a large body for a huge number.
A representative line:
- Attack 6k, 6k, 6k.
- Force or bait Kaido’s leader effect.
- Play Shanks.
- Rest or target the large Kaido body.
- Put large DON!! onto Shanks.
- Attack the boss body for 17k or force Kaido to give multiple cards.
- Either the body dies or Kaido loses most of its hand and life.
Important Rule
Do not give Kaido unlimited time.
If Kaido reaches repeated boss development turns, it will eventually have more threats than Mihawk can answer. Mihawk must pressure, answer the first bomb efficiently, and make Kaido develop into an already-established board.
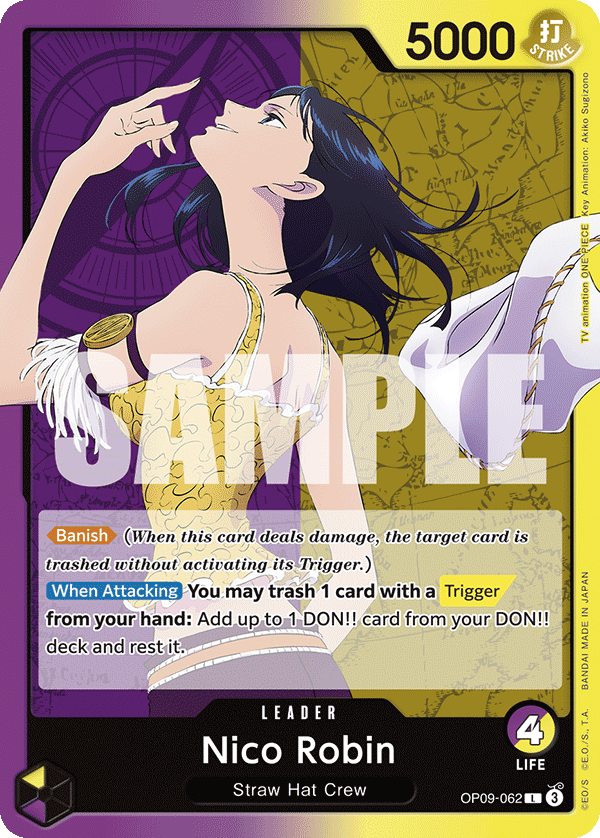
Mihawk vs Robin and Yellow Big Mom Decks
Matchup Identity
Robin tries to starve Mihawk through a banish leader, build a board, use Sweet Generals for control, then stabilize with Big Mom and Giant defense.
Mihawk is favored when it prevents Robin from developing a meaningful attacker base.
TurnoGoing First
Impact prefers going first into Robin.
The goal is to:
- Interrupt Robin’s ramp and Big Mom progression.
- Establish an extra attacker.
- Use Yasopp to remove 4k bodies.
- Keep Robin’s board narrow when Linlin enters.
- Prevent Robin from comfortably playing two Big Moms.
EarlyEarly Plan
Mihawk should:
- Take the first few banish hits when safe.
- Search for card draw and continuation.
- Use Yasopp to clear Robin’s 4k body.
- Use Oden to freeze the biggest relevant attacker.
- Keep Robin to zero or one meaningful attacker going into its Linlin turn.
- Pressure life before Robin can establish repeated Big Mom healing.
- Robin’s banish plan is less dangerous if Mihawk uses searchers and draw to out-card the starvation plan.
Stun Bonney
Stun Bonney is extremely strong if it takes Robin off the 10-DON!! Big Mom turn.
If Mihawk denies that key turn:
- Robin often has no comparably productive replacement.
- Mihawk gains another development turn.
- Robin’s board remains too narrow.
- Mihawk can push life before healing and Giant defenses come online.
- The exception is more flexible Pudding-style yellow builds, which may have alternate plays.
Borsalino Plus Giant
Impact identifies Borsalino plus Giant as Robin’s strongest defensive structure.
To beat it:
- Ensure Robin does not have established attackers going into the defensive turn.
- Go wide.
- Force Giant through repeated 7k attacks.
- Use Shanks to remove the big body when possible.
- Make Robin spend its whole turn staying alive rather than building pressure.
If Robin is defending but has no meaningful board, it is not winning. It is only delaying the game.
Linlin Choice
When Linlin offers discard versus heal, Impact generally prefers the discard.
Exception:
- Let them heal only if the random discard could hit a card that completely ruins the current game plan.
- If they’re low on hand, making it heal becomes stronger because the extra discard is a real cost.
- If Mihawk has lethal, never give the heal.
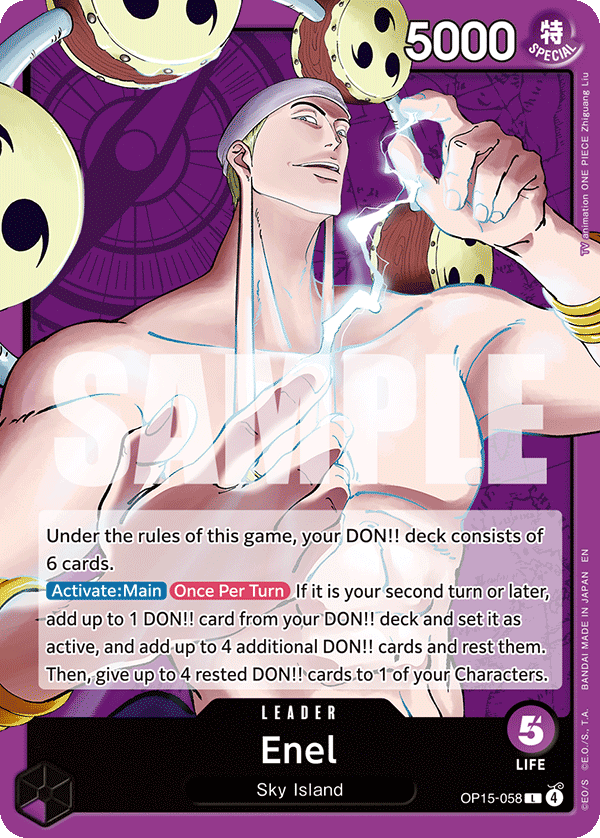
Mihawk vs Enel
Matchup Identity
Mihawk versus Enel is more comfortable in OP17 because Mihawk now has stronger board control and Shanks-based lethal lines.
The plan is:
- Control Enel’s one-drops.
- Use Yasopp to remove midrange bodies.
- Use Oden to stall large Enels.
- Push life every turn with leader power.
- Do not let Enel develop a wide board.
- Use Shanks and Luna to remove both large and small threats.
Key Cards
Yasopp
Yasopp removes Enel’s midrange bodies before they snowball.
A key Enel win pattern is:
- A body sticks.
- Enel develops another 4-cost card.
- It removes or pressures Mihawk’s board.
- It begins to snowball.
- Yasopp interrupts that sequence by killing the 4-cost before Enel can build around it.
Oden
Oden is excellent against large Enel characters. Use it to stall a major body and reduce Enel’s attack count.
Shanks and Luna
When Shanks is played, Mihawk can often clear or disable Enel’s board:
- Shanks handles Reiju or another major body.
- Luna freezes the remaining one-drops and attackers.
- Searchers can be used to clean up the smaller board.
- Enel can be left with no meaningful attacks except Rush Shura.
- This is much different from older Mihawk, where Enel could force a pseudo-race through removal and board pressure.
LateSecret Enel Lethal Pattern
If Enel is at one life and Mihawk has two Shanks:
- Play the first Shanks.
- Send the board and leader at life.
- Put Enel at zero or exhaust its resources.
- Use the second Shanks next turn for the kill.
- Mihawk’s leader can push large numbers every turn, so getting Enel low is realistic if the Mihawk player does not waste attacks.
Hand-Rip Law
Mihawk should try to play around Enel’s hand-rip Law when possible.
Counter a small attack if it keeps you out of hand-rip range.
Use event counters on early minor attacks if doing so protects key combo pieces.
Do not hold low-value cards such as Decken or Kawamatsu if they can simply be used as counter.
Preserve enough life and hand that Enel cannot hand-rip repeatedly.
The goal is not to prevent every Law. The goal is to prevent consecutive Law turns from removing all of Mihawk’s critical pieces.
Common Mistakes
Not Attacking Aggressively Enough
Mihawk receives free DON!! every turn. Use it.
Common mistake:
- Leaving DON!! open for events that are not needed.
- Attacking 6k when 7k is available.
- Failing to pressure life.
- Waiting too long to put the opponent into Shanks range.
Correction:
- Convert free DON!! into 7k attacks.
- Push damage every turn when board state allows.
- Use events only when they preserve a critical body or prevent real lethal.
Holding Bricks
Common mistake:
- Keeping a third Law.
- Keeping a third Shanks.
- Holding redundant 5-cost bodies.
- Holding events until they become unusable.
- Failing to use Kin’emon and Samurai.
Correction:
- Plan the next two turns.
- Discard non-counter cards you will not play.
- Use Samurai to cycle pieces before Shanks turns.
- Use Boat and events before the late game if they will be stuck later.
Not Bouncing Perona
Perona should often be bounced and replayed with Law.
Why:
- It finds continuation.
- It finds Luna.
- It finds Shanks support.
- It finds Samurai.
- It filters the deck into the cards that matter.
- A Law turn that does not reuse Perona must have a clear reason to be better.
Overvaluing Face Pressure
Mihawk is aggressive, but board control still matters.
If Yasopp can kill a key early body:
- Use it.
- The opponent must develop into your board.
- That new body cannot attack immediately.
- You gain a permanent attack advantage.
Mihawk does not win by blindly attacking life every turn. It wins by establishing an attack advantage and then converting that advantage into life pressure.
Holding Events Too Long
If you do not have stage, late Shanks turns can consume all DON!!.
Before committing to a Shanks plus Decken plus Luna turn, ask:
- Will I need these Rad Beams next turn?
- Do I have a chance to use them now?
- Is this the last turn I can convert event counter before the full-DON!! bomb turn?
- Do I need to save natural counter for the late game?
- Do not die with several event counters trapped in hand.
Final Tournament Checklist
Before registering Mihawk, players should know:
- Their exact mirror die-roll preference.
- Their planned number of Shanks, Law/Bepos, Lunas, Bonneys, and defensive events.
- Which slots are flex cards and what matchups they improve.
- Their answer to Sabo’s early board.
- Their plan to deny Rocks’ Newgate and Shiki board.
- Their Kaido line for King and the first 10-cost boss.
- Their Robin plan for Borsalino plus Giant.
- Their Enel plan for one-drops, 6c Enels, and hand-rip Law.
During every match, players should ask:
- What is my win condition this game?
- Does this turn need to develop board, control board, pressure life, or survive?
- Which cards in hand do I realistically play in the next two turns?
- Which cards are bricks and should be filtered?
- How many attacks can the opponent actually send next turn?
- Can I afford one more turn instead of taking a risky lethal?
- Does my Shanks turn put the opponent to one or zero?
- Can I Luna the board on the turn it actually matters?
Final Takeaways
Mihawk is an aggressive midrange deck, not a passive control deck.
Shanks plus Luna is the deck’s defining OP17 endgame.
Yasopp, Oden, Perona, Kin’emon, Samurai, and stage make the deck exceptionally consistent.
The mirror rewards damage mapping, 7k attack sizing, Stun Bonney timing, and preserving life for Shanks turns.
Rocks is favorable if Mihawk controls Newgate and Shiki while respecting Captain John lines.
Sabo is controlled by Yasopp, Oden, Decken, and accurate race decisions.
Kaido must be pressured before it establishes multiple boss turns.
Robin must not be allowed to settle behind repeated Big Mom and Giant turns.
Enel’s board must be controlled before it snowballs, then finished with Shanks pressure.
The biggest Mihawk mistake is leaving free DON!! unused instead of turning board into meaningful attacks.
The best Mihawk players will not merely know their cards. They will know how much damage they need to deal before Shanks, which bodies they must remove, which attacks they can safely take, and when to turn a favorable board into a two-turn kill.
Video vs appunti
Cosa c'è solo nel video, e dove video e appunti non coincidono.
impact-lezione-video-trascrizione.md (sottotitoli automatici YouTube) ↔ impact-lezione-video-note.md (appunti di terzi scritti in base al video — NON sono la trascrizione).1. Indice capitoli del video
Parte slide (00:00 – 01:20)
| Inizio | Argomento |
|---|---|
| 00:00:05 | Intro to the deck: midrange con rush finisher; aggressivo vs control, controllante vs aggro («you're trying to do both but you're not trying to do both at the same time») |
| 00:01:37 | Sticky characters (Yasopp, Oden); il loop Perona+Law («you just try and like spam Perona») |
| 00:02:22 | Posizionamento: «more towards the aggressive side of mid-range… not as aggressive as Ace, not as defensive as Rocks»; deck di fondamentali |
| 00:03:53 | What the deck isn't: non control, non il vecchio Mihawk OP14; le freeze spingono tempo, non allungano la partita |
| 00:05:25 | Board reload: le carte si rimpiazzano da sole (esempio Gravity Blade su Law+Yasopp) |
| 00:06:11 | Strengths: consistenza, searcher, filtraggio verso le unsearchable (Vander Decken, Yasopp, Coffin Boat) |
| 00:06:56 | Free DON!!: 4 extra a turno (leader+stage), 6 con Shanks; racing con Shanks e Luna |
| 00:07:43 | Weaknesses: partenze esplosive (Blue-Green, Sabo, Black Luffy) — solo le partenze VERE |
| 00:08:29 | Brick count: ~18 bricks (contro i 10-11 degli altri deck); micromanagement con Kin'emon/Samurai |
| 00:09:17 | Weakness: bodies fuori Luna-range senza Decken; gli 8-cost sono gestibili (Yasopp + Decken, bounce con Law) |
| 00:10:02 | Le partenze forti di Robin (Yamato+doppio ramp → Teach → Big Mom) e la risposta Yasopp+Decken sul turno a 7 DON!! |
| 00:10:49 | «Deck is pretty overtuned… kind of broken»: previsione di ban (ottobre, limitazione a Shanks) |
| 00:11:35 | Q&A searcher: Otama prima (meno bersagli), Perona dopo; Kin'emon turno 1 |
| 00:12:20 | Sequenza di draw/search: draw singoli prima (stage → Kin'emon → Samurai), poi ricerche (Otama → Perona) |
| 00:13:54 | Parte 2 — la lista: flex slot (Law/Bepo, For Fun, 4° Shanks); perché lui gioca 4 Shanks |
| 00:14:39 | Desiderata (più stage, 3ª Luna, 4ª Rad Beam); tech cards: Hody Jones, 6c Smoker+Perona build |
| 00:15:25 | Smoker come risposta alla Bonney OP07; Dead Man's Game da torneo grande |
| 00:16:12 | Law/Bepo tech: nel mirror invalidi le 6k diventando leader 8k, ora che tutti attaccano full board per girare intorno a Shanks |
| 00:17:46 | Mulligan going first: searcher, «these 18 cards are the key pieces», Yasopp unsearchable |
| 00:18:34 | Mulligan going second: più aperto a 5-drop e Law; «Perona casts the widest net» |
| 00:19:22 | Key cards: Perona, Kin'emon, Law, Samurai; Shanks «this card's broken» |
| 00:20:10 | L'efficienza di Shanks: 5+17 invece di full jam leader a 15; chiedi 14k di counter |
| 00:20:56 | Law double develop; Yasopp restands; Q&A mulligan (mano Samurai+Law senza one-drops = no keep) |
| 00:21:46 | Regola mulligan: «what you're looking for is a hand that does things» |
| 00:22:33 | Curva going first turno per turno («perfect curve is one one samurai»); convertire i free DON!! in danni, i 7k presto |
| 00:24:06 | Il turno a 5 DON!!: Law+Yasopp/Vander Decken per killare Shiki/Teach/Katakuri; è IL turno per ciclare i searcher |
| 00:25:37 | Curva going second: doppio one-drop, corpo attivo per Law, killare il drop del loro turno a 5 DON!! (lead 2-0) |
| 00:26:24 | Contare i turni alla fine partita; primo Shanks li porta a 1-0, il secondo uccide; «15 DON» → 16 con stage, 17 con Smoker |
| 00:27:54 | Early/mid/late plan; timing delle Luna in base ai turni residui (2 turni → spam Luna; 3+ → primo Shanks per board control) |
| 00:29:29 | Pitfalls: poca aggressione, non ciclare i brick, non bounciare Perona, sottovalutare il board control |
| 00:30:15 | Board control fondamentale: l'esempio Law+Yasopp sul loro Yasopp → lead 4-1, 5 attacchi vs 2 |
| 00:31:02 | Far uscire gli event counter dalla mano (senza stage non tieni DON!! su nei turni finali) |
| 00:32:36 | How to defend the life: prendere danni aggressivamente, stabilizzare a 2 vite con Rad Beam/Law-Bepo/Luna; nel mirror counterare i colpi 6-8 |
| 00:34:07 | Difendere i personaggi; lasciarli morire quando scali verso i turni Shanks |
| 00:34:54 | Early game plan: non prendere pezzi ridondanti (3° 5-drop, 3° Law); prendere danni presto per pescare |
| 00:35:39 | Mid game 5-9 DON!!: «you go 5 65 65», le 6k diventano 7k; budget di un turno extra («one more turn») |
| 00:37:13 | Late game: Shanks combo; il singolo Law/Bepo («when I wrote the guide, I was playing a single Law/Bepo») |
| 00:38:44 | Filtering: scartare non-counter prima dei counter; non tenere 3° Shanks/3° Law |
| 00:39:29 | Differenza dai vecchi build: «we are a Luna based deck», niente più infinity DON!! in difesa |
| 00:40:14 | Leader skill: 1 DON!! → 2 carte di danno = good trade; endgame «solitaire» Shanks-Luna a catena |
| 00:42:34 | Come finisce la partita: Shanks 17k, lavorare a ritroso; damage mapping («in Pokemon they call it prize mapping») |
| 00:44:11 | Don't ship risky lethals; Law+Bonney per congelare il loro DON!! e proteggere il blocker da Shanks |
| 00:45:45 | Q&A: niente 5-drop sul 5? «I just play Yasopp and tap it to my leader skill»; attacker vs "turtle" (blocker); Bonney per skippare il loro 6; Oden vs Yasopp |
| 00:48:18 | Turning around losing scenarios: back-to-back Shanks anche da dietro; estendere con Law+Oden/Bonney/Bepo |
| 00:49:04 | Matchup — Mirror (go second): damage mapping, «if you're good at pre-release, this is like pre-release» |
| 00:51:22 | Mirror: taglie d'attacco 7k/8k/9k/10k; il mirror gioca solo otto 2k counter |
| 00:52:56 | Mirror: life buffer per i turni Shanks; ciclare Perona per trovare le Luna («Luna will often save you like four cards») |
| 00:53:46 | Q&A: build Mihawk/Perona vs Law/Yasopp nel mirror («if it's better, it's only marginally better») e contro il resto del meta |
| 00:56:05 | Matchup — Rocks (go second): «GG easy», leader Slash, Don Marlin carta morta |
| 00:57:02 | Rocks: attaccanti 7-cost deboli a Luna; Captain John + Usopp event; Bepo stalla John; Newgate = doppio danno |
| 00:58:36 | Rocks: giocare intorno a Shiki, Decken sugli Shiki scoperti, Yasopp sui Kyo; taglie d'attacco; paragone con i vecchi deck Kid |
| 00:59:22 | Matchup — Sabo: i 2-for-5 che diventano 2-for-6, giants, Luffy rush; «Yasopp is a stupid card» |
| 01:00:54 | Sabo: Oden su Loki (nega un 9k), For Fun per i Saul, Yasopp su Zoro così Decken prende i grossi; niente Otama sul tavolo |
| 01:02:26 | Sabo: race vs starve; two-turn kill con doppio Shanks; Q&A (quando attaccano per 7, starve a 4 vite) |
| 01:04:02 | Matchup — Kaido (go first): Shanks+Decken ha ribaltato il matchup («you're paying two to kill their 10») |
| 01:05:40 | Kaido: fishing della leader skill con i 6k, poi Shanks 17k sul boss; heals = contare un turno extra |
| 01:07:11 | Kaido: restand di Shanks contro la Big Mom 10; overload dei loro DON!!; due 10-cost in gioco = morti |
| 01:09:30 | Dinamica anti-ramp: bomba → risposta immediata; i 7c Kaido ti lasciano usare Luna |
| 01:11:05 | Matchup — Robin/giallo (go first): out-cardare lo starve; Yasopp sul 4k pre-Linlin; ora giocano 4 Teach |
| 01:12:38 | Robin: 65-65-65 meglio di 65-65-Shanks; Stun Bonney sul loro turno a 10; Borsalino+Giant buono contro tutto tranne Shanks |
| 01:14:26 | Robin: la linea completa di board control fino a essere five wide |
| 01:15:11 | Matchup — Enel: matchare i loro one-drops, Oden sui grossi, Yasopp sui 4-cost anti-snowball |
| 01:16:42 | Enel: Shanks+Luna svuota il board; secret win condition (2 Shanks con loro a 1 vita); hand-rip Law e Kawamatsu/Decken come counter |
| 01:19:45 | Fine slide: «final thoughts. Deck broken. Need nerf. Play till end.» |
Parte gameplay + Q&A finale (01:20 – 02:07)
| Inizio | Argomento |
|---|---|
| 01:20:33 | Premessa ai VOD: nasconde il nickname ranked (cambia account) per non farsi leggere la lista prima del «million-dollar tournament» (flame flame fruit) |
| 01:23:01 | Mirror game 1: sequenza searcher/Samurai; a 01:25:22 la "pseudo Luna" (Bonney+Luna da five wide) |
| 01:27:51 | Mirror game 2 (vs build Perona): sizing per fare danno; Law+Bonney per estendere; Stun Bonney che nega il 10-Shanks avversario |
| 01:31:23 | La lista giocata: copiata da una top 4 cinese, 2 Bonney; «very important to try other people's decks» |
| 01:34:05 | Mirror game 3: keep di mano media, board control, il turno del cash-out delle Rad Beam (01:40:20, spiegato a 01:43:05 e 01:45:35) |
| 01:46:36 | Mirror game 4: l'avversario concede con mano Shanks-Shanks-Shanks-Luna-Luna dopo la Bonney sul DON!! |
| 01:49:21 | Q: mai 3 Bonney? No — ne basta vederne una, la ricicli con Law |
| 01:50:21 | Robin game (l'unica sconfitta della sessione) + differenze lista cinese vs lista della guida |
| 01:53:34 | Analisi dell'errore vs Robin: doveva pushare danno e metterlo a 1 prima degli heal |
| 01:54:33 | Q&A finale: quando è male tappare le 6k con Samurai; «when there is a tier zero deck, you play the tier zero deck» |
| 01:56:57 | Meta talk: Kaido cala di play rate; la build Perona verrà «gapped» dalla Stun Bonney+Law |
| 01:57:53 | Anti-aggro: board control presto; opzione Zoro 2k counter |
| 02:00:12 | Vs Teach: searcher sul board per swingare 5-5 con la leader skill |
| 02:01:49 | «If you're losing with Mihawk, it's more about yourself than it is the deck»; Stun Bonney come comeback tool going first |
| 02:03:24 | Ipotesi: going first migliore con tante Bonney+Law; la build Perona going first «gets invalidated» |
| 02:04:23 | Opzioni singola Kiku / singolo Zoro; col primo searcher di solito prende un altro searcher |
| 02:05:09 | Off-topic (la storia del negozio, OP5/OP6, «premium binders are infinite money glitch») fino al taglio a 02:07:44 |
2. Decklist / conteggi detti a voce
Impact mostra la lista a schermo («this is just a standard deck list», 00:13:54) ma NON la legge carta per carta. Questi sono gli unici conteggi/scelte dette a voce:
| Carta / scelta | Conteggio | Citazione + timestamp |
|---|---|---|
| Shanks | 4 | «I personally like four Shanks because I think it's really important to hit back-to-back Shanks in almost every matchup. And it is a card that if you play four of it, it's easy to pitch the first one off Kin'emon. […] I feel like when I played three, I had to take it off searches more than I like to.» — 00:13:54 |
| Flex slot | Law/Bepo, For Fun, 4° Shanks | «The cards that I consider flex [slots] are the Law and Bepo, the For Funs, the fourth Shanks probably. […] If you want the full info of what I think are the flex slots, it is [the last] Shanks, Bepo, and For Fun.» — 00:13:54 / 00:14:39 |
| Stage (Coffin Boat), Luna, Rad Beam | vorrebbe di più (implica 2 Luna e 3 Rad Beam in lista) | «I would love to play more stages, but I can't. I would like to play a third Luna, but I don't know if there's space. I would like to play a fourth Billion. And then obviously the Bonneys I think are really good.» — 00:14:39 |
| Law/Bepo | 1 (nella lista della guida) | «I think like one Law/Bepo can be good» — 00:16:12; «When I wrote the guide, I was playing a single Law/Bepo. I usually recommend to play the single Law/Bepo.» — 00:37:13 |
| Stun Bonney (OP07) | 2 (nella lista dei VOD) | «This list just has two Bonney. I copied this list from one of the lists from China.» — 01:31:23 |
| Lista attuale vs lista della guida | −For Fun, −Law/Bepo, +1 Rad Beam, +2 Bonney | «I think I copied like the top four deck list. It was just two Bonney […] two Bonney, four Billions […] from the deck list in the guide it's: cut the For Funs, add another Billion, cut the Law/Bepo, two [Bonney].» — 01:50:21 |
| Bonney: mai 3 | max 2 | «Do you want to ever play three Bonney? The thing is you can draw so many cards you'll just find the Bonney. […] You only need to see one. If you see one […] you can just put it back into play with Law.» — 01:49:21 |
| Brick count | ~18 | «Most decks play like 12, like 10 to 11 bricks. Mihawk plays like 18 just because it is a green deck.» — 00:08:29 |
| Key pieces (searcher/draw) | ~18 carte | «These like 18 cards I'd say are the key pieces, and then this is like the best five drop to have on the five DON!! turn.» — 00:17:46 (indica lo schermo) |
| 2k counter nel mirror | 8 | «The mirror only plays like eight 2k counters» — 00:51:22 |
| Aggiunte possibili | 1 Zoro 2k o 1 Kiku | «You can easily play the 2k counter Zoro» — 01:57:53; «I think you can maybe play like a single Kiku or a single Zoro. I don't think it is 100% necessary though.» — 02:04:23 |
Nessun altro conteggio (Yasopp, Oden, Perona, Otama, Kin'emon, Samurai, Vander Decken…) è detto a voce: sono solo indicati sullo schermo. Il deck code viene promesso in chat: «I can send the deck code. I literally just copied it from someone else though.» — 01:56:11.
3. Punti presenti SOLO nel video
Gli appunti coprono bene la struttura della guida ma tagliano quasi tutto ciò che è specifico della lezione live: numeri, tech card, confronto tra build, meta talk e gameplay. Elenco esaustivo.
3a. Lista, tech card e meta
- Previsione di ban. «Deck is pretty overtuned. Deck is kind of broken. I think we will probably see a ban of some sort in the near future. […] probably in October, like probably by [EB05] release, they'll probably like limit Shanks — not Mihawk — just cuz the combination of the free DON!! from Shanks and the free DON!! from the leader skill is just too much in one turn.» — 00:10:49 · Impact si aspetta un ban/limitazione di Shanks (non del leader) entro ottobre-novembre, dopo i finals.
- I flex slot e il ragionamento sul 4° Shanks (vedi §2) — 00:13:54 · Gli appunti non nominano mai flex slot né conteggi di Shanks.
- Tech: Hody Jones. «Some people like [Hody] Jones. I think [Hody] Jones might be a little bit better now that people are playing Stun Bonney because you can go like Hody Jones Luna, even if they Stun Bonney you. I still have to test it.» — 00:14:39 · Hody come piano B se ti congelano un DON!!.
- Tech: 6c Mihawk + coppia di Perona. «I've seen a build that plays like a single six Mihawk and like a pair of Peronas. I think that is something that could possibly work.» — 00:15:25
- Tech: 6c Smoker anti-Bonney. «Smoker — this was kind of my answer to the OP7 Bonney. If you play a Smoker, they can't really Bonney your DON!!. […] Even if you don't get the two DON!! from the Shanks, you still get to play Shanks, which taps down their board and then you can Luna them after. This is just an idea. I don't even know if this would really work in practice.» — 00:15:25
- Tech: Dead Man's Game. «Probably good to just include Dead Man's Game in a big tournament just because you never know what kind of situations. It's always just like a good finisher when you have board. […] Dead Man for the black Teach for sure.» — 00:16:12
- Confronto build Law/Yasopp vs Mihawk/Perona. «Is the Mihawk Perona build better in the mirror? […] I think it's like marginal. If it's better, it's only slightly better. I also really like Law because I really like Bonney Law. […] I played against several of the Mihawk Perona builds and I beat them all. Law was very critical in resetting my Bonney so I can stun them off multiple 10 Shanks.» — 00:54:32 · Il tema centrale del titolo del video, del tutto assente dagli appunti.
- Perché la build Law è migliore contro il resto del meta. «I think it's better dealing with the Elbaf stuff. I think it's better with dealing with Robin and all those other decks. The Yasopp stuff actually helps you beat the decks that are actually trying to beat you. So you're more likely to go far in a tournament because you are dealing with the counter decks to you in a more effective way instead of trying to beat up on the mirrors. Whereas I think mirrors are like fundamentals games anyway.» — 00:55:20
- Previsione sulla build Perona. «I think the Law Perona build — or the Hawk Perona build — is going to get gapped by the Stun Bonney Law stuff. I think it's just going to happen.» — 01:56:57
- Kaido in calo nel meta. «Kaido keeps going down and down and down in play rate because low key the deck loses to Mihawk now.» — 01:56:57
- Zoro 2k anti-aggro. «If you have any trouble against the aggro decks, you can easily play the 2k counter Zoro. It's a 2k so the floor is pretty high, but it also just [wrecks] those decks in the early and it helps with Samurai.» — 01:57:53
- Going first con Bonney+Law. «Maybe an angle where you can maybe make going first better with a bunch of Bonneys, but I'm not 100% sold. I think going first with a bunch of Bonneys and Laws is a lot better than if you're playing like the Perona build and you have to go first. […] You play the Perona [build] and you go first, you get invalidated a lot of the time by them just being a turn quicker, and you can't Bonney stun their DON!! a bunch of times because you don't have Law.» — 02:03:24
- Consiglio generale sul meta. «Most of the time you can just play the deck you like. When there is a tier zero deck, you [have to] play the tier zero deck.» — 01:55:24
- «Try other people's decks». «I think it is very important to try other people's decks. Other people put time into figuring out their decks. […] Maybe they see something you didn't.» — 01:32:12 · Detto della lista cinese che sta giocando.
- Op-sec da torneo. «I change my ranked name every couple weeks […] I don't want people knowing my deck list going into a million-dollar tournament» + promessa di un 2v1 VOD con Elijah in Europa — 01:20:33 / 01:22:11
3b. Numeri e micro-regole di gioco
- La matematica di Shanks. «It is more efficient to attack for 5-17 with Shanks than it is to just attack 15 when your opponent has no life. I think this is the first time that it is more efficient to play [a] rush character and just attack with it than it is to just full jam the lead[er]. […] Instead of asking your opponent for 11k counter, you're asking your opponent for 14k counter on the last turn of the game.» — 00:20:10 · Gli appunti hanno il concetto ma non i numeri (5+17 vs 15; 14k vs 11k).
- Free DON!! quantificati. «Every turn is four extra DON!! between leader and stage. When you combine Shanks, it's six extra DON!!.» — 00:06:56; e sul turno a 10: «It's actually 16 if you have the stage. It's actually 17 if you have Smoker.» — 00:26:24
- La curva perfetta going first. «This is a good turn to Samurai — like perfect curve is one, one, Samurai.» — 00:22:33 · T1 one-drop, T2 doppio one-drop + Samurai.
- Psicologia dei 7k early. «Your opponent is more likely to take these early hits when they're sevens. […] Almost all your swings are going to be sevens at some point in the game anyway. So if you just get them to take those early hits […] your opponent is more inclined to give you cards if they're already at like two life.» — 00:23:19
- Il 5-DON!! turn è IL turno di cycling. «This is a good turn to cycle all your searchers because you're looking for combos — after [the] 10 DON!! turn you're going to spend all your DON!!, so you don't have turns to convert your searchers in the future. […] You will spend all 15 DON!! on these future turns.» — 00:24:06
- Going second: il kill sul loro 5-DON!! drop. «Ideally you can use your leader skill and then kill the character that they put into play on the five DON!! turn. That way you have a two character to their zero character lead. You miss a damage, but you get to make up that damage the next turn […] and then you also get to push 7-7-7 with your leader.» — 00:25:37
- L'economia dei 2k nel mirror. «7k [is] very important: the mirror only plays eight 2k counters, often puts Otama on the table, often is pitching the fish to the Vander Decken. So you actually do get to pressure a lot of 2k counters out of your opponent's hand. If you swing a bunch of sevens, your opponent has to give you a bunch of 2ks, [and] they will also give you events very likely.» — 00:51:22
- 6k e il check 1k vs 2k. «6k attacks are okay, but it is a lot easier for this deck to fail the 2k check than the 1k check. The deck plays a lot of 1ks and not a lot of 2ks.» — 00:52:08
- Il valore di Luna quantificato. «Luna will often save you like four cards. It'll trade itself for three cards from the opponent when you Shanks them.» — 00:52:56
- Mirror: quando NON puoi counterare. «Usually your hand structure can't really afford to counter super early swings. You very very often don't have the ability to counter like the first six [at] your lead[er]. You need all your pieces. But like fourth life, after you've Samurai'd, you might be able to afford to. Third life for sure: you should be able to cover 6k swings with one card, 7k swings with one card.» — 00:52:08
- «Cover the five to take the eight». «Don't take damage you don't plan on accounting for on a future turn. […] Defend a five or six on your third or fourth life [when] you know that next turn your opponent is going to attack you for eight and there isn't much that you can do about it. You kind of just should cover the five so that you can take the eight.» — 00:33:22
- Lasciar morire i corpi negli Shanks turn. «You can let pieces of your board die when you're scaling into your Shanks turns. Calculate if you need the counter to stay alive versus keeping [an] extra 6k body. Ask yourself if that body is actually necessary to win. Often you'll be winning by dropping the back-to-back Shanks anyway and the character doesn't matter.» — 00:34:07
- Prendere danni presto per pescare. «Take early damage to draw additional cards. […] Going to three life or even two life pretty early is super chill because you eventually will stabilize once all the things come together.» — 00:34:54
- Stabilizzare a 2 vite. «In most matchups you can take [damage] fairly aggressively. […] You can stabilize most games at two life pretty easily when you combine Billion [Rad Beam], Law/Bepo and Luna.» — 00:32:36
- L'endgame "solitaire". «You push all your damage, you go Luna, you go Shanks Luna — skip your turn — Shanks Luna — skip your turn — haha, you have no more turn — Shanks, you're dead.» — 00:40:14
- Damage mapping (analogia Pokemon). «Map out the damage you're dealing each turn. […] In Pokemon they call it prize mapping. In Riftbound they call it point mapping. In One Piece it's just dealing damage. Think about how you plan on taking the first life, the second life, third life, fourth life, fifth life.» — 00:44:11
- Law protegge il blocker da Shanks. «You can go Law plus Bonney: stun their DON!!, [and] Law now prevents the Shanks from tapping your blocker. So now you have a blocker and you can freeze their board.» — 00:44:59
- Yasopp È il tuo 5-drop. «You've not been playing a five drop [on the 5 DON!! turn]? I just play Yasopp and tap it to my leader skill, because it just restands itself at end of turn anyway.» — 00:45:45
- Skippare il blocker ("turtle"). «Most of the time I skip playing the turtle. You have to be in like a really sketchy position to have to put the turtle on the board. […] The first attacker gets frozen a lot of the time anyway, so it's not as bad to skip it.» — 00:46:46
- Il timing delle Rad Beam (dal gameplay). «I knew that that was the turn that he was going to attack me 7-7-7. So I just wanted to cash the Rad Beams in on that turn. […] If I spend the Rad Beams now, I get to use my DON!! to attack back at his board [next turn]. I just worked my way backwards: do I see myself needing the DON!! to kill his characters? Yes → I should use the Rad Beams now.» — 01:43:05 (ribadito a 01:45:35)
- Quando tappare le 6k con Samurai. «When is it bad to tap your 6k bodies with Samurai? If they're not going to attack, just do it. It's typically fine: they're bigger than your leader most of the time, you can defend them with an event.» — 01:54:33
- Il mirror è "pre-release". «Before it was a Law fest […] Here you're trying to kill with the mid-range bodies and not the big bombs. […] If you're good at pre-release, this is like pre-release: you just know how many turns you need to stay alive and know how to push damage.» — 00:50:36
- Niente più infinity DON!! in difesa. «We are a Luna based deck, and Luna is the way that we're avoiding getting beat to death by sixes and sevens in the mirror now, instead of being an 8k leader. We can't hold up infinity DON!! like we used to be able to.» — 00:39:29
3c. Matchup
- Rocks: Don Marlin morta e il valore del leader. «Don Marlin is [a] completely dead card now because of Mihawk. […] [The leader] at least saves you five cards per game and then allows you to push at least an extra damage per game. It is pretty unfair.» — 00:56:05
- Rocks: il matchup dipende da Shanks+Luna. «All its primary attackers are seven cost, so it is very very weak to Luna. If [the] Luna Shanks combo didn't exist, I don't think the matchup would be as lopsided as it is.» — 00:57:02
- Rocks: Bepo stalla Captain John. «Bepo is another great card to stall a John.» — 00:57:02 · Negli appunti Bepo non compare mai nel piano anti-John.
- Rocks: la matematica su Newgate. «Killing a Newgate isn't just saving you 3k counter. It's saving you 6k counter while also getting rid of one of their 3k counters. […] Newgate allows the leader to swing eight without any DON!! commitment.» — 00:57:49
- Rocks: la micro-regola su Shiki. «Play around Shiki by not attacking with one single 6k hit power body at a time.» — 00:58:36 · Più la regola intermedia «attack them with your leader for seven if they have Shiki up» (vedi discrepanza D12).
- Sabo: For Fun per i Saul. «For Fun was an inclusion to help with the Sabo matchup as well, because if you get to deal with their Sauls early, it's super super nice.» — 01:00:54
- Sabo: Oden su Loki = 9k negato. «Stalling the Loki is the most possible value you can get. You're stopping a 9k swing.» — 01:00:54
- Sabo: quando attaccano per 7. «What turns [do] they attack you for seven? When their leader is a 6k, they will attack you for seven every turn.» — 01:02:26
- Kaido: 2 DON!! contro 10. «Purple ramp decks like Kaido [and] last set['s] Katakuri were favored because Law/Bepo wasn't good enough at stalling out the bombs, and then Big Mom would deal with your bomb. However, with the Shanks-Vander Decken combo, that got instantly flipped. Your opponent is paying 10 and you're paying two to kill their 10.» — 01:04:02 · Gli appunti hanno il concetto ma non il rapporto 2-vs-10.
- Kaido: due 10-cost = game over; il restand di Shanks. «You get to restand the Shanks to play around the 10 [Big] Mom. If you get like two ten cost in play, they're basically dead every time.» — 01:07:11; e «Big Mom is less chill if they can rebound the DON!!» — 01:06:26
- Kaido: i 7c ti lasciano usare Luna. «The seven [cost] Kaidos are trying to deal with an early development. Luckily for you, seven [cost] Kaido lets you use your Luna [in the] Kaido game. It is not necessarily racing: you're trying to put them in a position where they can't both develop and deal with your [board].» — 01:10:20
- La dinamica anti-ramp in generale. «You don't want to give ramp decks infinity time, [because] they'll eventually play more bosses than you have answers. They play a bomb → you immediately answer the bomb. They're playing their bomb into your established board again, and then you try and kill them over two [turns].» — 01:09:30
- Robin: il meta è cambiato dalla guida. «They don't play KO-you triggers except for Teach now. Now it's more likely that they play four Teach since I wrote the guide. […] If they have [the] Teach trigger, that could be like a win condition for them.» — 01:11:51
- Robin: 65-65-65 > 65-65-Shanks. «It is more important for you to go like 65 65 65 than it is to go like 65 65 Shanks a lot of the time.» — 01:12:38 · Vai wide invece di anticipare Shanks.
- Robin: la linea completa fino a five wide. «You board control their first guy with the Yasopp, the next turn you go Law Yasopp, you board control another guy, you get to attack with the Yasopp that you developed before, your leader kills the rested guy twice, they play one more guy, you Oden that guy, and you get four swings [at] life and you're five wide. Even if they do develop the Big Mom, you have five attackers plus your leader plus potentially Shanks.» — 01:14:26
- Enel: prima serviva Dead Man's Game. «You always kind of had to play like a pseudo race against [Enel] — they had removal and you didn't — whereas now you have removal too. Before you had to kill them with Dead Man's Game, but now you just have Shanks.» — 01:17:28
- Vs Teach: searcher sul board. «One thing I saw that people weren't doing was they weren't putting their searchers on the board. You're supposed to put your searchers on the board against Teach anyway, because you can use your leader skill and swing five-five with your searchers.» — 02:00:12
- Stun Bonney a 5 DON!! (six-on-six deny). «Stun Bonney also allows you to go: five DON!! [turn], make [it] so that they can't play a six on six, and then you can Law back the Bonney and deny them the Shanks too.» — 02:02:37; e come comeback: «if you stumble in the early game, or you're going first and they Yasopp kill your first creature, you can still come back with the Stun Bonney stuff.» — 02:01:49
3d. Gameplay (decisioni commentate)
- La "pseudo Luna" da five wide. «I could Shanks Luna him, but I go for this play just because [of] the life disparity. I'm trying to make up the life disparity by playing Bonney then using one of my Lunas this turn. I'm five wide; his Luna is not that good because I have three standing.» — 01:25:22
- Bonney invece del 10-Shanks. «What made me realize the Bonney over the ten Shanks? I just realized that if he gets the 10 Shanks [on] me, I am going to be too far behind to 10 Shanks him back the turn after and be able to counter the last 10 Shanks. The Law Bonney stuff let me push again one more time.» — 01:30:35; poi «I didn't see the back-to-back Shanks being a realistic lethal, so I went for a turn skip on them» — 01:32:12
- La concessione da Bonney. «He's setting up to kill me with Shanks. […] Bonney stun, tap down his thing — he just concedes. His hand is Shanks Shanks Shanks Luna Luna and he concedes because I DON!!'d his [DON!!].» — 01:46:36/01:48:10 · Dimostrazione plastica di quanto Stun Bonney spenga la mano "tutta bombe".
- La lezione della sconfitta vs Robin/Linlin. «I think I should just push a damage. […] I should have just tried to set him to one, so that when he heals he's not at two. […] This was a game I should have won if I just pushed the damage [and] took the risk that he got a trigger.» — 01:53:34
- Fiducia nel mirror. «I win like every mirror across every tournament when I play this deck. I just have better fundamentals than most because I've been playing One Piece since the dawn of time.» — 01:37:54; e «I think every matchup is favored with Mihawk. I think Mihawk is unbeatable.» — 01:37:54
- Mihawk = skill del giocatore. «I think it doesn't matter the list for Mihawk. If you're winning with Mihawk, you're winning because you're winning. If you're losing with Mihawk, it's more about yourself than it is the deck. This is like 100% fundamentals deck.» — 02:01:49
4. ⚠️ Discrepanze appunti ↔ video
Punti dove gli appunti dicono qualcosa che nel video è diverso, più forte, o proprio assente. Diverse sezioni degli appunti sembrano prese dal PPTX o contaminate da altre fonti (alcune coincidono con capitoli della lezione di samsansOP, non di questa).
- «Samurai — Impact recommends four copies». Nel video Impact NON dice mai il conteggio di Samurai. L'unico "four" detto a voce è sui Shanks: «I personally like four Shanks» — 00:13:54. Il "4 Samurai" può venire dal PPTX o da samsansOP («four Samurai "for sure"»), ma in questo video non c'è.
- Kaido: «freeze King on the relevant 7-DON!! and 9-DON!! turns» / «Use Oden to freeze King». Non trovato nel video. Nella sezione Kaido (01:04:02→01:10:20) King è nominato solo come partenza ramp da negare («take them off their easy King ramp auto win starts»); Oden non viene mai indicato su King, né esistono i turni 7/9. Curiosamente «Oden on 7 and 9» è un punto della lezione Kaido di samsansOP — probabile contaminazione degli appunti.
- Robin: «The exception is more flexible Pudding-style yellow builds». Non trovato nel video. "Pudding" compare una sola volta in tutta la trascrizione, a 02:05:57, parlando di carte vendute («I made a bunch of money on Puddings»). Anche qui l'eccezione-Pudding è un punto della lezione di samsansOP.
- L'intera sezione «Linlin Choice» (discard vs heal). Non trovata nel video. Nella parte Robin/giallo Impact non discute mai la scelta discard-vs-heal di Linlin; gli heal sono trattati solo nella sezione Kaido («they have multiple heals… account for that extra turn», 01:06:26) e nella sconfitta vs Robin («set him to one so that when he heals he's not at two», 01:53:34). «Linlin discard vs heal» è, ancora, un capitolo della lezione samsansOP.
- «Final Tournament Checklist» e «Final Takeaways». Non trovate nel video. La slide finale della lezione è, testualmente: «final thoughts. Deck broken. Need nerf. Play till end.» — 01:19:45. L'elaborata checklist pre-torneo degli appunti (die-roll preference, conteggi pianificati, piani per matchup…) è una costruzione del note-taker (o del PPTX), non contenuto del video.
- Mirror: la sezione «Why Going Second Is Strong» (5 motivi elencati). Nel video c'è solo «Mihawk mirror: go second, ideally» — 00:49:04, senza l'elenco di motivi (better development curve, earlier Shanks access, ecc.). Anzi, a fine video Impact apre all'ipotesi opposta: «maybe make going first better with a bunch of Bonneys […] I'm not 100% sold» — 02:03:24. Gli appunti presentano come argomentazione dettagliata ciò che nel video è una riga.
- «Impact likes at least one Law/Bepo» presentato come posizione attuale. Nel video il singolo Law/Bepo è datato: «When I wrote the guide, I was playing a single Law/Bepo» — 00:37:13; la lista che gioca ORA nei VOD (copiata dalla top 4 cinese) lo ha tagliato per le 2 Stun Bonney: «cut the For Funs, add another Billion, cut the Law/Bepo, two [Bonney]» — 01:50:21. Gli appunti ignorano completamente l'aggiornamento.
- Sabo: «Use Vander Decken to… Kill Saul». Nel video il piano anti-Saul è affidato a For Fun, non a Decken: «For Fun was an inclusion to help with the Sabo matchup […] if you get to deal with their Sauls early» — 01:00:54. Decken nel video è per i grossi/giants dopo che «Yasopp deal[s] with Zoro so that you can Vander Decken the big characters». Gli appunti hanno riattribuito la carta (e non nominano mai For Fun).
- Mirror life management: «players should counter more of the smaller attacks» senza il caveat del video: «usually your hand structure can't really afford to counter super early swings. You very often don't have the ability to counter the first six» — 00:52:08. Il video limita il countering ai colpi su terza/quarta vita; gli appunti generalizzano.
- Soglie d'attacco del mirror: 9k e 10k invertite/fuse. Appunti: «9k: useful when the opponent cannot efficiently use Billion Fold». Video: «8k is good if they don't have a DON!! […] 9k if they don't have eight rested cards, 10k to attack past Billion Fold. Very rare that you actually attack 10k to attack past Billion Fold.» — 00:51:22. Nel video la condizione di Billion Fold/Rad Beam è legata al 10k, e il 9k alla condizione «eight rested cards»; gli appunti hanno spostato Billion Fold sul 9k.
- «The 7-DON!! and 9-DON!! turns are vital for [cycling]». Nel video il turno di cycling indicato esplicitamente è il 5-DON!! turn: «this is a good turn to cycle all your searchers» — 00:24:06, con un esempio a 7 DON!! («a seven DON!! turn, for example, is a good turn», 00:41:01). Il 9-DON!! come turno di cycling non è mai detto.
- Rocks: la regola d'attacco a tre livelli è stata compressa. Video: «Attack Rocks for seven if they don't have Newgate up. Attack them with your leader for seven if they have Shiki up. Attack them for eights with characters or base numbers when they have Shiki up.» — 00:58:36. Gli appunti riportano solo primo e terzo livello, perdendo la distinzione leader-vs-personaggi con Shiki attivo (il leader può swingare 7 perché Shiki non lo uccide; i personaggi devono andare a 8/base).
Nota terminologica: gli appunti intitolano «Rad Beam (Billion Fold)»; nel video Impact chiama la carta quasi sempre «billion(s)» / «Billion Fold» e nei VOD «Rad Beams» — stessa carta, nessuna discrepanza di contenuto.
5. Q&A / domande della chat
La lezione è una live class: le domande arrivano in chat (e a voce non udibile) lungo tutto il video. Q&A rilevanti:
| Timestamp | Domanda | Risposta di Impact (sintesi) |
|---|---|---|
| 00:11:35 | Punti di forza/debolezza di ogni searcher? | Otama prima (meno bersagli), poi Perona (rete più ampia); Kin'emon ottimo T1 perché costa 1; sequenza: draw singoli → Samurai → Otama → Perona |
| 00:16:58 | Dead Man's Game per il black Teach? | «Dead Man for the black Teach for sure» |
| 00:20:56 | Mano con stage+Samurai+Law è keepabile? | «No, absolutely not. If your hand has Samurai and Law, you need one drops. […] You have to make sure that you're keeping hands that actually do stuff.» |
| 00:26:24 | (chat) «All 15 DON!! [on] a 10 DON!! max game is so sick» | «It's actually 16 if you have the stage. It's actually 17 if you have Smoker. It's like stupid.» |
| 00:45:45 | Non giochi un 5-drop sul turno a 5? | «I just play Yasopp and tap it to my leader skill — it just restands itself at end of turn anyway.» |
| 00:46:46 | Attacker o blocker ("turtle")? | Quasi sempre l'attacker: «having an attacker advantage is really really good»; il turtle solo in posizioni «really sketchy» |
| 00:47:33 | Giochi Bonney per skippare il loro 6? E Oden sopra Yasopp? | «Yeah, it's very important to do that […] on the nine DON!! turn you can just Law back the Bonney»; no, preferisce Yasopp («a free leader ability» che si restanda) |
| 00:53:46 | La build Mihawk/Perona è migliore nel mirror? Perché preferisci Law? | «If it's better, it's only marginally better»; Law sinergizza con Bonney e la build Law/Yasopp batte meglio i deck anti-Mihawk (Elbaf, Robin) |
| 01:02:26 | Vs Sabo, in che turni ti attaccano per 7? | «When their leader is a 6k, they will attack you for seven every turn.» |
| 01:03:16 | Puoi starvare Sabo a 4 vite? | Sì, ma è contestuale: «if you win the early game quickly, kill them. If you're fighting for board, you're fighting for board.» |
| 01:08:43 | Vs Kaido tieni DON!! sulle 6k? | «It depends. If they only have their leader skill, I just guard when they attack. I just try and punch for good numbers.» |
| 01:22:11 | Ci saranno altri 2v1 VOD? | «I'm going to try and record one when I get to Europe with Elijah.» |
| 01:30:35 | Cosa ti ha fatto scegliere Bonney invece del 10-Shanks? | Se subisce il 10-Shanks resta troppo indietro per rispondere; il Law+Bonney gli compra un altro push (vedi §3d.58) |
| 01:49:21 | Giocheresti mai 3 Bonney? | No: «all my cards draw cards […] you'll just find them. You only need to see one» e la ricicli con Law |
| 01:54:33 | Quando è male tappare le 6k con Samurai? | «If they're not going to attack, just do it. It's typically fine.» |
| 01:56:11 | Ci dai il deck code? | «I can send the deck code. I literally just copied it from someone else though.» |
| 01:56:57 | Se la build Law è peggio nel mirror e Mihawk è tier 0, perché non giocano tutti la Perona? | «The Hawk Perona build is going to get gapped by the Stun Bonney Law stuff.» |
| 01:57:53 | Problemi contro gli aggro? | Board control presto («they fall apart [if] they need the early damage») + eventualmente Zoro 2k |
| 02:00:12 | Vs Teach? | Searcher sul board, «swing five-five with your searchers» con la leader skill |
| 02:00:58 | (flame flame fruit) In fase 2 devi andare imbattuto? | «Yeah, you have to go 6-0»; cambierà qualche carta? «Probably not. There's like a lot of cards I can swap in.» |
| 02:04:23 | Kiku o Zoro in lista? | «Maybe a single Kiku or a single Zoro. I don't think it is 100% necessary though.» |
Trascrizione integrale del video
Sottotitoli automatici, a blocchi di ~45 secondi: ogni orario apre il video in quel punto.
impact-lezione-video-note.md.Deep Dive Q&A 17/09 · note di sessione
Le note di sessione (20 pagine) del Q&A pre-Finals sul Dojo: il «rest spell», le tre build, i matchup rivisti e il weekend di torneo. È la fonte più recente di Impact.
3. Mihawk Mirror: Counter Discipline and Sequencing4. Playing From Behind: Find the Win Condition in Your Hand5. The Other Decks: What Impact Would Play and Build6. Tournament Weekend: Body, Head and FieldMatchupsQ&A HighlightsQuick Reference CardResourcesIn the coach's wordsBig Picture
Going into Nationals / the Flame Flame Fruit weekend there are three or four decks you can really consider: Mihawk, Robin, Enel and RG Luffy-Ace; "everything else is kind of mid". Mihawk and Robin are "that little bit better than everything else", Enel and Luffy-Ace are right there. Rocks beats everything that beats Enel and Robin, but loses to Mihawk. Pick the one you are most comfortable with, not the one the meta tells you to FOMO into.
The one real change of the week is the rest spell — I Never Bother to Remember the Faces of Trash (OP14-038, the "trash event") — which "became more popular because it did very well and got a lot of good publicity over the last week". A free tap-and-trade tool paid by the leader that turns the early-game decks that used to prey on Mihawk (Sabo, Enel) into good matchups and makes the deck a board-control deck first, aggro second. "Sabo has gotten a lot worse this week" because of it. Mihawk overperformed last weekend: 5 of the top 8 at the big regional, 11 in the top cut vs 6 Robin and 5 Enel.
1. The Rest Spell: Mihawk Becomes a Board-Control Deck
- What it doeslets you tap your searchers / 1-drops and trade into their things; a keep-away game against Sabo and Enel, the two matchups that were tougher.
- Before, you had to wait for Yasopp to deal with a T2 body; now you answer it on turn 2.
- It is a spell that costs nothing because the leader pays for it: "spells cost nothing because your leader lets you do it for free".
- The exchange math on the early trade: you used one card from hand that replaced itself → zero cards spent; they either lose the character (lose a card) or counter and lose two cards to protect it.
- Keep removingspell + Yasopp + Law + Yasopp again, every turn, until you have won the board. You are full-starving Enel and Sabo until the board is won.
- Once the board is won: one turn to pull cards out of their hand, one turn to take a lot of life, next turn kill — or life first, then cards, then kill.
- Ruleremoval without a board is just removal — "if you're not ahead on board, your opponent just plays another thing". You need the prerequisite attackers in play; the best use of the spell is their early 1-drops.
- Removing their early 1s also denies them a Law on the 6-DON turn. Minimum 3 Vander Decken in every build.
- Contest a searcher-light handif they only have two searchers, Yasopp one and rest-spell the other → deny the 6-5 on the 6-DON turn. "The most interesting thing you can do with it."
- Late game the card is even more impactful: with 4 stages you counter out of a 10k Shanks swing with Event + DON, or Event, Event. "Super chill if you can get into those positions."
- Most of the time the gameplay is still standard. "It's not really changing too much — don't completely mess your head up about it": the card is a flexible tool that lets you do additional things on top of the normal Mihawk game.
- It complements Yasopp, it does not replace him. "More of the same effect to do more of the same thing throughout the game." Never cut Yasopp: draws a card, kills their guy, re-stands itself — "what card is this?".
- Even in the hybrid Hawk build Impact kept 3 Yasopp. More Hawks is not the way.
- Coffin Boat is the best card in the deck and the second Boat is literally free with the rest spell: use the leader DON on the spell, tap the old boat, play the new boat = a 0-cost draw.
- Commit to 4 copies. It is not a tech card, it is a whole game plan: rest → remove → repeat until the board lead is big enough to "blast them 7-7-7-7-7 and melt them".
- Is it a sacrifice in the mirror? No: "you're not making sacrifices to play it" — the list is good into the mirror too.
- Why the rest build over the Perona/Yasopp tempo buildrest is good into all the random decks (Enel, Sabo, Robin, Rocks, Luffy-Ace, Kaido); Peronas are better in the mirror. "You never play against the same deck five times in a tournament" → cover the random stuff. "Fighting Enel is miserable if you don't have it, especially if you lose the roll."
- Edge in the mirror with the rest buildrest their 1-drops so they cannot Law on the 6-DON turn, then you 6-5 them on 7 DON and you are up three. Same idea as Stun-Bonney on a DON, except you also deny next turn. "Everything that rests once also draws a card."
- Keep with the rest spell vs aggrorest spell + stage + unit is a keep. Searchers are still the priority.
- T1: stage + any 1-dropKikunojo, Tama, Perona, Kin'emon…
- T2: tap DON + stage + 1-droprest spell: hit their 2-drop for 8, draw a card
- They lose the body or spend 2 cardsyou spent 0 cards from hand
- T3+: Yasopp / Law / spell againfull starve: no life cards for them
- Board wonthey have no bricks to counter with
- Cards → life → kill2-3 turns, 6k leader + sized bodies
Rule: the spell only works when you already have attackers on board. Best target: their early 1-drops.
2. Building Mihawk for the Weekend
- Two good lists. Bailey's winning list ≈ Impact's Utrecht list, a bit more meta-optimized (DMG for Robin, good event spread); Impact would force a third stage into it. The 2nd-place list is the rest spell + 4 Coffin Boat version.
- Impact's pick for this weekend: the rest spell. "Elite ball knowledge": rest 4, Beam 3, Stronger 2 = 9 events.
- Mostly Mihawk mirrors → tempo / Perona buildPerona 4, Yasopp 3, Oden 3, 3 Luna, DMG, Law/Hawk 4-1 — the 1st-place list
- Random field (Enel, Sabo, Robin, Rocks, Luffy-Ace) → rest-spell build4 Faces of Trash, 4 Coffin Boat, Stronger over Luna, 9 events — Impact's pick
- Want both → hybrid3 Law 2 Hawk (not 4-1), still 3 Yasopp, 4 Shanks, DMGs, 4 Samurai
"You never play against the same deck five times in a tournament" → Impact covers the random stuff. Fighting Enel without the spell "is miserable, especially if you lose the roll".
2.1 What the top 8 lists actually were
- 1st place (tempo)4-1 Law/Hawk split, 5-drop split Perona 4 / Yasopp 3 / Oden 3, 3 Vander Decken, Shanks/Bepo split, 1 DMG, 3 Luna (because Perona stuns and then Luna after). "I think this is the exact 50 I said to play in the Dojo before the tournament."
- 2nd place (rest spell)trash event + 4 boats, 2 Luna, 2 Samurai, 3-1 split, 4 Otama. It makes "all of Enel's random stuff not as good".
- Other top 4the most standard list ever, with 2 Stun Bonney. Fine, not Impact's taste.
- The rest-spell team4 played it in the main event, 3 made cut, one 2nd and one top 8.
Tempo / Perona build (1st place)
- Perona 4, Yasopp 3, Oden 3
- 3 Luna, 1 DMG, 3 Decken
- Law/Hawk 4-1
- Best in the mirror
Rest-spell build (2nd place) — Impact's pick
- 4 rest spell, 4 Coffin Boat
- Stronger over Luna (keep ≤2 freezes)
- 2 Samurai, 4 Otama
- Best into Enel, Sabo, Robin, Rocks, Luffy-Ace, Kaido
Hybrid / many Hawks
- 3 Law 2 Hawk, not 4-1
- Needs 4 Shanks, DMGs, 4 Samurai
- Still 3 Yasopp
- More Hawks "is not the way"
2.2 Card-by-card verdicts
- Stronger > Luna when you play 4 stages. One spell for free every turn; even used as a 2k "who cares" — the opponent never gets multiple cards off a 7k swing. Cut the Lunas for Strongers; keep some freezes (2 max) for Luffy-Ace.
- Why Elijah cut Luna: in the mirror you board-control them anyway, so you don't need it.
- Vs Luffy-Ace Luna is objectively better, but Law + Oden + stun spell gets the same effect: "you just need Luna to freeze enough that you survive enough that you can kill them".
- Vs Sabo Luna is useless (their guys are +12 cost); Stronger at worst is a counter and still stops the same swings.
- Two freezes are enough"you only need to see one per game in this build" — the opponent has fewer things in play to freeze. They are mostly for Luffy-Ace and the odd Robin game where you go "I'm racing you now: Shanks and freeze".
- No Luna scary in the mirror? "Nah." With the rest spell you board-control one more unit, so Stronger does the same job; once you control enough, Stronger is still a defensive spell while Luna does nothing.
- 4 Shanks > 3 Shanks + 1 Bepo. "Seeing Shanks-Shanks is better than seeing Shanks-Bepo in almost any matchup." Bepo = a defensive 10-drop that buys one more turn (pseudo-blank all their 6k bodies + stun the big body ≈ Decken + Luna in one turn), for the second-to-last turn so the Shanks 11-12 lethal is more reliable.
- When Law & Bepo is right: you need to board-control them the entire way and stretch your Lunas one more turn — become an 8k leader for a turn, keep the Luna in hand, and still push a damage attacking for 10-11 with the freed DON.
- "I'm still not convinced it's better than the 4th Shanks. It certainly can be — that scenario comes up fairly often."
- 4 Otama, never Kikunojo instead. "Kikunojo is an Otama that always whiffed; Otama is a Kikunojo that sometimes draws a card." The re-stand is fake: a 1-drop in play gets rest-spelled / Yasopped anyway. Only add Kiku as extra Otama targets, never cut Otama for it.
- The real cost: Otama whiffs "maybe one game in 20" more than before; Kikunojo "whiffs 100% of the time". You will feel dumb playing Kiku on the 7-DON turn to enable Law when an Otama would have done the same and sometimes drawn.
- Samurai2 is fine; you cannot cut it completely ("it needs to hit some of the time"). With the rest spell your 1-drops stick more because you tap theirs → Samurai resolves more often.
- DMG costs 1 in this deck— "the best DMG deck of all time" (after GP Luffy). Tap the Robin DON on the last turn and still attack with 9 DON; tap the Mom then Decken her early; push through a DON + a Blocker for lethal in the mirror.
- How to fit itcut a Beam for the DMG ("not the worst thing in the world"), or go 1 Stronger / 1 DMG.
- 5-cost Peronamultiple copies is valid (the winner did). In the aggro build the opponent cannot Yasopp-bomb her; good into rest-spell decks, Enel and Luffy-Ace ("Perona owns Luffy-Ace").
- Stun Bonneynot greedy, just another tech — stun their DON on the 9-DON turn and keep them off Shanks for a turn. Makes going first less "cancer" in the mirror.
- Paradise Waterfall is the upgrade Impact would play in Mihawk: when they Shanks you, Waterfall picks up the Law (out of Luna) and you block the Shanks swing with it. Also very good in Luffy-Ace: when they Luna you, Waterfall is a blowout.
- Hody Jonestested in the VOD. Some games the best card in the pool, some games unplayable because you cannot take a life; at worst it is still a fish.
- Two Decken? No.
- Hybrid splitif you go hybrid, 3 Law 2 Hawk instead of 4-1 — "to lessen my reliance on 1-drops: if people are playing rest spells I want to make sure I can play my Mihawks".
▦ COPY COUNTS IMPACT WOULD RUN
| Slot | Count | Why |
|---|---|---|
| Rest spell | 4 | It is the game plan, not a tech |
| Coffin Boat | 3-4 | "Four stages feel so good"; 2nd boat is free |
| Shanks | 4 | Shanks-Shanks > Shanks-Bepo |
| Yasopp | 3 | Never cut: draw + kill + re-stand |
| Otama | 4 | Kiku = Otama that always whiffs |
| Samurai | 2 | Must hit sometimes; resolves more with rest spell |
| Luna / Stronger | 0-2 / 2 | Stronger with 4 stages; ≤2 freezes for Luffy-Ace |
| Radical Beam | 3 | Unconditional defense |
| DMG | 1 | Costs 1 here; lethal tool vs Robin and mirror |
3. Mihawk Mirror: Counter Discipline and Sequencing
- Life plantake the first two life, defend the third. If you lost the board fight you may need to counter the fourth too, because you need time to fight back for the board.
- Aggro version (Hawks + Peronas)take the first two for free — Perona stuns two 5s and is hard to remove, Mihawk swings 8 with a DON, you win fast with Shanks.
- In the aggro build you "don't care about your 1s": Samurai them away (you don't care about Law) and play max Samurai.
- Sequencing going firstOden first so they Yasopp your Oden and then you Yasopp their Yasopp. Or use your Yasopp on their 1-drops so they cannot 6-5 you. Either way: keep your board-control tools to deal with their stuff.
- The 1-DON tap linewith little stuff in play, use the leader's free DON to tap down nonsense characters (a Perona, your stage), rest their guy and bomb it for 8 — one avenue, not the only one.
- When to defend a body"you defend if you think the body is going to help you board-control them back next turn; if not, let it die".
- Search etiquette with the spell buildtake a Kin'emon over a Law if you are stranded on one 1-drop — "I'm so scared my opponent kills my one 1-drop and I can't play Law". Play the curve and aim for double 6-5s.
- Your event is active → fine to counterone card, no problem
- Body helps you board-control their character next turn → keep itcounter if it costs 1 card
- Aggressive version and the body swings 8 at life next turn → keep it"very chill as well"
- It would cost 2-2 → less likely, let it diesequence so you can still attack their things back
4. Playing From Behind: Find the Win Condition in Your Hand
- First look at your cards and decide what your win condition is. "My hand is just all those cards, that is the game I'm trying to play."
- You are not just playing the cards in your hand but the cards in your deck. If the plan is play Shanks, swing out, top-deck another Shanks, top-deck another Shanks — "that's just how it is".
- Envision the world where they miss. "If they had the pieces, you weren't winning anyway." Take more risks in a losing position: your range beats fewer cards, so play around only what you can actually beat.
- "If you can't play around anything because you don't beat anything, then your opponent has to have nothing. That's just the play you have to make."
- A bunch of Shanksall damage face, race, not a resource battle
- 5s that replace themselvesboard-control game: Yasopp + bomb one guy, lessen their double summons, slow the game
- No searchers, they have searchersonly one win con: push, be aggressive
5. The Other Decks: What Impact Would Play and Build
5.1 Robin
- Still Robin, still very good— "the literal first day I played OP17 I played Robin and the deck was OP". Its worst matchup is maybe the 7th most popular deck; you don't want a deck with a personal auto-loss to the 1st or 2nd most popular deck.
- Yost's upgrade: 4 Borsalino— "this is the nuts". Fewer triggers is not a concern: you heal more life so you get more trigger chances. Gives a consistent mid-game turn going second (take, take, Borsa swing 7, heal, go to 10 DON); later Borsa + Yamato + Giant is the nuts against everyone except Mihawk, and even there you heal twice.
- Vs RG Luffy-Ace (the only real bad matchup)dodge the turn-2 combo, ramp, heal, and at 1 life take all your swings, play Big Mom, burn them. Ramp → banish, Borsalino swing 7 to get them to 2 and take 2 banishes.
- Vs Mario Brosthe sketchy line — jam them T2, banish, Yamato, banish again, hit triggers, Mom burn. "Relies on your four random cards in life, but that is better than 0%."
- Vs Rockstake second: Teach on turn 3, Big Mom on turn 4, fast ramp with big threats. "A lot more chill than you think."
- Mirrorcount the leader swings; use Ovens to poke 5s — not much difference between a 5 and an 8 when both hands are low.
5.2 Enel
- Buildlots of 1s, Laws, Frankys, Pinks, Enels. 4 Enel (Kaido made top 4 with 3 and they agreed on 4): vs Robin you need Enel-Enel-Enel because they heal and you need "a comically large swing to push past the heal"; vs other decks you need big Enels standing.
- 2 Divine Departure for the bricks; 2-2 split Gamma Knife / Gum-Gum Lightning (not 3-1) so Pink can toolbox either.
- No dog"a pretty stuff card if everyone's playing the rest spell" — the dog just dies.
- Biggest edge in the mirror: more Pinks; Enel is chill too.
- Sequence removalrested body → Gamma Knife; active bodies → Gum-Gum Lightning. Use non-Pink tools first so Pink fetches exactly the tool you need.
- Develop 1son a 4-drop turn go 4-1-1-1; on an Enel turn you don't have to swing 6-6 — play Enel, swing 5-6, play a 1. Always have 1s in play for the leader skill.
- Vs Boa"cooked" — they keep healing. Max big Enels, Pink to spam Lightning Dragon and Mama on every 5 (each is a +1), Enel-Enel-Enel to have enough attacks. A student lost 10 of 10 test games with a 2-Enel list; "with just two you can win pretty decently" but you need the 4th.
- Vs Mono Teachpseudo-starve; sandbag the 1s until you can play a bunch in one turn; as many big Enels standing as possible; chip with the leader.
- Don't donate your 1s— you want the life cards. Once you have a board of 1s, put DON on them and swing 5 (one of them swings for free) while you pseudo-starve and build up.
5.3 RG Luffy-Ace
- On the up-trend— one RG Luffy in the top 8 of the small Athens regional (3 Enel, 3 Mihawk, 1 RG Luffy, 1 Kaido). Recommended for fast-paced online matchmaking: "your games last 5 seconds".
- Vs Mihawkcombo on the 5-DON turn, then another Rush; take them to 1; then defend with events for back-to-back turns and use Strongers so you only counter the leader swing. Double Luna = you're dead, one Luna you can tank a turn.
- 2k-check early, then switch to 7s. "Damage, damage, damage." Conqueror's Haki gets you out of all the 6s; they swing 7 to play around it; the Whitebeard spell plays around 7s.
- Leave the correct amount of DON for their attacks — "don't hurt yourself for free"; one extra DON vs a wide board to play around DMG.
- Sabo the event is very strong (searches, trigger searches) and you get Radical Beam, the only real "radical beam".
- Which combo piece to searchgrab the less searchable one; here they are all Straw Hats so take the one you've already seen and passed in a previous search; otherwise dealer's choice.
5.4 Rocks, Sabo, Boa, Black Luffy, Nami
- Rocksgood into everything except Mihawk — "it beats everything that beats Enel, it beats Robin, and it beats all the things that beat Robin"; Gloriosa FTKs Luffy-Ace. Play it only if you think you can dodge Mihawk; it punishes Mihawks that go "oh, easy win", never tested the matchup and let the board snowball into Captain John + Usopp spell.
- Vs Mihawk as Rocks: pressure life while developing, attack 6 and play the odd curve with the leader, Newgate then Newgate skill to attack 8; Kyo on 2, Wang on 4, Newgate on 6, Shiki; Captain John + Usopp spell to force them into the John while you pitch cards to keep it alive.
- Rocks' own plan into Mihawk: pressure life while defending your board; when they Luna you ("an inevitability") play Captain John + Usopp spell.
- Saboworse if people play the rest spell; "if you register Sabo this week, you're going to have a bad time" (vs Mihawk with practice). Vs Robin: outlast, spin the wheels, play hand-neutral waves (Usopp, Docking, Luffy), attack with multiple units not one at a time, swing 7s not 6s ("she plays a ton of 2k"), Loki deals with Pudding while adding an attacker.
- Black Luffy with Ice Agedecent, not fully tested; Great Eruption + Ice Age + Loki kills their 6-5 on the 7-DON turn; Paradise Waterfall in Luffy-Ace blows out a Luna.
- What is strong: the 6-5 on the 7-DON turn and Ice Age on a Franky mid-game — "nothing super deep"; Impact would still just play Mihawk.
- Boanot that bad, "attack 5 a bunch of times"; beats Enel but loses miserably to Robin → scratch it. Gets abused by players who know not to attack early.
- Namino — Mihawk, Luffy-Ace, Kaido-style ramp and Sabo all fill the board with 6s and swing 7s. "Where are the matchups where Nami would be good? I just don't see it."
- Which deck to register"whichever one you pick, pick the one you are the most comfortable with" — in a long tournament comfort with your deck and matchups matters more than the last-minute edge. If Mihawk, play the rest spell: do the early board control, then Mihawk shines going wide with Laws and spinning the wheels.
▦ META MAP FOR THE WEEKEND
| Deck | Verdict | Good into | Loses to |
|---|---|---|---|
| Mihawk | Tier 1, overperformed (5/8 top cut) | everything with the rest spell | Robin slightly (45-55) |
| Robin | Tier 1, most played | random stuff, Rocks, Enel | RG Luffy-Ace only |
| Enel | right there | Robin with 4 Enel | Boa ("cooked"), rest-spell Mihawk |
| RG Luffy-Ace | right there, up-trend | Robin, fast games | Rocks (Gloriosa FTK), Perona |
| Rocks | nuts if you dodge Mihawk | Robin, everything that beats Enel or Robin, Luffy-Ace (Gloriosa FTK) | Mihawk |
| Sabo | bad week | — | rest-spell Mihawk |
| Boa | seems fine | Enel | Robin |
| Nami | no | — | Mihawk, Luffy-Ace, Sabo, ramp |
5.5 Which deck do I register?
- Mihawk — top overallrest-spell build for an open field; Perona build if you expect mirrors
- Robin — "still Robin"4 Borsalino; only real bad matchup is RG Luffy-Ace
- Enel — right there4 Enel, more Pinks, 2-2 Gamma Knife / Lightning, no dog
- RG Luffy-Ace — on the up-trendfast games; combos on the 5-DON turn
- Rocks — only if you can dodge Mihawkbeats Robin, Enel and their predators; loses to Mihawk
- Sabo / Boa / Nami — not this weekrest spell + Yasopp starve Sabo; Boa loses to Robin; Nami eats 7s all day
"Everything else is kind of mid." Rocks is the only non-tier-1 deck Impact would consider, and only for a field light on Mihawk.
6. Tournament Weekend: Body, Head and Field
- Sleepgo to bed an hour earlier than you think you should, "because it takes about an hour for your mind to really calm down". Stressors or worries before the tournament → write them on a piece of paper: the brain relaxes, you can come back to them later, "you will have a better sleep".
- Caffeine (if you are a caffeine person) at strategic timings: not first thing when you wake up — wait until you've been awake about an hour, then a second caffeine break around the halfway point of the day.
- Friday: dinner and scrims after, but "don't burn out too much on a Friday before the Flame Flame on the Saturday" — don't stay up too late.
- Snacks and watersmall snacks all day for consistent energy; carry the water bottle — "if you are dehydrated it is as bad for you as not sleeping well".
- It is mostly a learning experience. If you lose in a frustrating way, write down how you lost and the spot, say you will review it later — "that is enough for your brain to allow you to move on". Don't tilt.
- Marathon, not a sprintplay at an appropriate pace so you finish your games, but don't make "stupid mistakes because you're rushing too quickly". Think about how the game looks when you win it and work your way backwards: take the searches and cards that move toward that endgame.
- A lot of it is hand-dependent, but a lot is matchup understanding: "if you're listening to how I've described these matchups you can tell which cards you actually need — I'm basically telling you what you need to do".
- On stream / people hovering"the only thing I care about when I'm playing a match is playing the match to the best of my ability". Impact's edge: 10 years of esports and "a million times" on stream — you hear white noise plus your opponent through the mic and you block it out.
- The Nats fieldpeople take it more seriously than a regional, but no LCQ and many store-champ qualifiers → player quality is still around the middle. The difference: no "round-1 Jimmy" decks — you play the good decks: lots of Mihawk, Robin, Enel, some Luffy-Ace and Sabo.
- Same deck for every event. Don't FOMO into a different deck for Nats vs Flame Flame vs the next one; play the deck you are comfortable with the entire way through.
- After winningdon't tell them "I just got lucky" — say "you played really well, I think you'll win" and keep their OWR high.
- Bed 1h earlier than you thinkan hour to calm down; stressors on paper
- Awake ~1h, then caffeine
- Small snacks + water all day
- 2nd caffeine at halfway
- Lost badly? Write the spot downreview later, move on
- Play the endgame you seemarathon, not a sprint
Matchups
vs Rocks (as Mihawk)
- Assessmentyou are a 6k leader, so they must commit DON to swing you with the leader and play off-curve. Once the board is won it takes little effort: 6k leader + decently sized bodies, and with no characters in play they cannot use random bricks in hand as counter — "they just die quickly".
- Plan — board control, not starveShanks, Vander Decken and Yasopp are removal tools first. Decken their 10-12; Yasopp + Decken kills Shiki. Swings go to life only when convenient, after their board is dealt with; then repeat.
- They must discard a card for the leader to attack 8 and defend their board constantly; with no life cards from you they run out. Rest everything, Shanks, Decken, clear the team, repeat.
- Trap — the all-face routego all face then Luna their board, and Captain John + Usopp spell "Lunas you back": you cannot deal with their board productively and cannot kill them, turns trade back and forth, and "if they have more Usopp spells and cards than you have attacks, you're in trouble".
- Captain John rulewhen they go John + Usopp spell, get as many cards as you can out of your hand that turn and Oden the John so it cannot press again — no back-to-back John + Usopp with the same John. Then take them out.
All face, then Luna the board
- They answer with Captain John + Usopp spell = they "Luna you back"
- You can't clear the board productively and can't kill them
- Turns trade back and forth: more Usopp spells than your attacks → you lose
Board control first (Impact)
- Shanks / Decken / Yasopp as removal: Decken the 10-12, Yasopp + Decken on Shiki
- You are a 6k leader: they go off-curve to swing you; no board = bricks in hand
- John + Usopp turn: empty your hand, Oden the John, take them out
- Life only when convenient; Luna makes it unlosable
Board control, not starve: Rocks cannot win without Newgate, Shiki and Linlin in play.
vs Robin (as Mihawk)
- Assessment"Robin is still Robin", slightly ahead for her, ~55-45, but it is a gradual board-control game, not a race: remove a couple of early characters so that Big Mom is just a 10-mana heal + draw, not two 8k rushers into your life the turn she lands. Develop while picking apart their board — the spell lets you develop and spend only the free DON.
- Early game — Yasopp is really importanthe taps but stands himself back up, so you never get Sweet Generals'd. "I try not to turn my bodies" when Robin has a board she can trade into; if she doesn't, turning them is fine.
- With Yasopps in play you can tank a Teach hit later, no problem; if your plan is to turn Laws and Odens, keep cards to protect them.
- Counter disciplinetake the first two life against Robin most of the time. Take the second banish too unless you have a super redundant 1k (a third 5-drop you won't play): throw it away to tank a bigger swing later — only if you don't plan on turning your Laws. Robin is trying to run you out of resources.
- Pressure with 5-5, not one big swingwhen their hand is low, refresh DON onto Perona / Kin'emon and attack 5-5. Early they give up so many cards to ramp, and triggered bodies don't refill the hand, so small swings force a counter or a double take — instead of one big swing "they happily take and then just heal".
- Shanks as a board-control tooltap their things, swing under them, Decken the Mom, then attack her; or Shanks and blast the Teach — either they Giant and still lose 2-3 cards, or they lose him. "Their next turn is super slow": no cards to defend their stuff.
- Use a couple of Shanks to run them out of cards, then out of relevant threats; your board sticks, they play heals and you slowly chip through the heals.
- Law is the best card in the matchuppicks up Decken for later, resets Peronas, attacks when they have nothing to attack into it, and eventually blocks a 12. "Spam your Laws."
- Go wide so even after Sweet Generals they can't put weenie attacks into your guys; a leader swing into a rested 3k is one Radical Beam. Switch from the 4k bodies to life once their board is under control.
- DMG linetap down the Mom's DON and Decken the Mom early — a valid way to stop the snowball.
- Banishes and Ovenyou "counter" the banishes by drawing extra cards elsewhere (stage, Yasopp) to make up for the missing life cards. Oven: ignore it — they rarely have the DON to put it down (maybe exactly the 7-DON turn); clear everything around it and freeze it with Oden / Stronger until it does nothing.
- First two life → take (most of the time)you "counter" banishes by drawing elsewhere: stage, Yasopp
- Redundant 1k in hand (third 5-drop you won't play) → throw it awaytank a bigger swing later — only if you won't turn your Laws
- Your plan is to turn Laws / Odens → keep cards, take the banishprotect the bodies you will attack with
- Your board is Yasopps → take freelythey re-stand: no Sweet Generals, you can tank a Teach hit later
- Their hand is low + board controlled → go life 5-5Perona / Kin'emon swings force counters or double takes; not one 8 they take and heal
Big Mom must land as "a 10-mana heal and draw", not two 8k rushers. Shanks on the Teach: Giant + 2-3 cards lost, or he dies → their next turn is super slow.
vs Kaido (as Mihawk)
- Assessment"a super good matchup — it's hard for them to win". Take first almost always.
- First developed characters = Yasoppsthey dodge the leader skill by re-standing; later they stand the Shanks back up so Kaido can't Big-Mom it easily.
- Pressure the life so they don't get "infinity turns". Scale attacks oddly if needed: swing 7 with characters so they must use leader skill + a card, even if the leader swings 5. Don't spread attacks so they save a free card with the skill.
- Plan for their healKaido has to take early damage because it needs pieces. Get them to 3, they heal to 4, get them to 2; your guys stand back up while they develop. Mid game: Odens + stun the King while pressuring. Poke cards out, fish the leader skill on a 6, then Shanks + Decken one guy and blast the other.
- Easy win con: Shanks puts them at 10-12, next turn 10-12-12.
- Go firstdeny the easy ramp curve, extra attacker for you
- Yasopps firstthey re-stand: the leader skill whiffs; later they re-stand Shanks
- Pressure life early7s with characters so they need leader skill + a card; leader can swing 5
- They heal 3 → 4plan for one extra turn: Kaido needs pieces, takes early damage
- Odens + stun the Kingpoke cards out, fish the leader skill on a 6
- Shanks + Decken one, blast the otherthey're at 10-12; next turn 10-12-12
Don't spread attacks: they save a free card with the leader skill. "It's hard for them to win."
vs Enel (as Mihawk)
- Assessmentfrom bad to really good with the rest spell — "fighting Enel is miserable if you don't have it, especially if you lose the roll". Full starve + board control.
- Plandon't give life cards. Their removal (Gamma Knife, Gum-Gum Lightning) doesn't replace itself, so every answer costs a card: "they have to continually find removal plus character". Play Shanks and bomb their Enel: with no life cards they have nothing to defend with.
- Why it worksyour things draw when removed, so you keep playing more; you go low on life while starving them, but they run out of removal first. Something sticks, then force all their life in one turn — they get 1-2 turns max to use those cards.
- When something sticks, play two more, remove their guy: eventually 3 things stick, then Shanks, then 4 — you win. Each attack asks 2 cards from their hand and they have few 2ks (two Sanji, a Mama 1k). Pre-play units on turn 1 (unit + stage or two units) so you can bomb the thing.
- T1: unit + stage / two unitspre-play so you can bomb later
- Rest spell / Yasopp / Perona / Oden on their boardno life cards for them
- They remove your guyGamma Knife / Lightning don't replace themselves: -1 card each time
- Your guys draw when removedkeep playing more; you go low on life, it's fine
- 1-2 things stick → Shanks bombs the Enelthey have no cards to defend
- 3-4 things stickforce all their life in one turn; they get 1-2 turns with those cards
"They have to continually find removal plus character — not the easiest ask in the world." Each attack asks 2 cards; they have few 2ks.
vs Sabo (as Mihawk)
- Assessmentfrom bad to really good with the rest spell. "Starve, especially if you're playing the spell" — if you attack life you never control their board, because they keep cards to defend it.
- Plan (their perfect curve, they win the roll)they play a 2 → you spell it with the leader. They play two 2s → Yasopp one. You are still at 5 life. They play Saul + a 2, maybe swing 5 with the 1 → counter with a junk card (it's just a 5). Then spell again on the Saul.
- Why starving worksif you remove the Saul that turn, "their Luffy doesn't have Rush the next turn"; remove the first couple of units and they cannot create board pressure back. Their 2-for-5s don't replace themselves unless it's Usopp / Docking Station — with Sanji they go down a card every time. "Your rest events are super good at board-controlling their stuff."
- Once the board advantage is built: one turn to get cards out of their hand, one turn to take a lot of life, next turn kill (or life, cards, kill).
- When to switch to facewhen they go double 6-cost. That also means something on your board probably stuck — from there chain Odens into those guys. It only works against those builds.
- They play a 2you: rest spell with the leader, kill it
- They play two 2syou: Yasopp one — still 5 life
- They play Saul + a 2swing 5 with the 1? counter with a junk card
- You: spell again on Saultheir Luffy has no Rush next turn
- Board lead builtcards out of hand → life → kill (2-3 turns)
- Trigger: they go double 6-costswitch to face, chain Odens into the big guys
Remove the first couple of units and Sabo cannot create board pressure back; their 2-for-5s don't replace themselves (except Usopp / Docking Station).
 vs RG Luffy-Ace (as Mihawk)
- Assessment"you win the game the last turn before you die". You cannot starve a deck whose leader gives everything Rush and you cannot deny them any swings — you also have to race: "blast them, blast them, blast them".
- Plan — a mid-range mirrorgo life, stun their 6s, swing 7s all game to empty their hand. You double-develop, so with 4 units one of yours stuns one of theirs — Oden is the most important 5. Cycle Peronas with Law to find +4s for their rushes.
- Build a board: 5, then 6-5, 6-5, kill with Shanks + Luna. Events in hand are mostly for getting out of swings. 8-DON turn: Decken a guy, then 6-5 where the 5 is Oden stunning another → two bodies handled, next turn Shanks + Luna.
- Life managementcounter early 5s with random 1ks; be at an odd life total when they double attack — 3 → 1, not 4 → 2 — to play around the double strike.
- Stronger does the job of Luna here because you mostly freeze the two Luffys (a DON on a searcher kills Sanji); Luna is still "objectively better" vs RG Luffy-Ace — keep 2 freezes.
- 5-dropcounter early 5s with junk 1ks
- 6-5, 6-5Oden stuns one of theirs each turn; cycle Peronas with Law for +4s
- 8-DON turnDecken a guy, then 6-5 with Oden stunning another
- Sit at an odd life3 → 1, not 4 → 2: play around the double strike
- Shanks + Luna / Strongerfreeze the two Luffys; a DON on a searcher kills Sanji
- Win the last turn before you dieyou cannot starve Rush; blast them
Events in hand are for getting out of swings. Oden is the most important 5.
 vs Boa (as Mihawk)
- Assessment"a lot chiller than you think". Don't give them triggers early, even while they heal — don't attack face when it's the only thing to attack.
- Planremove the non-Kuja stuff (Zoros, Namis) while building a board; aim to double clear two Kuja Pirates in one turn so you only take one. "Not really attack them until you build up a board, then attack all at once": Shanks, rest all their triggers, Luna.
- A couple of 7s just gets "take, take, trigger, trigger, heal": go wide enough to challenge them, counter out of their smaller swings, poke-poke-poke, then Shanks + Luna. Laws chump the big attacks later. Stun their guys: they turn two, you kill both and take one.
- Don't hit face earlyno free triggers, even while they heal
- Remove the non-Kuja stuffZoros, Namis; counter out of their small swings
- Double clear 2 Kuja Pirates in one turnso you only take one
- Go widea couple of 7s = take, take, trigger, trigger, heal
- Shanks: rest all their triggers, LunaLaws chump the big attacks later
"A lot chiller than you think": they turn two, you kill both and take one.
Q&A Highlights
Quick Reference Card
- Four decks only: Mihawk, Robin, Enel, RG Luffy-Ace. Play the one you are most comfortable with for every event of the weekend; Rocks only if you can dodge Mihawk.
- Mihawk = board control first. 4 Faces of Trash (the rest spell), 3-4 Coffin Boat, Stronger over Luna (≤2 freezes for Luffy-Ace), 4 Shanks, 3 Yasopp, 4 Otama, 2 Samurai, ≥3 Decken. The spell only works if you already have attackers on board; best target = their early 1-drops (denies their Law).
- Full starve Sabo and Enel (switch to face when Sabo goes double 6-cost), board control Rocks and Robin (Oden the Captain John; take the first two banishes and swing 5-5), take first vs Kaido and open on Yasopps, race Luffy-Ace at an odd life total, vs Boa never hit face early and double clear.
- Counter rules: take the first two life in the mirror and defend the third; defend a body only if it board-controls them back next turn or costs one card; vs Robin always take the first banish.
- From behind: read your hand, pick the one win condition (Shanks race / board control / push), envision the world where they miss — "if they had the pieces, you weren't winning anyway".
- Weekend: bed an hour early (the mind needs an hour to calm down; stressors on paper), caffeine after an hour awake and again at halfway, snacks, water bottle; write down the bad losses and move on; work backwards from the winning board.
Resources
- Top 8 lists from last weekend's regionals (uploaded to The Codex): 1st place tempo Mihawk (≈ Impact's Utrecht list), 2nd place rest-spell Mihawk with 4 Coffin Boat.
- Impact's gameplay VOD dump (rest spell + Hody Jones test games) — uploaded after the stream.
- Dojo meetup at the finals: a group picture in the interim between the 6 pm events and the Flame Flame on Saturday (announcement to follow).
In the coach's words
Q&A 17/09 · note ufficiali del Dojo
La stessa sessione nelle note ufficiali della Training Library del Dojo (Codex, sessione 1): più discorsive, con qualche passaggio che nelle note di sessione è riassunto.
#
IMPACT OP17 META Q&A
Deck Selection, Meta Updates, Matchup Theory, and Tournament Preparation
Session Overview
This session is Impact responding to Dojo questions while updating his view of the OP17 metagame shortly before the weekend's major events. The conversation centers on Mihawk, Robin, Enel, Sabo, Rocks, Luffy Ace, deck selection, new tech choices, and how to prepare mentally for long tournament days.
The largest update is that Mihawk’s new rest-event build has improved its early-game control matchups substantially. Impact believes the deck can now remove early Sabo and Enel bodies earlier and more efficiently than before, which makes Sabo a much less attractive registration than it was in prior weeks.
His broad current hierarchy is:
- Mihawk
- Robin
- Enel
- Red-Green Luffy Ace
He sees these as the most realistic high-level event choices. Rocks remains extremely powerful into much of the field, but its Mihawk matchup is too severe for Impact to recommend it if Mihawk remains popular.
Meta Update
Mihawk Has Improved
Impact believes Mihawk became better because the new rest spell gives the deck earlier, cheaper board control.
Previously, Mihawk often had to wait until Yasopp or later interaction to answer early characters. That gave decks such as Sabo and Enel opportunities to establish an early board and leverage it before Mihawk’s main control tools came online.
Now, Mihawk can:
- Play stage.
- Develop a one-drop.
- Use the rest spell on the following turn.
- Rest an opposing early body.
- Attack it for a meaningful number.
- Draw or filter while trading favorably.
This changes the exchange dramatically.
If Mihawk uses one card that replaces itself and removes the opponent’s character:
- Mihawk often loses no meaningful hand resources.
- The opponent either loses the character outright or spends multiple cards defending it.
- Mihawk gains time to develop Yasopp, Oden, Perona, Law, and Shanks.
Impact sees this as especially important against Sabo and Enel, which previously gained a lot of equity from early board development.
Sabo Is Worse This Week
Impact is much lower on Sabo than he was previously.
Why:
- Mihawk’s rest spell gives early answers to Sabo’s key 2-cost development.
- Mihawk can now rest and remove a Sabo body before it becomes a 6k attacker.
- Yasopp can remove the next body.
- The rest spell can later remove Saul or another important Giant.
- Sabo loses much of its early pressure if its first two meaningful bodies are removed.
Impact’s conclusion is blunt: Registering Sabo into the current Mihawk-focused field is likely to be a bad experience.
Sabo can still win when it curves perfectly or Mihawk fails to find interaction, but the matchup has shifted away from the early OP17 Sabo advantage.
Choosing a Deck
Mihawk vs Sabo
Impact’s answer to the question “Why register Sabo with practice instead of Mihawk with OP16.5 experience?” is effectively that there is little reason to choose Sabo right now unless a player has extraordinary comfort with it and expects a very specific field.
Mihawk is the better general registration because:
- It remains highly consistent.
- It rewards strong fundamentals.
- It gained new tools against previous difficult matchups.
- It has a good plan into Sabo, Enel, Robin, and Rocks.
- The mirror is a fundamentals matchup where OP16.5 experience still transfers.
- It is less dependent on the opponent failing to interact with its board.
Play the Deck You Know
Impact’s event recommendation is not to chase every new list or switch decks because of fear of missing out.
For a major event:
- Pick the deck you understand.
- Know your matchup plan.
- Know your mulligans.
- Know your ideal curve.
- Know your expected lethal patterns.
- Use the same deck throughout the event unless you have a clear reason to switch.
He sees very little value in changing leaders between different portions of an event if you are less practiced with the alternate deck.
Comfort, familiarity, and matchup knowledge matter more than chasing a theoretical “perfect” list at the last minute.
Mihawk vs Rocks
Matchup Assessment
Impact views Mihawk versus Rocks as very favorable, but warns that players must understand why.
Mihawk’s major advantages:
- Mihawk is a 6k leader.
- Rocks must often commit DON!! to make its leader attacks meaningful.
- If Rocks spends DON!! attacking, it can fall off curve.
- Mihawk can remove or freeze the characters that make Rocks’ board function.
- Mihawk can use Shanks, Vander Decken, Yasopp, Perona, Oden, and stuns to control board.
- Rocks struggles if Newgate and Shiki cannot remain in play.
- Once Mihawk wins board, Rocks’ non-counter cards become much worse.
Do Not Pure Race
Impact identifies two possible Mihawk plans:
Face pressure plus Luna
Mihawk can attack life, push Rocks low, then Luna the board.
The danger is Captain John plus Usopp spell.
Captain John plus Usopp spell can function like Rocks “Luna-ing Mihawk back”:
- Rocks gets an extra turn.
- Mihawk cannot efficiently kill the board.
- Rocks can repeat pressure.
- The matchup can become dangerous if Rocks has more Captain John and Usopp spell access than Mihawk has answers.
Board control first
Impact prefers board control.
The plan:
- Remove Newgate, Shiki, Linlin, and other Rocks engines.
- Use Yasopp plus Vander Decken to kill Shiki.
- Use Shanks as board control, not merely face damage.
- Use Oden to stop Captain John from resting again.
- Prevent Captain John plus Usopp spell from generating repeated turns.
- Once Rocks has no engine board, pressure life and finish quickly.
The main point is that Rocks cannot win without a board. It has cards in hand, but its hand only becomes defense, pressure, and value when Newgate, Shiki, and similar characters are in play.
Captain John Rule
When Rocks uses Captain John plus Usopp spell:
- Do not panic and race blindly.
- Get cards out of hand where possible.
- Use Oden to freeze Captain John or the body that enables the next pressure turn.
- Ensure Rocks cannot reuse the same Captain John for a second major turn.
- Remove its other attackers so Captain John does not become a real threat.
Impact compares this to older Kid matchups. Keeping one protected unit alive is not enough if every other attacker is gone.
Mihawk vs Sabo
Matchup Assessment
Impact now strongly prefers the rest spell build into Sabo.
The Mihawk plan is:
- Starve Sabo early.
- Use the rest spell to remove its first 2-cost body.
- Use Yasopp to remove the next body.
- Use the rest spell or other interaction to remove Saul.
- Keep Sabo from developing a Giant-enabled board.
- Establish your own board advantage.
- Switch to life pressure only after you have won board.
This is a much different plan than blindly racing.
Why Starving Works
Sabo needs life, board, and card access to create a critical mass of 2-cost bodies plus Giant effects.
If Mihawk starves Sabo while removing early bodies:
- Sabo cannot establish its normal pressure board.
- Sabo cannot comfortably play its Luffy turns.
- Saul or Loki becomes less impactful.
- Its board lacks enough attackers to race.
- Mihawk can develop while Sabo is forced to keep replacing pieces.
The goal is not to starve forever. The goal is to starve until Mihawk has a board lead. Once that happens, Mihawk transitions into a two-turn kill.
When to Change to Face
Impact’s practical trigger is when Sabo reaches a double-6-cost development or starts playing bodies that survive the early-control plan.
At that point:
- Mihawk likely has a board advantage.
- One of Mihawk’s bodies probably survived.
- Mihawk can start chaining Oden into Sabo’s larger threats.
- Mihawk can begin attacking life while still freezing or controlling board.
- Sabo’s hand should already be limited from replacing early bodies.
The rest spell is strongest before Sabo’s board becomes active. Once Sabo has a larger board, Mihawk must use its usual Odin, Yasopp, Perona, Law, and Shanks tools to finish the game.
Mihawk vs Robin
Matchup Assessment
Impact sees Robin as slightly favored, approximately 55-45, but believes the matchup is playable if Mihawk approaches it as a gradual board-control game instead of a pure race.
Robin’s strengths:
- Banish leader pressure.
- Ramp.
- Teach.
- Sweet Generals.
- Big Mom.
- Giant.
- Borsalino.
- Large hand and healing late game.
Mihawk’s plan is to prevent Robin from having a board when its Big Mom turns begin.
EarlyEarly Game
Mihawk should:
- Use Yasopp heavily.
- Remove Robin’s early 4k bodies.
- Keep Robin’s board narrow.
- Avoid turning your own bodies into Sweet Generals trades when Robin has board.
- Take the first one or two banish hits when needed to preserve hand for board defense.
- Use smaller 5k attacks to pressure Robin’s low early hand.
Robin often spends several cards ramping:
- Leader effect costs cards.
- Ramp costs cards.
- Pudding requires hand investment.
- Teach, Big Mom, Giant, and heal lines require resources.
Mihawk should punish this with multiple small attacks rather than one big attack Robin can take and heal.
When to Attack Life
Attack life when:
- Robin’s hand is low.
- Robin has ramped and is short on counter.
- Mihawk has already controlled the board.
- Robin cannot easily play a Big Mom plus Giant turn.
- Multiple 5k attacks force multiple small counters.
- Robin is approaching one or zero life before a healing turn.
Impact prefers several 5k swings with smaller bodies, such as Perona and Kin’emon, over one giant leader swing when Robin is low on cards. Multiple attacks force Robin to make more decisions and may prevent it from comfortably healing back.
Shanks as Board Control
Against Robin, Shanks should often be used as a board-control tool.
Strong Shanks lines include:
- Rest Robin’s board.
- Use Mihawk bodies to attack smaller rested characters.
- Vander Decken Big Mom.
- Attack Teach with Shanks.
- Force Giant while Robin also loses two or three cards.
- Leave Robin with a slow next turn and insufficient hand to defend.
Mihawk does not need to kill Big Mom immediately in every game. It needs to make Robin’s Big Mom turn weak.
If Robin’s Big Mom is only a 10-DON!! heal and draw with no active attackers behind it, Mihawk is in a much better position.
Law Is Excellent
Impact considers Law very strong against Robin.
Law can:
- Recycle Vander Decken.
- Recycle Perona.
- Create a blocker.
- Attack when Robin has no efficient body to contest it.
- Create repeated board-control turns.
- Help Mihawk maintain wide development.
- Help prevent Robin from establishing a second full Big Mom board.
Mihawk vs Kaido
Matchup Assessment
Impact considers Kaido a very favorable Mihawk matchup.
Mihawk should usually take first.
Why:
- Kaido wants time and curve space.
- Kaido wants the easy King ramp line.
- Taking first interferes with Kaido’s preferred ramp progression.
- Mihawk gets an extra attacker into play.
- Mihawk can begin life pressure before Kaido reaches repeated boss turns.
Key Plan
- Develop Yasopp early.
- Use Yasopp to avoid Kaido leader interaction because it stands again.
- Pressure Kaido’s life early.
- Use Oden to stun King.
- Force Kaido to use leader effect and counter before Shanks.
- Use Shanks plus Vander Decken to answer Kaido’s major bodies.
- Continue pressing because Kaido can heal, so plan for one extra turn.
Attack Sizing
Against Kaido, attack sizes can manipulate leader effect.
- Use 6k attacks to bait Kaido leader effect.
- Use 7k attacks when you want Kaido to spend leader effect plus a card.
- If Kaido spends leader effect on a smaller attack, it becomes harder for it to protect a major body later.
- Once leader effect is spent, Shanks can threaten a large character with 17k or more.
The goal is to overload Kaido’s DON!!. Kaido may need to:
- Develop.
- Heal.
- Use leader effect.
- Defend life.
- Protect a big body.
- Answer Mihawk’s board.
It cannot always do all of those things in one turn.
Mihawk Build Choice
Rest Spell Build
Impact is leaning toward the rest spell build for major events.
The rest spell build is better into:
- Enel.
- Sabo.
- Robin.
- Early aggressive decks.
- Random ladder or tournament decks.
- Fields where board control is more valuable than mirror-only optimization.
The rest spell lets Mihawk:
- Rest early characters.
- Use free DON!! to remove them.
- Deny early development.
- Keep opponents off key curves.
- Board control before they build a functional attack plan.
- Survive Shanks pressure through flexible event defense.
Impact sees it as more than a single tech card. It is a full game plan.
If you include it, commit to the strategy:
- Use it repeatedly.
- Build board so you can attack the rested character.
- Do not spend the spell as generic removal while behind.
- Use it to establish a lead, then attack with five 7k swings once you have enough board.
Perona / Midrange Build
Impact also likes the Perona-heavy midrange version.
It is better when:
- You expect many Mihawk mirrors.
- You want stronger 7k body density.
- You want more resilient board development.
- You want Perona’s protection against rest-based board control.
- You want more direct pressure through 8k leader swings and Shanks turns.
This build is more mirror-focused, while the rest spell build is more broad-field focused.
Hybrid Build
Impact sees hybrid builds as viable.
A likely hybrid direction:
- 3 Law.
- 2 Mihawk.
- 3 Yasopp.
- 3 Perona.
- 3 Vander Decken.
- Shanks plus Law/Bepo split.
- A mix of Rad Beam, Stronger, DMG, and rest spells based on field expectations.
He considers the 3 Law, 2 Mihawk configuration preferable to a 4 Law, 1 Mihawk structure if rest spells are common. More Mihawks reduce dependence on one-drops, which can be removed by early rest-spell lines.
Event Choices
Stronger vs Luna
Impact prefers Stronger over Luna in rest-spell builds.
Why:
- Stronger is a more flexible defensive event.
- With four stages, the deck can often cast a spell cheaply or effectively for free.
- Stronger can stop several 7k attacks.
- Luna can be dead outside certain matchups.
- Rest spell plus board control can reduce the number of bodies that need to be frozen.
- In many Sabo and Luffy Ace situations, freezing two important attackers is enough.
Luna is still strong in dedicated mirror or Shanks-focused lists. But Impact sees Stronger as the more flexible choice for an all-field rest-spell build.
Dead Man’s Game
Impact rates Dead Man’s Game highly.
It is useful because it:
- Taps Robin’s Giant DON!!.
- Taps open DON!! in a Shanks plus Decken/Luna turn where opponent has one DON!! up.
- Helps force lethal against Robin.
- Can deny a key event line.
- Is valuable in mirrors where the opponent needs one DON!! for defense or development.
- Helps push through a blocker plus open DON!! scenario.
Impact considers DMG especially strong when Mihawk has already won board. Tapping the final defensive DON!! or Giant resource can make the opponent’s entire defensive turn collapse.
Four Shanks vs Three Shanks Plus Law/Bepo
Impact prefers four Shanks.
His reasoning:
- Shanks is the deck’s strongest win condition.
- Seeing Shanks plus Shanks is better than seeing Shanks plus Law/Bepo in most matchups.
- The deck can use Shanks to create immediate damage, board control, and lethal pressure.
- Law/Bepo is useful as a turn extension, but may be less important than a fourth copy of the main finisher.
- The more aggressive Mihawk build especially wants four Shanks.
Law/Bepo remains playable as a one-of because it can:
- Make Mihawk an 8k leader.
- Pseudo-blank opposing 6k bodies.
- Freeze a large attacker.
- Buy an extra turn.
- Create a 10k to 11k leader swing.
- Bridge into the second Shanks turn.
But Impact is not convinced the 3 Shanks, 1 Law/Bepo split is stronger than simply playing four Shanks.
Mihawk vs Enel
Updated View: Starve and Control
Impact has changed his opinion on Mihawk versus Enel.
He now believes Mihawk should often starve Enel, control board, and make Enel run out of removal.
The plan:
- Do not feed Enel easy life cards.
- Use rest spell, Yasopp, Perona, Oden, and Vander Decken to control Enel’s board.
- Force Enel to spend removal spells.
- Do not give Enel more cards while it is trying to clear your board.
- Eventually stick one or two meaningful bodies.
- Play Shanks and remove Enel’s big threat.
- Force Enel to take life in one large board turn.
- Kill over the next one or two turns.
Why the plan works:
- Enel’s removal spells do not replace themselves.
- If Mihawk starves Enel, Enel must find both removal and a character repeatedly.
- Enel may be forced to spend hand to remove Mihawk’s board without receiving new life cards.
- Once Mihawk sticks multiple bodies, Enel cannot efficiently clear all of them.
Mihawk may go low in life while starving Enel, but that is acceptable if Enel is also running out of cards and cannot maintain its board.
Playing From Behind
Hand Context Determines the Plan
Impact explains that Mihawk should not play every game the same way.
When behind or when the opener is weak, determine the plan from the hand.
Shanks-heavy hand
If the hand contains multiple Shanks but lacks a strong early engine:
- Play aggressively.
- Send damage face.
- Aim for a Shanks-based race.
- Take calculated risks.
- Force the opponent to have the specific answers.
- Accept that the plan loses to more things, because the standard resource game was already losing.
Midrange-heavy hand
If the hand contains multiple 5-costs, 6-costs, Yasopps, Peronas, or board-control pieces:
- Play a board-control game.
- Remove one of the opponent’s double-development bodies.
- Reduce the opponent’s attack count.
- Make their double summon less impactful.
- Stabilize, then convert board advantage into life pressure.
No-searcher hand
If Mihawk misses searchers while the opponent finds many:
- You are unlikely to win a pure card-quality battle.
- Look for a line where the opponent misses a key answer.
- Push more aggressively.
- Identify your actual possible win condition.
- Do not pretend you can beat every possible hand.
- Make the play that beats the widest realistic range.
Impact’s principle: When you are behind, play toward the line that wins if the opponent does not have the exact answer. If they have every answer, you were not winning anyway.
Tournament Mental Game
Sleep
Impact emphasizes sleeping earlier than you think you need to.
His recommendation:
- Go to bed about one hour before your actual intended sleep time.
- Give your mind time to settle.
- Do not expect to instantly sleep after a stressful practice session or travel day.
- Write down stressful thoughts, tasks, and tournament concerns before bed.
- Telling yourself “I will revisit this later” helps the mind stop looping on it.
Caffeine and Food
For long tournament days:
- Do not caffeinate immediately after waking up.
- Wait roughly an hour until you are naturally awake.
- Take caffeine strategically.
- Consider a second caffeine point around the middle of the day.
- Carry water.
- Stay hydrated.
- Bring small snacks.
- Maintain stable energy rather than relying on one huge meal or one early caffeine spike.
Impact treats hydration and food as tournament preparation, not an afterthought. Dehydration can hurt performance as much as poor sleep.
Handling Losses
When a bad beat, misplay, or frustrating game happens:
- Write down what happened.
- Note the turn or decision that bothered you.
- Promise yourself you will review it later.
- Return focus to the next round.
Do not let the brain replay a loss all day. Writing it down gives you permission to stop thinking about it until the event is over.
Playing Pace
A long event is a marathon.
Impact’s guidance:
- Do not rush because you are excited, nervous, or behind.
- Play at an appropriate pace.
- Think through turns.
- Avoid slow play, but do not donate games by making fast mistakes.
- Work backward from the winning board state.
- Use searches to take the cards that support that endgame.
Finals and National-Level Events
What Changes at Finals
Impact believes finals-level events are somewhat more serious than a normal regional, but not dramatically different in baseline player quality.
Expect:
- Fewer completely unprepared opponents.
- More players who can win locals.
- More top meta decks.
- Fewer random rogue decks.
- More Mihawk, Robin, Enel, Luffy Ace, and other established good decks.
Do not assume every opponent is a top-cut regional-level expert. Players can qualify through store championships, so the field still includes a broad skill range.
The practical difference is that “round one random rogue deck” is less likely. Tournament preparation should prioritize high-play-rate decks and established Tier 1 choices.
Playing on Stream or at Top Tables
Impact’s mental approach is to treat spectators and stream conditions as white noise.
His rule: The only thing that matters is playing the current match as well as possible.
He attributes this partly to esports experience. He does not attempt to manage the audience. He narrows attention to:
- Board state.
- Hand.
- Life.
- DON!!.
- Matchup plan.
- Next-turn lethal and survival math.
Final Meta Conclusions
Impact’s current OP17 recommendations are:
- MihawkTop overall choice, especially with the rest spell build.
- RobinOne of the two decks slightly above the rest, highly strong and resilient.
- EnelVery strong, particularly with multiple Enels, multiple Pinks, Laws, Frankies, and a balanced Gamma Knife / Gum-Gum Lightning package.
- Red-Green Luffy AceStrong, fast, and capable of exploiting the field, especially in quick-match structures.
- RocksExtremely strong into most decks, but too risky if Mihawk remains highly represented.
- SaboLess attractive because the rest spell and Yasopp give Mihawk much better early control.
- NamiNot recommended; too many top decks punish it.
- BoaPlayable but too polarized, especially because Robin is a difficult matchup.
Impact’s event-level recommendation is to pick Mihawk, Robin, Enel, or Luffy Ace based on comfort and matchup knowledge. Do not abandon a practiced deck chasing a marginal theoretical edge. A player who understands their deck, curve, search targets, counter plan, and matchup strategy will gain more equity than a player who copies an untested list the night before.