VOD review · Mihawk vs Robin · 9/09
Il matchup con Robin analizzato su VOD: tempo prima del primo Big Mom, Dead Man's Game, Shanks + Luna, gestione della vita. Attenzione: sul turno la fonte si contraddice (è segnalato nel punto esatto).
Matchup Overview
Mihawk versus Robin is a race between two very different resource engines. Mihawk wants to establish a wide, active board, pressure Robin with repeated 7k attacks, and use Shanks plus Luna to deny Robin’s defensive turns. Robin wants to ramp quickly, develop Teach and Big Mom ahead of schedule, heal through the early pressure, and eventually force Mihawk to fight through Giant-backed bodies and multiple large bodies.
The main lesson from the session is that the matchup is heavily shaped by tempo before the first 10-cost Big Mom turn.
- Mihawk wins when it pressures Robin before Robin can establish multiple large bodies and Giant defense.
- Robin wins when it ramps efficiently, gets to Teach into Big Mom before Mihawk’s board is online, and keeps enough Giant or counter access to prevent Shanks from removing the first major body.
- Mihawk should usually prefer going first to deny Robin’s most explosive going-second ramp curve.
- Robin generally prefers going second because its strongest starts involve ramping, then reaching its high-cost threats ahead of schedule.
Mihawk’s Matchup Plan
Take Second
The session’s strongest strategic conclusion is that Mihawk should generally choose second against Robin.
Why:
- Robin’s most dangerous high roll occurs going second.
- Going second allows Robin to double-ramp early.
- That ramp can lead into 8-cost Teach followed by 10-cost Big Mom.
- Mihawk is much less comfortable when Robin’s first Big Mom arrives before Mihawk has built enough board or assembled Shanks plus Luna.
The matchup is still playable from other die-roll positions, but Mihawk’s first-player seat is much better for controlling Robin’s progression.
Pressure Robin Before Big Mom
Mihawk cannot sit back and let Robin build a full healing board.
Robin’s leader banishes life rather than giving Mihawk cards, but Robin pays a real cost for its early setup:
- It often discards cards for leader skill.
- It may discard cards to ramp.
- It has to spend cards to find Pudding, Teach, Big Mom, and Giant.
- Its early hand can become much smaller than it appears.
- If Mihawk starts sending repeated 7k attacks, Robin may be forced to spend cards before its larger threats stabilize.
The core Mihawk plan is:
- Develop bodies early.
- Push real attack thresholds.
- Force Robin to answer 7k attacks.
- Keep Robin from freely ramping into Teach plus Big Mom.
- Go wide enough that Robin’s first defensive turn cannot answer everything.
- Use Shanks plus Luna once Robin is low enough that the freeze actually matters.
Impact’s central observation was that Robin’s board, without Giant and without enough open DON!!, often folds to repeated 7k attacks. Robin can heal, but it cannot defend every attack if Mihawk is consistently asking for multiple cards.
Attack Sizing Against Robin
Repeated 7k attacks are the core pressure tool
Mihawk should use 7k attacks to create the most difficult defensive decisions.
Why 7k matters:
- Robin’s leader cannot efficiently cheat defense without Giant.
- Robin often has limited natural 2k density after ramping and developing.
- A 7k attack often asks for 2k plus 1k, two cards, a defensive event, or life.
- Robin may be forced to take damage before it has a good healing turn.
- Multiple 7k attacks drain Robin’s hand before Big Mom can restore the board.
Mihawk should not default to:
- 5k leader swings.
- Small attacks that Robin can take comfortably.
- One giant attack that Robin can Giant through efficiently.
- Board trades that do not reduce Robin’s actual future pressure.
The preferred goal is not merely “hit life.” It is to make Robin spend the exact cards it needs for its ramp, Teach, Big Mom, and Giant sequence.
Use extra DON!! productively
If Mihawk has extra DON!! and does not need it for:
- Rad Beam
- Another defensive event
- Samurai
- Boat
- Searcher cycling
- A needed development play
then it should convert the DON!! into a larger attack.
A 5k attack into Robin can be low impact. A 7k attack can force a real card exchange and accelerate the game before Robin’s healing engine comes online.
Robin’s Matchup Plan
Robin Wants the Game to Reach Big Mom
Robin’s goal is not to trade evenly in the early turns. It wants to ramp into large bodies fast enough that Mihawk’s normal midgame attacks become inefficient.
Robin’s best sequence is generally:
- Ramp.
- Develop Pudding or another card-selection piece.
- Get to Teach.
- Follow with 10-cost Big Mom.
- Heal.
- Hold Giant or establish Borsalino.
- Force Mihawk to spend Shanks, Vander Decken, and Luna just to get through one defensive turn.
- Develop a second Big Mom or Sweet Generals while Mihawk runs out of pressure.
The most dangerous Robin high roll is a fast curve such as:
- Double-ramp early.
- Teach on the 6-DON!! turn.
- Big Mom on the next major curve.
- Trigger value or healing support.
- Giant-backed board protection.
If this happens while Mihawk misses 6-cost development, misses useful one-drops, or gets Samurai stuck in hand, Mihawk can be overwhelmed.
Do Not Counter Every Banish Attack
Robin’s banish leader forces an unusual decision pattern. The opponent does not gain a card when taking life, so it is tempting to counter every banish attack.
The session’s conclusion was that this is often wrong.
Against Robin, Mihawk should usually:
- Take at least one early banish attack when safe.
- Preserve hand for board development and defense.
- Counter later banish swings when the life threshold becomes important.
- Avoid spending every card just to remain at high life.
- Prioritize surviving the Big Mom and Giant turns rather than preserving early life at all costs.
The reason is simple:
- If Mihawk counters every banish swing, Robin can focus on clearing Mihawk’s board.
- Mihawk loses cards protecting life.
- Robin gets more time to ramp.
- Mihawk enters the critical turns with too little board and too little hand.
Banish attacks matter, but board is still the deciding resource.
The Robin High Roll
Double Ramp Into Teach
Mihawk must understand Robin’s strongest curve because it changes the entire matchup.
Robin’s ideal high-roll progression can include:
- Early ramp.
- A second ramp or trigger-assisted acceleration.
- Teach on 6 DON!!.
- Fast 10-cost Big Mom.
- Healing or trigger support.
- Giant access.
This is the sequence Mihawk should fear most.
Why it is dangerous:
- Teach interferes with Mihawk’s board and hand progression.
- Big Mom is difficult to attack through.
- Robin can heal back before Mihawk finishes.
- Giant can absorb the attack that would otherwise remove Big Mom.
- Mihawk may have to spend Shanks and Vander Decken too early.
- Robin can then establish a second large body while Mihawk is low on pressure.
How Mihawk responds
Mihawk must punish the setup before it becomes complete.
The best tools are:
- Early 7k pressure.
- Yasopp to remove Robin’s 4k bodies.
- Oden to freeze the character that makes the next turn dangerous.
- Perona to reduce the number of attacks Robin can make.
- Wider development rather than relying on one Shanks turn.
- Stun Bonney to deny a critical 10-DON!! turn when the board state supports it.
- Dead Man’s Game, if included, to tap Robin’s DON!! and shut off Giant defense.
Dead Man’s Game
Why DMG may become mandatory
The session identifies Dead Man’s Game as a potentially important future inclusion if Robin becomes popular.
Robin’s strongest defensive turns frequently involve:
- Holding Giant.
- Holding one or more DON!! open.
- Playing Borsalino.
- Using Giant to save Big Mom.
- Rebuilding through triggers or Sweet Generals.
Dead Man’s Game can break that structure.
If Mihawk taps Robin’s key DON!!:
- Giant may become unavailable.
- Borsalino plus Giant lines become weaker.
- Robin cannot protect Big Mom as efficiently.
- Shanks becomes much harder to answer.
- A second Shanks can often finish the game immediately.
The group’s view was that one Dead Man’s Game can drastically change games that otherwise look unwinnable.
Important DMG principle
DMG is not just a generic event. Against Robin, it is often a direct answer to the deck’s survival mechanism.
The goal is:
- Force Robin low.
- Identify a turn where Giant is the only real defense.
- Play Shanks.
- Tap the necessary DON!!.
- Push the board and leader attacks.
- Leave Robin without the Giant line that would normally buy another turn.
Shanks Plus Luna
When to use the package
Mihawk should not automatically Shanks plus Luna at the first possible opportunity.
The package is strongest when:
- Robin is at one or zero life.
- Robin’s board is rested or vulnerable to the full freeze.
- Robin cannot hold Giant effectively.
- Mihawk has already forced Robin to use much of its hand.
- Mihawk can kill on the current or following turn.
- Robin’s attackers would otherwise threaten to stabilize through Sweet Generals or Big Mom.
The ideal sequence is:
- Use your existing board first.
- Make as many meaningful attacks as possible.
- Force Robin to reveal triggers, blocks, or counter.
- Play Shanks.
- Rest the board.
- Luna after the Shanks resolves.
- Freeze Robin’s relevant attackers.
- Push Robin to zero or leave it unable to defend the next Shanks.
Why sequence matters
The session highlights that attacks should generally happen before Shanks when possible.
If Mihawk attacks first:
- Robin may trigger bodies.
- Robin may reveal whether it has Giant.
- Robin may reduce hand size.
- Mihawk can see which bodies are active before Shanks rests everything.
- Luna becomes more effective once Shanks has created the proper board state.
The basic sequence is: Attack first, then Shanks, then Luna.
Do not waste the opportunity to make your existing board attack before freezing the opponent’s side.
Mihawk Development Strategy
Go wide, not tall
Mihawk’s strongest plan into Robin is frequently to develop more bodies rather than race to Shanks immediately.
Why:
- Robin’s first Big Mom can answer one major threat.
- Robin’s Sweet Generals can interact with individual bodies.
- Giant can protect one decisive target.
- A wide Mihawk board asks Robin to solve several problems at once.
- Multiple 6k and 7k attackers can force Robin’s hand down before Big Mom becomes safe.
A development pattern such as:
- 6-cost plus 5-cost
- 6-cost plus 5-cost again
- Perona plus another body
- Law plus Perona
- Oden plus board pressure
can be better than simply jamming Shanks at the first opportunity.
The goal is to create a board where Robin cannot:
- Heal enough.
- Clear enough attackers.
- Protect Big Mom.
- Maintain Giant.
- Develop the second Big Mom.
- Keep enough cards for banish pressure.
Mihawk before Law
The session also reinforces a sequencing principle for lists playing both Mihawk and Law:
Why:
- Mihawk’s body enters active.
- Law’s summoned body enters rested.
- If Mihawk is played first, the board’s bodies are more likely to become rested together on the later Law turn.
- This makes the board easier to manage around opponent attack patterns.
- It also reduces the chance of leaving one isolated body as an easy target.
This is not an absolute rule, but it is a useful sequencing default.
Perona and Oden
Perona’s role
Perona is valuable against Robin because it can reduce the number of meaningful attacks Robin sends while also creating a resilient board body.
Perona is especially good when:
- Robin has multiple small or medium characters.
- Robin is about to play a Big Mom but has limited board.
- Freezing one key body means Big Mom only gets one weak follow-up attack.
- Mihawk needs to survive the turn before Shanks.
- Mihawk needs to keep Robin’s board narrow.
Oden’s role
Oden is valuable when one character is the real problem.
Use Oden when:
- Robin has a major attacker that must not swing.
- Mihawk needs to stop the most threatening body before the next Shanks turn.
- The board is narrow and freezing one body materially reduces pressure.
- Mihawk needs the draw or filter to find combo pieces.
The main difference:
- Perona is better at reducing a wide board.
- Oden is better at stopping the one character that decides the turn.
One-Drop Hate and Mont-dor
Do not play around it by not playing your deck
Robin may include one-drop hate such as Mont-dor. This can punish Mihawk’s one-drop development and cause a blowout if it removes multiple searchers or Samurai targets.
However, the session’s conclusion is clear: Mihawk should not stop playing one-drops just because Robin could have Mont-dor.
Why:
- Mihawk’s deck functions through cycling, searching, and Samurai.
- Refusing to play one-drops means refusing to use your engine.
- Robin has to spend a real turn and card on Mont-dor.
- If Robin plays it, it delays ramp or another key development.
- The card is a blowout when it happens, but not something Mihawk should build its entire game around.
The correct response is to acknowledge the risk, not cripple your own curve trying to avoid it.
Robin’s Defensive Tools
Big Mom
Big Mom is Robin’s central stabilizer.
Against Big Mom, Mihawk must ask:
- Does Robin have Giant?
- Does Robin have open DON!!?
- Can Shanks plus Vander Decken remove it?
- Can a wide board pressure Robin around Big Mom instead?
- Is it better to freeze the supporting board and race?
- Can Dead Man’s Game prevent Giant?
Mihawk should not assume Big Mom is removable immediately. If Giant is live, attacking into Big Mom may simply trade Mihawk’s biggest attack for Robin’s best defensive event.
Borsalino plus Giant
Borsalino plus Giant is one of Robin’s best defensive lines.
It can:
- Preserve life.
- Keep a major body standing.
- Stop the largest attack.
- Force Mihawk to commit more resources.
- Buy the turn needed for another Big Mom, Sweet Generals, or heal.
Mihawk’s response is to avoid allowing Robin to enter this defensive posture with a real attacking board.
If Robin has:
- Borsalino
- Giant
- A major body
- Multiple active attackers
then Mihawk can be in danger.
If Robin has:
- Borsalino
- Giant
- No real attacking board
then Robin is only delaying. Mihawk can continue developing, pressing life, and wait for the right Shanks or DMG turn.
Life Management
Mihawk Life
Mihawk should not automatically preserve life against Robin.
Take early banish hits when:
- Your hand needs cards to develop.
- You can survive the future Shanks / Big Mom sequence.
- Robin has not built enough attackers to punish low life.
- You need to preserve counter for a key body.
- You need to establish a board before Robin ramps.
Counter when:
- Robin can deal multiple large attacks in the same turn.
- You need to stay above a known lethal threshold.
- A future Big Mom or Sweet Generals turn will create an unavoidable attack spread.
- You are protecting a critical body or Shanks turn.
- Your hand already has the curve and does not need more life cards.
Robin Life
Mihawk should focus on getting Robin to one or zero before the full healing engine begins.
Robin can recover life, but every heal has a cost:
- A card must be played.
- DON!! must be committed.
- Counter may be reduced.
- Giant may become necessary.
Repeated 7k attacks make Robin choose between:
- Taking life and losing access to a card.
- Countering with cards needed for future development.
- Healing but falling behind on board.
- Protecting Big Mom but losing the board around it.
The goal is to make every defensive choice bad.
Mulligan Considerations
MulliganMihawk Mulligan
A hand is not good simply because it has Samurai and a one-drop.
Against Robin, Mihawk wants:
- Multiple one-drop searchers.
- Kin’emon, Otama, and Perona access.
- Oden or Perona for midgame interaction.
- A functional 5-cost or 6-cost development line.
- A route to Shanks.
- Enough bodies to build a board before Big Mom.
- At least some card flow that does not rely entirely on one Otama hit.
A hand containing one one-drop plus Samurai can still be a mulligan if everything depends on Otama finding exactly the missing body. The hand may look structurally close, but it is not functional enough if one search whiff means the whole curve fails.
MulliganRobin Mulligan
Robin wants to prioritize:
- Ramp.
- Pudding.
- Teach.
- Big Mom access.
- Giant.
- A route to a second major body.
- Enough counter or trigger access to survive early 7k pressure.
Robin cannot keep a hand that only looks good on the 10-DON!! turn. It needs a functional early progression because Mihawk’s 7k pressure can make an unprotected Big Mom turn too late.
Common Mistakes
Mihawk Mistakes
- Taking first and allowing Robin its best double-ramp curve.
- Keeping a hand that needs one searcher to hit perfectly.
- Attacking Robin only for 5k when unused DON!! could create a 7k threshold.
- Overcommitting to an early Shanks without putting Robin in lethal range.
- Using Luna too early, before Robin is under enough pressure for the turn skip to matter.
- Trying to avoid Mont-dor by refusing to play one-drops.
- Failing to include or test Dead Man’s Game if Robin becomes a major part of the field.
- Treating Big Mom as the only relevant target instead of reducing Robin’s attacking board first.
- Ignoring whether Giant is live.
- Spending hand to protect life while Robin clears board and reaches Big Mom safely.
Robin Mistakes
- Countering every early attack and losing too many cards before Big Mom.
- Ramping aggressively without tracking the hand cost.
- Playing Big Mom without Giant or enough counter when Mihawk has Shanks access.
- Using Banish pressure while failing to remove Mihawk’s board.
- Turning medium characters into Mihawk’s board without forcing meaningful exchanges.
- Letting Mihawk build five attackers before attempting the first major defensive turn.
- Playing Mont-dor as a default line instead of recognizing when it delays a more important ramp or development turn.
- Treating a full healing board as enough to win when Mihawk still has multiple attacks and a Shanks turn coming.
Tournament Preparation
Mihawk Player Practice Goals
Practice these scenarios:
- Going first versus Robin double-ramp starts.
- Pressure lines that create repeated 7k attacks before Teach.
- Shanks plus Luna sequencing when Robin is at one life.
- Dead Man’s Game timing into Giant.
- Perona versus Oden decisions when Robin has narrow versus wide board.
- Playing around Big Mom plus Giant without overcommitting Shanks.
- Recovering when Mont-dor clears several early one-drops.
- Deciding whether to take banish life or protect board.
Robin Player Practice Goals
Practice these scenarios:
- Double-ramp into Teach versus early Mihawk 7k pressure.
- Big Mom turns with and without Giant.
- Borsalino plus Giant defensive sequencing.
- When to take 7k attacks versus countering.
- When to use character attacks to clear Mihawk board rather than push banish life.
- Building a second Big Mom board before Mihawk’s second Shanks.
- Playing around Dead Man’s Game.
- Managing hand size after leader effect, ramp, and Pudding lines.
Final Takeaways
- Mihawk should generally choose second to reduce Robin’s double-ramp high roll.
- Robin must ramp quickly, but excessive ramp can leave it too low on hand to survive repeated 7k attacks.
- Mihawk’s strongest plan is wide pressure, not simply rushing Shanks into the first Big Mom.
- 7k attacks matter because Robin cannot efficiently defend them without Giant or spending cards it needs to stabilize.
- Do not counter every banish hit. Mihawk needs hand for development, events, and board protection.
- Shanks plus Luna should be used when Robin is already under lethal pressure, not simply because the combo is available.
- Dead Man’s Game may become a key Robin tech because tapping DON!! can turn off Giant and make Big Mom removable.
- Mont-dor is a real blowout but should not stop Mihawk from playing its one-drop engine.
- Robin’s best defense is Big Mom plus Giant plus a real board. If Robin is only defending without attackers, Mihawk can continue developing and eventually overwhelm it.
- The matchup is won before the second Big Mom. Mihawk wants Robin low and short on hand before that point; Robin wants to survive long enough to create a healing wall Mihawk cannot efficiently break.
Ladder con Elijah · 3/09
Elijah in ladder sceglie fra Law + Yasopp e Mihawk + Perona: tre Decken, tre Boat, Law/Bepo, mirror, Enel e Robin.
Session Overview
This ladder session is Elijah working through the practical reality of OP17 Mihawk rather than presenting a fixed final guide. The main focus is the unresolved choice between the Law plus Yasopp build and the Mihawk plus Perona build, with live games used to evaluate mirror performance, Enel, Robin, and a range of fringe ladder opponents.
His starting conclusion is nuanced:
- The Law plus Yasopp build appears better into the wider field.
- The Mihawk plus Perona build appears better in the mirror.
- Elijah is personally leaning slightly toward Law plus Yasopp, but sees the decision as close.
- The exact final 50 is still unsettled.
- The deciding factor is expected field composition, especially how many Mihawk mirrors and Mihawk plus Perona lists are expected at the top tables.
The session also sharpens several practical conclusions:
- Three Vander Deckens are probably enough.
- Three Boats are mandatory.
- Law/Bepo has been underwhelming in the mirror specifically.
- Stun Bonney is powerful in theory, but Elijah is personally less impressed with it than many other top players.
- Luna is much better against Mihawk plus Perona boards than against Law plus Yasopp boards.
- Perona proved much better in practice than Elijah expected in several non-mirror games.
- Enel is meaningfully harder for Mihawk now than it was in OP16.5, especially if Enel is built to target Mihawk.
THE TWO MIHAWK BUILDS
Law plus Yasopp
Elijah’s working view is that Law plus Yasopp is the stronger all-field version.
The build’s advantages:
- Yasopp provides board control against smaller characters.
- Yasopp is difficult to punish because it can rest for leader effect and then stand again.
- Law gives flexible double-development turns.
- Law can recycle a Perona or Vander Decken.
- Law creates blocker bodies.
- Law can be played later in the game more naturally than Mihawk.
- Law helps the deck make meaningful plays after the first Shanks turn.
- Yasopp makes several difficult matchups more manageable, especially where early board control matters.
The Law build’s weaknesses:
- It is more dependent on having enough one-drops.
- Samurai can be harder to resolve because the deck cannot afford to lose all of its one-drops.
- It can fail if it cannot Law, Samurai, or pick up a relevant body.
- It is less naturally powerful in the mirror because its main bodies are smaller.
- It needs more careful management of one-drop count, counter, and board space.
Elijah repeatedly notes that the Law version can develop “fail rate” when it does not have enough one-drops to Samurai or pick up with Law. This is one reason he does not want to cut too many small bodies or 2ks in the shell.
Mihawk plus Perona
The Mihawk plus Perona build is the mirror-focused option.
Its advantages:
- Mihawk has a 7k stat line.
- Perona is excellent in the mirror.
- Mihawk is harder to trade into than smaller Law bodies.
- Perona can float into a new character.
- The build can create high-value double development through Mihawk plus Perona.
- It performs better against a mirror field where opponents play Law plus Yasopp.
- Perona gives strong board pressure and better resilience in games where it lives for multiple turns.
The Mihawk plus Perona build’s weaknesses:
- It is less flexible into the broad field.
- It gives up some Yasopp-based board control.
- It can be less comfortable against Robin, Enel, and other decks where Yasopp’s immediate board interaction matters.
- It has fewer natural ways to exploit Stun Bonney with Law recursion.
- It may lose equity into the decks designed specifically to challenge Mihawk.
Elijah’s evaluation is not that one shell is unquestionably better. It is: Law plus Yasopp is likely better into the field. Mihawk plus Perona is likely better into the mirror.
The correct submission depends on whether the event is expected to be a Mihawk-heavy top-table tournament or a broad field full of Enel, Robin, Sabo, Kaido, and rogue decks.
DECKLIST FINDINGS
Three Vander Deckens
Elijah is firmly leaning toward three Vander Deckens.
Why three is enough:
- The deck has huge card velocity.
- You usually only need to resolve one Vander Decken in a game.
- Opponents now play around Decken better than they did in early OP17 testing.
- The old lines where Decken repeatedly punished blockers or major bodies are less common.
- A fourth copy can become a brick.
- The deck has better uses for its limited flex slots.
The old high-value Decken pattern was:
- Opponent blocks with a key body.
- Mihawk plays Decken and removes it.
- Next turn, Mihawk plays Shanks and Decken again.
- Opponent loses multiple major bodies while Mihawk keeps pushing.
Elijah believes competent opponents now prevent this pattern more often. Therefore, three copies provide enough access without overloading the deck.
Three Boats Are Mandatory
Elijah is very clear that he wants three Boats.
Boat matters because it:
- Provides a reliable rest target.
- Supports Samurai.
- Improves stage and event conversion.
- Helps the deck cycle and maintain card flow.
- Makes later turns less awkward.
- Allows Mihawk to use events without sacrificing the ability to develop and attack.
- Gives the deck a more stable structure in games where it needs to hold defensive DON!!.
He does not want to play fewer than three Boats.
Shanks Count
Elijah’s current list was playing three Shanks, which made him nervous in some ladder games.
With four Shanks:
- It is easy to pitch an early Shanks through Kin’emon.
- You do not need to take Shanks off searches as often.
- Missing Shanks is less concerning.
- The deck has more redundancy in its primary finisher.
With three Shanks:
- Pitching an early Shanks feels much riskier.
- You may need to hold a Shanks that would otherwise be a reasonable discard.
- The deck can fail to assemble its key 10-DON!! turns.
- Search priorities become more awkward.
Elijah was not fully settled, but the session shows the practical cost of lowering Shanks count: the deck becomes less willing to use Shanks as discard fuel and less able to trust its deck velocity.
Stun Bonney
Elijah is personally lower on Stun Bonney than much of the ladder.
Why he is skeptical:
- Bonney stops the opponent’s 10-DON!! bomb turn, but does not stop their current board from attacking.
- If the opponent has not been board-controlled, they can still send four or five attacks.
- Stun Bonney can leave the Mihawk player taking too much pressure even while preventing Shanks.
- Against Mihawk plus Perona, the opponent may still have a functional Perona turn and enough board to maintain pressure.
- The card often feels like an excellent 1k counter rather than a decisive win condition.
He sees cases where it is strong:
- If Yasopp has already removed important opposing bodies.
- If the opponent’s board is reduced to only a few threats.
- If Bonney forces the opponent into an awkward Perona-only turn.
- If Law can recycle Bonney and deny multiple bomb turns.
- Into yellow decks where denying the first 10-DON!! Big Mom turn is genuinely devastating.
But he does not believe Bonney alone automatically wins the mirror.
Luna Versus Stronger
Elijah’s view depends on which mirror shell dominates.
If the expected mirror is Law plus Yasopp:
- Stronger can be reasonable.
- The board is often narrower.
- Luna may not freeze enough targets to justify itself.
- Stronger is better outside the mirror because its counter text matters more often.
If the expected mirror is Mihawk plus Perona:
- Luna is much better.
- Perona floats into additional bodies.
- Mihawk’s 7k bodies are harder to clear.
- The opponent can easily have four or more relevant targets.
- Stronger is too small against that board.
- Luna is required to prevent the opponent’s full board from converting.
Elijah is worried that the Mihawk plus Perona build will remain common enough that cutting Luna entirely is dangerous.
One-Cost Zoro
Elijah discusses one-cost Zoro as an unusual flex option.
Potential uses:
- Strong against Sabo before its smaller bodies awaken.
- Can punish a weak Law build mirror opener if the opponent has only one one-drop.
- Has some merit against Enel.
- Can sometimes completely swing an early board race.
Why he is unsure:
- There is only one early Sabo turn where it is truly high-impact.
- It is not something the deck mulligans for.
- Law lists often play enough one-drops to make the line rare.
- Mihawk plus Perona lists may not care as much.
- It is not reliable enough to be a core slot.
Elijah sees it as a possible meta call, not a standard inclusion.
LAW/BEPO FINDINGS
Underwhelming in the Mirror
One of Elijah’s clearest ladder findings is that Law/Bepo has been underwhelming in the mirror.
Why:
- The opponent can Law/Bepo and still needs Luna.
- If the opponent does not Luna, Mihawk can attack into their board repeatedly.
- Law/Bepo often dies quickly.
- It does not create the same board-locking pressure as Shanks plus Decken plus Luna.
- It may gain only one extra 1k or one extra swing, which often does not decide the game.
- The deck can be better served by Shanks and Luna setups.
Elijah’s central question is: What does Law/Bepo actually do that Shanks plus Vander Decken plus Luna does not already do better?
He currently sees Law/Bepo as potentially better outside the mirror than inside it, but he is not yet convinced it is necessary.
Possible Non-Mirror Value
Law/Bepo may still have merit outside the mirror because it:
- Raises leader power.
- Punishes players who turn their full board sideways to play around Shanks.
- Buys an extra turn.
- Can invalidate a board of 6k attackers.
- Can serve as a late-game bridge between first and second Shanks.
Elijah does not rule it out. He simply sees far less mirror impact than expected.
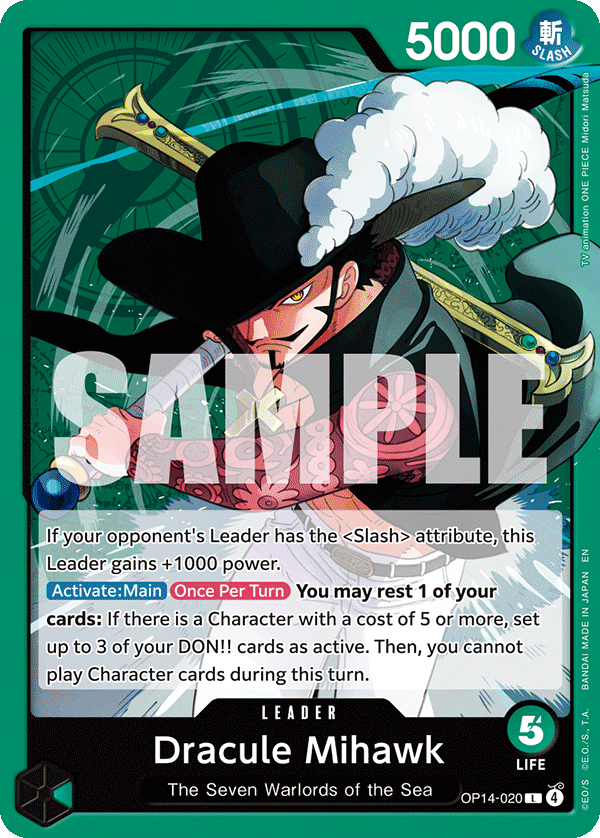
MIHAWK MIRROR FINDINGS
The Mirror Is About Pressure and Counter Density
The ladder session reinforces that the mirror is not only about bomb timing. It is about using 7k attacks to strain a deck with limited 2k density.
Elijah repeatedly favors attack patterns such as:
- 7k, 7k, 7k
- 7k, 7k, 7k, 7k
- 8k, 8k when the opponent has no relevant open DON!!
- 12k when the opponent is already low and cannot efficiently defend
Why 7k matters:
- The deck often plays limited 2ks.
- Many 1ks are placed on board or used for engine effects.
- The opponent may need to give several 2ks to stop a sequence of 7k attacks.
- Repeated 7k attacks can drain the opponent’s hand faster than mixed 6k/8k lines.
Elijah’s goal is often to “2k-check” the opponent repeatedly rather than offer a sequence they can answer with one event, one small counter, or a free block.
Perona Is Better Than It Looks
Elijah came away impressed with Perona.
In one Enel game, Perona remained in play and attacked several times because Enel could not clear it cleanly. Elijah noted that if Perona had been any other 5-cost body, it would have been removed immediately.
Perona’s value:
- It floats into a new body when removed.
- It creates repeated attacks if ignored.
- It gives a standing body that helps preserve board density.
- It contributes meaningful board pressure in matchups where the opponent cannot afford to trade into it.
This finding makes the Mihawk plus Perona shell more attractive than its abstract theory suggests.
Stun Timing
Elijah gives a concise theory of stuns:
- The stun prevents the opponent from winning before your lethal next turn.
- You will continue stunning the board until you win.
- You stun the board now so you can kill it next turn.
Stunning too early is often wasted value. The opponent untaps, and the body attacks later anyway.
Before playing Luna, Stronger, Perona, Oden, or another stun, ask:
- Does this prevent lethal now?
- Does this create lethal next turn?
- Does this let me remove the target before it attacks again?
- Does this buy enough time to reach Shanks?
- Will the opponent simply untap and continue their plan?
If none of these are true, the stun may be a tempo-negative action.
Board Versus Face
Elijah’s mirror decisions are based on projected game length, not merely the number of rested bodies.
When choosing between attacking board and face, ask:
- Who is ahead on board?
- Who is ahead on hand?
- Does one player need to race?
- Can the opponent stabilize if given another turn?
- Does clearing a body remove an actual future attack?
- Does attacking life put the opponent into Shanks range?
- Is the game likely to end in one, two, or three turns?
The number of rested bodies alone should not decide the line.
Samurai Timing
Elijah becomes more cautious about Samurai on turn three.
Why Samurai on three can be bad:
- You often have only a few one-drops.
- The opponent can trade into those one-drops.
- You may lose access to Law development.
- You may leave yourself too low on bodies for future Samurai.
- A Perona can be especially painful to expose because it is one of the more valuable one-drops.
Samurai is more attractive on turn four when:
- You have more one-drops in play.
- You can replace them with new standing bodies.
- You can develop two characters afterward.
- You can trade into an opposing body first, then Samurai.
- The opponent has limited ability to trade back.
Elijah’s practical advice:
- Do not automatically Samurai on three.
- Samurai on three is reasonable if the opponent has zero or one one-drop.
- If the opponent has several one-drops, preserve bodies for Law and future development.
- Consider attacking into a one-drop first, then Samurai once the board is safer.
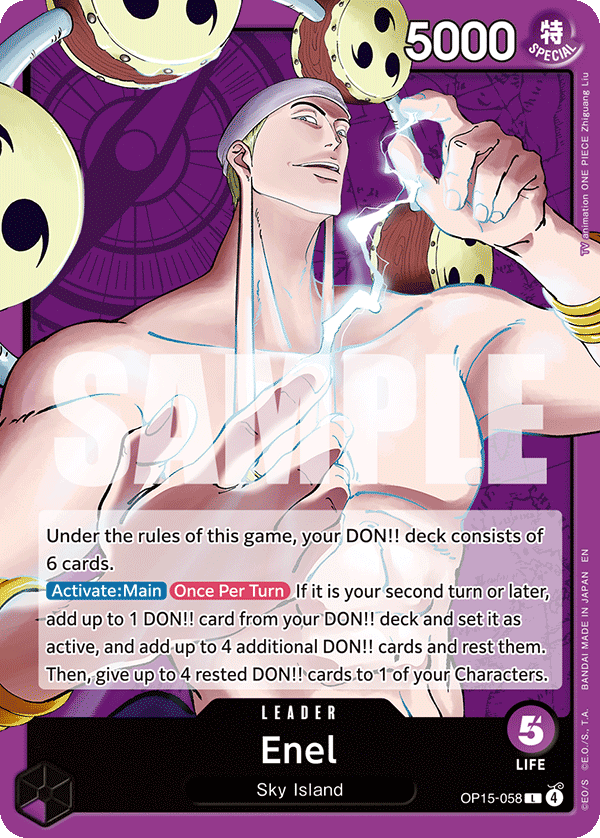
MIHAWK VS ENEL
Matchup Assessment
Elijah finds Enel harder now than in OP16.5 when playing the Law plus Yasopp version.
Why:
- Enel is more specifically built to beat Mihawk.
- Enel has X-Drake, Law, and other interactions.
- Enel can hand-rip key pieces.
- Enel can open many one-drops, especially Ohm.
- Enel can use Mamaragan to gain life and preserve hand.
- Enel can force Mihawk to protect board while still keeping a wide engine.
This is no longer a matchup Mihawk can treat as routine. It requires tighter counter management and better recognition of Enel’s board texture.
EarlyEarly-Life Decisions
Elijah is willing to take some early hits, but he specifically thinks about the future swing distribution.
A useful question is: Will there be enough attacks above 6k before my 10-DON!! turn that taking this 6k now is actually dangerous?
If the answer is no, taking can be correct.
If future attacks are mostly 6k or smaller:
- You may simply counter later with the same card.
- Taking life now may give Perona, Kin’emon, stage, or another playable.
- You gain hand quality and more options.
However, when Enel has a wide one-drop board and repeated 6k attacks, Mihawk must be more careful. The total number of swings can become more dangerous than the individual attack size.
Do Not Give Free Mamaragan
A major Enel lesson from the session: Do not attack Enel for 5k if you have unused DON!! and no reason to keep it open.
A 5k attack can be Mamaragan’d efficiently.
When Enel Mamaragans a 5k:
- Enel keeps hand parity.
- Enel gains a life.
- That life later absorbs a larger 7k attack.
- Mihawk’s pressure is effectively reduced by much more than the current 5k attack.
If Mihawk is not using the DON!! for:
- Samurai
- Boat
- search
- counter events
- development
then it should increase the attack size to 6k or 7k and force a more expensive response.
Triple Ohm Problem
Elijah is very clear that multiple Ohms change the matchup.
Against triple Ohm:
- Your medium bodies are often dying no matter what.
- Trying to clear every Ohm can be futile.
- Enel can trade back into most small bodies.
- Samurai can become correct even with larger bodies because those bodies are doomed anyway.
- The right plan may be to convert bodies into cards before Ohm trades consume them.
In the session, Elijah says that he would normally avoid Samurai’ing large bodies, but against a board like triple Ohm, he may Samurai them because they are unlikely to survive either way.
Hand-Rip Law
Elijah is willing to play around hand-rip Law if his hand has a critical vulnerability.
Counter early if:
- The opponent’s Law can take the only two cards that make your next turn function.
- You have one Oden and one key 5-cost, and losing both destroys your curve.
- You lack redundancy.
- You are already low on life and cannot afford another pressure turn.
Do not overplay around Law if your hand is redundant. Losing an Oden and Mihawk is bad, but not necessarily worth giving up too much life or hand if you still have functional follow-up.
Perona and Yasopp
Elijah sees Perona as excellent against Enel because it is hard to cleanly remove.
Yasopp is good when:
- It can remove Enel’s key midrange character.
- It prevents Enel from sticking a body and then building another 4-cost behind it.
- It lets Mihawk control the snowball point before Enel gets too wide.
The general priority is:
- Control Enel’s one-drops where possible.
- Remove midrange bodies before they snowball.
- Do not expect your board to remain untouched.
- Use Shanks and Luna to create a final turn where Enel’s one-drops no longer attack.
Enel Win Condition for Mihawk
Elijah’s expected winning sequence is often:
- Survive early pressure without losing all hand.
- Use Perona, Yasopp, Oden, and Law to reduce Enel’s board.
- Push Enel low enough for Shanks.
- Play Shanks plus Luna.
- Disable the one-drop board.
- Force Enel to spend resources without being able to attack back.
- Use the second Shanks to close.
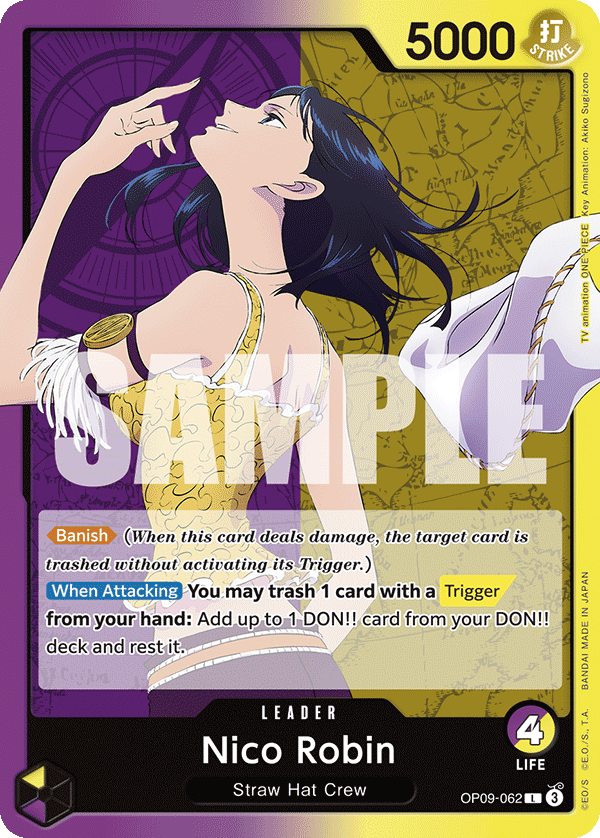
MIHAWK VS ROBIN
Matchup Assessment
Elijah prefers going first into Robin, particularly when using the Law plus Yasopp shell.
Why:
- Going first makes Robin’s strongest ramp start harder.
- Mihawk gets an extra attacker before Robin can fully stabilize.
- The Mihawk player can pressure Robin before double ramp, Teach, and Big Mom become active.
- Robin’s high-roll line is dangerous if Mihawk goes second and fails to establish early board.
Robin’s strongest start is approximately:
- Go second.
- Double ramp.
- Play Teach on 6 DON!! turn.
- Play Big Mom afterward.
- Build into a healing, board-control shell.
If Robin executes this while Mihawk misses six-cost development and small bodies, the matchup can become extremely difficult.
Why Law Plus Yasopp Helps
Elijah thinks Robin is harder without Law plus Yasopp.
Yasopp helps because:
- It removes Robin’s 4k bodies.
- It reduces Robin’s board before Linlin enters.
- It can prevent Robin from getting multiple attackers.
- It keeps Robin’s first Big Mom turn from converting enough pressure.
- It gives Mihawk a way to control board while still developing.
Law helps because:
- It can replay Perona.
- It can develop blockers.
- It can reuse Vander Decken.
- It creates more relevant late-game plays.
- It helps Mihawk go wide enough that Robin cannot survive solely through defensive cards.
Attack Plan
Against Robin, Elijah wants to attack for real numbers, especially when low-rolling.
If the DON!! is not needed elsewhere:
- Do not settle for a 5k attack into a possible Teach trigger.
- Consider whether 6k or 7k creates more useful pressure.
- Use board pressure to force Robin to spend cards before its healing engine comes online.
- Go wide rather than rely entirely on Shanks.
Elijah specifically notes that Mihawk may prefer 6-cost plus 5-cost development repeatedly over rushing Shanks. Robin struggles when Mihawk reaches a board of multiple attackers and can present five or more swings.
When Robin Damages Mihawk With Characters
Elijah identifies a major Robin mistake: attacking Mihawk’s life with characters too aggressively.
Why it is risky:
- Mihawk can take the damage.
- Taking life gives Mihawk more cards.
- Robin may fail to trade into Mihawk’s board.
- Mihawk’s Laws become blockers.
- Robin’s board is not actually reducing Mihawk’s future board.
- Mihawk can become too wide for Robin to answer.
Robin needs to be careful. If it attacks life but does not remove board, it may simply give Mihawk the hand it needs to assemble Shanks, Decken, Luna, and Law turns.
Robin High-Roll Warning
Even though Elijah prefers Mihawk, he is clear that Robin can create an almost unwinnable start.
The dangerous situation is:
- Robin double ramps.
- Robin plays Teach on curve.
- Mihawk misses a 6-cost development.
- Mihawk fails to find enough one-drops.
- Samurai gets stuck in hand.
- Robin hits trigger value.
- Big Mom comes down before Mihawk establishes a board.
In those games, Mihawk can lose not because the macro plan is wrong, but because Robin has combined acceleration, hand disruption, trigger value, and a major healing threat before Mihawk is online.
MIHAWK VERSUS FIELDS WITH LOW COUNTER
Attack for Sevens
Elijah repeatedly returns to the importance of knowing the opponent’s counter distribution.
Against decks with limited 2k density:
- Attack for 7k repeatedly.
- Force them to give 2ks or events.
- Do not default to 6k if 7k is available.
- Do not overcommit into a giant swing if multiple 7ks are more difficult to defend.
- Use the deck’s free DON!! to make every medium body ask a real question.
He calls this “2k-checking.”
The goal is to create a turn where the opponent needs more 2ks than their deck is likely to have.
GAMEPLAY FINDINGS
When to Leave DON!! Open
Elijah’s rule is not “always leave DON!! for events.”
Leave DON!! open when:
- You need an event to survive the opponent’s likely attack spread.
- You need Rad Beam to protect a key body.
- The event will become uncastable on the next all-DON!! Shanks turn.
- You are preparing for a known 7k, 7k, 7k attack sequence.
- You need to preserve a specific life total before a bomb turn.
Do not leave DON!! open merely because you want the opponent to counter. If the DON!! is unused and a larger attack prevents Mamaragan, forces a 2k, or advances lethal, attach it.
When to Protect a Body
Elijah’s practical framework:
Protect the body when:
- It will attack again.
- It keeps you wide enough that the opponent must use Luna.
- It creates a future 8k attack.
- It lets you maintain an attacker advantage.
- It prevents the opponent from getting a clean board-control line.
- It is a key blocker or engine body.
- You have enough card flow to afford the counter investment.
Let the body die when:
- It gets one weak attack and then enters Luna jail.
- You need the hand to survive a Shanks turn.
- The body is not needed for lethal.
- The opponent can still remove it with multiple attacks.
- Your remaining board is already wide enough.
- It cannot generate more than one card of value before becoming irrelevant.
LateLethal Planning
Elijah’s late-game plan is often:
- Put the opponent at one or zero.
- Shanks plus Luna.
- Skip their meaningful turn.
- Use second Shanks or remaining board to finish.
He emphasizes that players should calculate whether the game ends next turn or requires another turn.
If the game ends next turn:
- Use Luna aggressively.
- Spend the Shanks turn to disable the board.
- Do not preserve resources unnecessarily.
If the game requires more than two turns:
- Do not waste all Lunas early.
- Preserve events.
- Consider board control instead of forcing a low-percentage lethal.
- Use Law, Perona, or Oden to buy time and build toward the second Shanks.
FINAL TAKEAWAYS
Deck selection
- Law plus Yasopp is likely better into the field.
- Mihawk plus Perona is likely better in the mirror.
- Elijah slightly leans Law plus Yasopp but remains undecided.
- The final choice should depend on expected mirror density and tournament field composition.
List construction
- Three Boats are mandatory.
- Three Vander Deckens are likely enough.
- Three Shanks can create awkward discard decisions; four may be safer.
- Stun Bonney is strong in theory but not automatically correct.
- Luna is necessary if Mihawk plus Perona boards are common.
- Stronger becomes more attractive only if Law plus Yasopp mirrors dominate.
- Law/Bepo is currently underwhelming in the mirror but may retain non-mirror value.
Gameplay
- Do not Samurai blindly on turn three.
- Preserve one-drops for Law and future Samurai turns.
- Use 7k attacks to 2k-check opponents.
- Do not give Enel free Mamaragan on 5k attacks.
- Take early life when future attack math permits it.
- Counter early when hand-rip Law can remove your only functional curve.
- Use Perona more aggressively than abstract theory may suggest.
- Do not let Robin establish its full ramp, Teach, Big Mom sequence uncontested.
- Know whether your board is actually worth protecting before spending the counter.
Tournament view
Mihawk remains one of OP17’s strongest decks because it rewards card tracking, matchup knowledge, disciplined attack sizing, and correct late-game planning. The player who identifies the opponent’s counter thresholds, maps a two-Shanks kill, and uses their one-drops and searchers efficiently will gain more from the deck than a player simply copying the strongest list.
VOD review con Equinby · 27/08
VOD review condotta da Elijah su più mazzi: Sabo vs Mihawk, Robin vs Rocks, Mihawk vs P Enel e vs Ace Luffy, e un metodo generale per leggere vita, carte, board e DON!!.
OP17 and OP16.5 Gameplay, Matchup Theory, and Decision-Making Frameworks
Session Overview
This session is a broad VOD review led by Elijah. Rather than staying on one deck, he reviews several games and uses them to teach a universal decision-making framework:
- Understand which deck benefits if the game becomes shorter or longer.
- Do not treat life, hand, board, and DON!! as separate resources. Every decision exchanges one of them for another.
- Attack sizing matters. A 5k, 6k, and 7k swing can create completely different outcomes depending on the opponent’s deck.
- Use matchup knowledge to identify which cards are real and which cards are effectively bricks.
- Do not spend resources defending bodies that cannot survive the entire opposing turn.
- Build your game plan around the opposing deck’s actual win condition, not the card that looks scariest in the moment.
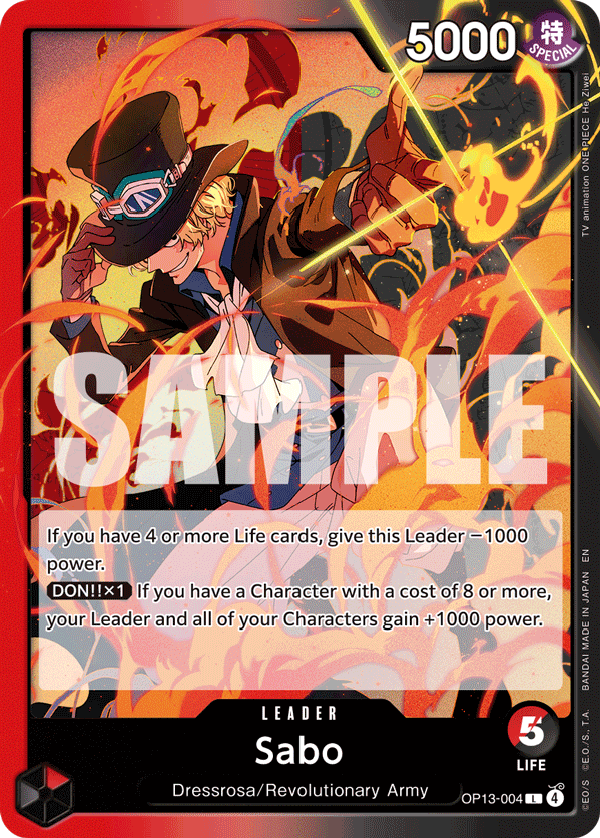
ELBAF SABO VS MIHAWK
Matchup Identity
Elijah sees Sabo versus Mihawk as a matchup that should favor Sabo when the Sabo player understands the race.
The reason is structural:
- Sabo can put more bodies and more stats into play earlier.
- Mihawk gets stronger as the game progresses.
- Mihawk gains access to more DON!! for events, stuns, and bigger development.
- Mihawk eventually has access to Shanks, Decken, Luna, and massive turns that can invalidate Sabo’s board.
- Sabo does not want to give Mihawk the time required to establish that late-game control package.
The core conclusion:
This is not just a matchup-specific lesson. Elijah uses it as a model for how players should analyze every matchup.
Before deciding whether to clear board, push life, or develop, ask:
- Which deck is strongest in the early game?
- Which deck is strongest in the late game?
- Does my current line speed up the game or extend it?
- Does extending the game benefit me or my opponent?
TurnoDie Roll and Going Second
Elijah believes Sabo should generally choose second into Mihawk.
Going second matters because:
- Sabo gets the stronger curve.
- It develops more efficiently.
- It can establish Giant plus bodies faster.
- It has greater ability to present multiple attacks before Mihawk’s major control turns.
- Mihawk’s going-first pressure can be difficult, but Sabo’s second-player development helps compensate.
A Sabo player who accidentally chooses first gives up a meaningful structural edge.
EarlyEarly-Game Plan
Elijah’s preferred Sabo progression against Mihawk is not to rush out Saul on the first available turn.
If Sabo goes first, he prefers something closer to:
- Play a 2-cost body on the 3-DON!! turn.
- Swing 5k.
- On 5 DON!!, develop two 2-cost bodies again.
- Swing another 5k.
- On 7 DON!!, establish Saul or Loki.
- If Saul is used, pair it with another 2-cost body.
- Enter the following turn with a board that can attack multiple times.
Why this is better than Saul on 5:
- Sabo wants to chip Mihawk early before Mihawk has large defensive options.
- Double 2-cost development creates more board density.
- Saul alone does not create enough immediate pressure.
- A delayed Saul can create a five-wide board and several 6k to 7k attacks.
- Mihawk will often stop only one or two attacks with Perona, Oden, or Yasopp, leaving Sabo with multiple remaining swings.
Saul and Loki Roles
Saul
Saul is powerful, but fragile.
Elijah sees Saul as a card that:
- Enables the Giant package.
- Makes the board function.
- Can create a large conversion turn.
- Often must remain standing because losing it can collapse the deck’s entire structure.
Saul is not always the best immediate play. If Sabo has no second Giant or no follow-up body, playing Saul too early can create a bottleneck where Mihawk removes it and Sabo loses its entire plan.
Loki
Loki is more resilient than Saul.
Loki is often preferable when:
- The opponent has removal.
- Sabo needs a Giant that can safely attack.
- Saul is the only remaining Giant.
- Sabo needs to avoid being locked out of its leader or Giant-dependent turns.
Loki’s advantage is that it can often attack without immediately collapsing the board plan. Saul frequently has to remain active because it is too important to lose.
Zoro as the Anti-Shanks Tool
A key Elijah lesson in this matchup is using Zoro to survive the Mihawk Shanks plus Decken turn.
Mihawk’s intended 10-DON!! turn often involves:
- Shanks plus Decken.
- Stuns or freezes.
- A major body that invalidates Sabo’s board.
- Pressure that attempts to remove Sabo’s Giant and lock its attacks.
Sabo’s answer is often Zoro.
The Sabo player should:
- Have a Zoro available before Mihawk’s 9-DON!! or 10-DON!! control turn.
- Preferably play the Zoro from the Luffy turn, so it has not been exposed earlier.
- Be willing to spend a huge amount of hand defending Zoro.
- Treat Zoro as the card that keeps the whole board functional through the critical turn.
Elijah’s core idea is that the Sabo player may need to “dump the hand” to protect Zoro.
Why that can be correct:
- Mihawk can attack with several 6k bodies, then a 12k Shanks or similar large attacker.
- Sabo may need to give multiple 1ks and 2ks.
- But if Zoro survives, Mihawk should die on the following turn because Sabo has already landed several earlier attacks.
- Mihawk cannot cleanly Decken Sabo if Sabo’s Zoro and board remain functional.
Double Giant Line
Elijah describes a stronger Sabo sequence when the player finds two Giants:
- Giant on 5.
- Giant on 7.
- Luffy on 9.
- Use Luffy to deploy Zoro.
- Mihawk attacks the Zoro with multiple 6k swings.
- Sabo counters the 6ks.
- Mihawk sends a large 12k attack.
- Sabo can allow Zoro to die to the 12k.
- Mihawk uses Decken on the second Giant.
- Sabo still retains the first Giant and Luffy, leaving a functioning board.
This line is stronger because it forces Mihawk to spend its control tools on multiple different threats. Sabo does not need every body to live. It needs enough of the board to remain active after Mihawk spends its big turn.
Why the Reviewed Game Was Lost
Elijah identifies both draw issues and gameplay mistakes.
The Sabo player:
- Missed early pressure.
- Did not swing 5k on the 3-DON!! turn.
- Did not double-develop 2-cost bodies on the 5-DON!! turn.
- Played Saul in a spot where it did not advance the actual race.
- Fell behind on board density.
- Allowed the game to progress into Mihawk’s ideal late-game window.
By the time the player used Gravity Blade, clearing Mihawk’s board may have delayed defeat, but it did not create a realistic winning route.
This is an important distinction: A play can prevent you from losing immediately without helping you win.
Gravity Blading Mihawk in that spot gave Sabo more time, but Sabo was already too far behind to use that time productively.
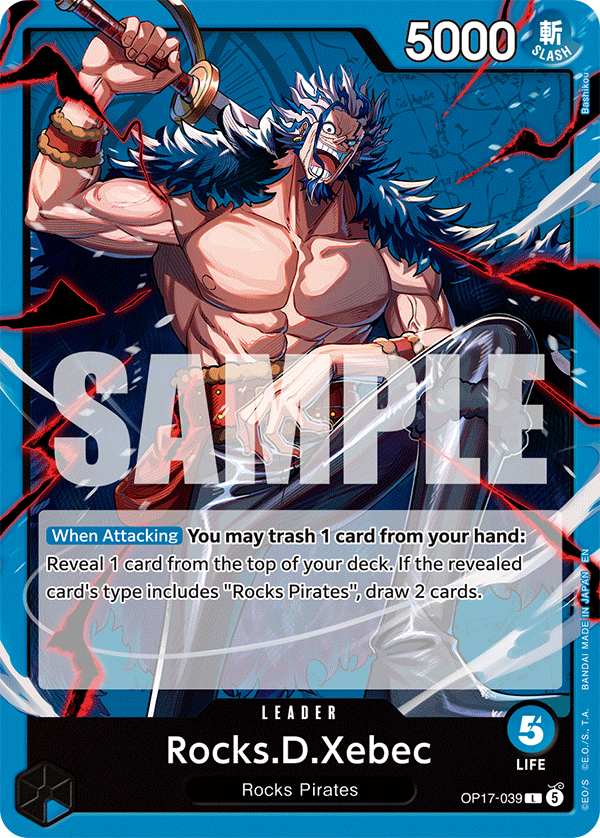
ROBIN VS ROCKS
Matchup Identity
Elijah sees Robin versus Rocks as a difficult matchup for Robin, but more playable than Sabo versus Rocks.
Robin’s general plan is unusual:
- Starve Rocks except for leader swings.
- Heal through Rocks’ pressure.
- Wait for Rocks to turn meaningful bodies sideways.
- Use Sweet Generals and board interaction to clear those rested bodies.
- Slowly exhaust Rocks’ hand and board despite the leader drawing cards.
At face value, starving Rocks seems strange because Rocks draws two cards every turn. However, Robin’s plan is not to win instantly through starvation. The plan is to make Rocks develop without gaining life resources, then punish the board once it turns.
TurnoGoing Second
Elijah strongly supports Robin going second into Rocks.
Reasons:
- Robin gets more DON!! for repeated searches.
- Robin can more reliably find Pudding, 3-cost plays, and 10-cost Big Mom.
- Robin gets better access to its ramp and healing progression.
- The 6-DON!! turn becomes more efficient because Robin can use a Big Mom spell rather than spending leader skill repeatedly.
- Robin has more room to maintain hand quality while preparing for Rocks’ early Linlin turns.
Search Sequencing
Elijah highlights a major fundamental rule: Resolve the smallest search first, then resolve the larger search.
Why:
- The small search provides information.
- The larger search can then use that information.
- You always want maximum information before committing to the higher-impact search.
- You may learn that you no longer need to search, or that one card should now be prioritized over another.
For example:
- Look at 3 cards first.
- Then use the search that sees 5 cards.
- Do not automatically reverse the order.
The only exception is when the player is uncertain whether they will use every search effect. If you know you will use all of them, start with the smallest one.
Pudding and Big Mom Spell Management
Elijah likes preserving the card that allows Robin to double-ramp efficiently on the 6-DON!! turn.
The logic:
- Rocks often plays Linlin on 5.
- If Rocks develops the expected Big Mom card, Robin can use its Big Mom spell on 6.
- This can avoid spending leader effect twice.
- Robin saves a card in hand compared with a leader-effect-heavy sequence.
- Robin maintains a smoother route to Sweet Generals and 10-cost Big Mom.
A player should not discard this setup piece too casually just because another card looks playable now.
When to Use Smoothie
Elijah is skeptical of Smoothie in many Rocks positions.
Smoothie is best when:
- The opponent is countering banish attacks.
- The opponent has a small hand.
- The player needs to force hand pressure immediately.
- The game is a yellow mirror where life cards and trigger access matter heavily.
Smoothie is weaker when:
- Rocks is willing to take banish hits.
- Robin cannot meaningfully punish Rocks’ hand.
- Playing Smoothie delays Big Mom development.
- Robin has better healing and board-control lines available.
Robin’s Starve Plan
The proposed Robin plan against Rocks is:
- Attack primarily with leader.
- Do not feed Rocks unnecessary life resources.
- Heal regularly.
- Develop Sweet Generals and Big Mom bodies.
- Wait for Rocks to turn Newgate, Shiki, Linlin, or other important characters.
- Clear the rested board.
- Keep Rocks low enough that it cannot rebuild efficiently.
The theory is that Rocks eventually runs low on cards because:
- It must counter.
- It must develop board pieces.
- It must spend hand cards through leader effects.
- Several Rocks bodies do not replace themselves as efficiently as they appear.
- Robin’s repeated heals reduce Rocks’ ability to end the game.
Elijah acknowledges this plan is not fully solved. Rocks can simply develop more cards, keep major bodies standing, and wait until it has multiple 10-cost developments plus Shikis and Newgate. This is why Robin versus Rocks remains a matchup requiring more testing.
Big Mom Timing
Elijah spots a missed opportunity to play 10-cost Big Mom earlier.
The key lesson: If you have enough life, enough hand, and the opponent has limited ways to punish the board, play the major threat before it becomes too late.
In the reviewed line:
- Robin had multiple important bodies.
- Rocks had limited immediate pressure.
- Robin had enough counter and a heal available.
- Playing 10-cost Big Mom would have created a much larger board and made future Sweet Generals turns stronger.
Instead, delaying the Big Mom gave Rocks more room to build its own board.
Borsalino and Deck Construction
A Robin player in the session describes playing Borsalino as a key survival piece.
Borsalino matters because:
- It creates a meaningful body.
- It can stabilize against multiple attacks.
- It can help protect the board.
- It pairs with Pudding and Giant lines.
- It gives Robin survival turns that other cards cannot provide.
Elijah agrees that Borsalino is extremely strong, but notes that Robin list space is tight. The deck has many attractive options:
- Teach
- More searchers
- Borsalino
- “You’ll Frighten Me!”
- More Big Mom pieces
- Additional trigger density
- More healing cards
The key deckbuilding question is not whether a card is good. It is whether it is better than the card it replaces.
MIHAWK VS PENEL
Matchup Identity
The Mihawk versus Enel review focuses on life management, attack sizing, one-drop management, and how to avoid giving Enel high-value Mamaragan turns.
Mihawk’s overall plan is:
- Take early life liberally.
- Develop Mihawk plus Oden.
- Preserve enough board to create wide future turns.
- Use Perona, Oden, and Law/Bepo to control Enel’s relevant attackers.
- Avoid giving Enel efficient Mamaragan targets.
- Convert the board into large life pressure once Enel can no longer afford to use its events freely.
EarlyChoosing What to Counter Early
Elijah gives a highly transferable counter framework.
When deciding whether to take an early 6k attack, ask:
- How many future attacks bigger than 6k will occur before my 10-DON!! turn?
- Can those future attacks be stopped with Oden, Perona, events, or board interaction?
- If the future attacks are 6k or smaller, would I simply spend the same counter card later anyway?
- What can I draw from life that improves my next turn?
His conclusion is that Mihawk should generally be willing to take the first two attacks, including a 6k attack, unless there is a specific hand structure or lethal concern.
The logic:
- Mihawk needs several future attacks larger than 6k to make taking the current 6 actually punishing.
- Mihawk often has events and stuns that prevent future attacks.
- Life can reveal a playable Perona, Kin’emon, stage, or event.
- A counter card spent now may be the same card spent later against a smaller attack anyway.
When to Respect Hand-Rip Law
Elijah does not ignore hand-rip Law completely.
Counter early to avoid Law only when:
- Losing specific cards immediately loses the game.
- Your hand contains one crucial Oden and one crucial 5-cost.
- The opponent’s Law can remove both of the only cards that make your curve function.
- Your hand has no redundancy.
Do not overplay around Law when your hand has redundant pieces.
If the opponent can rip one Oden and one Mihawk but you still have functional curve and board development, that is annoying but not necessarily worth sacrificing multiple life cards or counters early.
Mamaragan Attack Sizing
A major correction in the Enel review is not leaving DON!! unused while attacking for only 5k.
If Mihawk is not using its remaining DON!! for:
- Samurai
- Boat
- an event
- a needed defensive line
- another development action
then it should increase the attack size.
Why:
- Enel can Mamaragan a 5k attack.
- Mamaragan preserves Enel’s hand while adding life.
- That extra life later absorbs a 7k attack.
- The result can be a huge effective advantage for Enel.
A 5k attack into a ready Mamaragan may be worse than a 6k or 7k attack that forces real resources.
The rule:
One-Drop Management
Elijah sees triple Ohm as a board that must be respected.
If Enel has multiple Ohms:
- Mihawk’s smaller bodies may die regardless of whether they remain active.
- The board can trade into Mihawk’s medium attackers.
- Samurai can become correct even with larger bodies if those bodies are doomed anyway.
- Drawing cards from Samurai and Mihawk cycling may be better than preserving bodies that cannot live.
Normally, Elijah would not Samurai major bodies in the matchup. But against triple Ohm, the board can be so hostile that extracting the draw immediately becomes reasonable.
The concept is: If a body is certainly dying, convert it into value before it dies.
Mihawk Plus Oden
The standard development is Mihawk plus Oden.
The goals are:
- Establish more than one relevant body.
- Freeze an attacker.
- Reduce Enel’s available attack count.
- Make Enel spend attacks on board instead of life.
- Create a board that can eventually attack for multiple 7k swings.
The Enel player can remove one body. The Mihawk player wins by forcing Enel to answer several bodies over multiple turns.
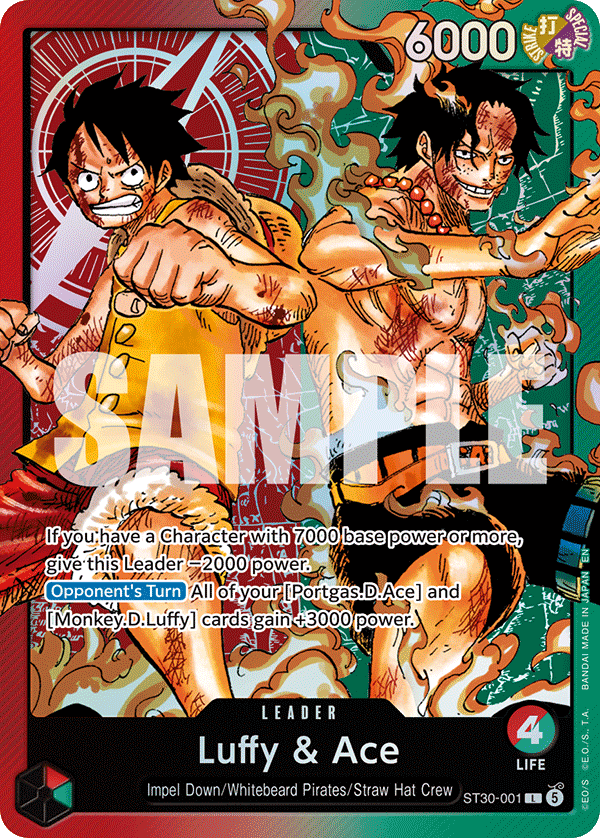
MIHAWK VS ACE LUFFY
Matchup Identity
Elijah considers Ace Luffy a low-play-rate deck that is deceptively easy to beat once the opponent understands its list construction.
Its major weakness is extreme lack of counter.
The deck effectively plays:
- Very few 2ks.
- Almost no meaningful 1ks.
- Low-cost cards that are usually placed on board rather than held.
- Bricks and event-heavy hands.
Elijah’s simplified matchup rule is: Attack Ace Luffy with repeated 7k swings and it dies.
He states that the deck can fold to one 6k attack followed by several 7k attacks because it cannot meaningfully protect life through normal counter.
Key Intelligence: Count the Counter
Against Ace Luffy:
- Do not assume it has normal counter density.
- Do not play as though you need giant 10k to 12k attacks.
- 7k, 7k attack patterns are often ideal.
- Repeated moderate attacks are better than inefficient overcommitted swings.
- The opponent’s real 1k cards are often cards they want to play, not cards they want to hold.
This is a tournament-level scouting lesson: If you know a deck’s counter distribution, you know which attack sizes actually matter.
Mihawk Plan
Mihawk should:
- Attack face.
- Use Yasopp aggressively.
- Let Yasopp restand itself through its effect when possible.
- Stop wasting turns on board control.
- Force Ace Luffy to defend life with cards it does not have.
Elijah critiques a line where Mihawk skipped two face swings.
The issue was severe because Ace Luffy does not have the counter density to survive. Every missed 6k or 7k attack is a missed opportunity to exploit the deck’s main structural weakness.
Why Board Control Is Usually Wrong
Mihawk cannot reasonably starve Ace Luffy and then clear its board like it might against a smaller-body deck.
Reasons:
- Ace Luffy’s relevant bodies are too large.
- Mihawk’s attacks are better spent at face.
- Ace Luffy is not built to defend repeated life pressure.
- A board-control plan extends the game, which helps the deck find more development and creates unnecessary variance.
If Mihawk has unused DON!! and is not spending it on Boat, Samurai, development, or events, it should attach the DON!! and make a larger face attack.
LIFE, COUNTER, AND RESOURCE THEORY
The Core Counter Question
Elijah spends substantial time explaining why counter decisions should be based on the entire future turn cycle, not the immediate attack.
The wrong question is: “Can I counter this attack?”
The correct question is: “If I do not counter this attack, what future attacks become impossible to survive, and what do I gain by taking the life now?”
EarlyWhen to Take Early Life
Taking early life is usually correct when:
- The attack is 5k or 6k.
- Your future defense can stop larger attacks.
- You have Oden, Perona, events, or stuns that reduce future attack count.
- The life card could be a playable card on your next turn.
- You are not immediately entering lethal range.
- Your hand has important but awkward cards and you need more options.
- The counter spent now would likely be spent later against a similarly sized attack.
EarlyWhen to Counter Early
Counter early when:
- The opponent has enough attacks to deal two or more life in the same turn.
- Your next turn requires a specific hand size or life total.
- You have a crucial card that needs protection from hand-rip.
- Taking life creates a known lethal threshold.
- You need to maintain a specific number of life to survive a later double-attack or rush sequence.
- The card spent is less valuable than the future life it saves.
Counter as Future Value
Elijah explains card value through future exchanges.
Example:
- Countering a 5k now with Franky may save one life.
- If you instead take the 5k, you may later need three cards to survive a 7k or 8k sequence.
- In that case, spending Franky early may be correct.
- But if taking the 5k gives you a playable card and future attacks remain manageable, taking is better.
The player must compare:
- One card now.
- Two or three cards later.
- The chance the life card improves the curve.
- The board state created by either decision.
Do Not Hold a Card You Cannot Play
A recurring example involves Franky.
If countering with Franky means you still have a workable Pink turn or another playable line, that can be correct.
But do not counter with Franky and then pass with no development if playing Franky was your only meaningful turn. That is a disaster because the card was not merely a counter. It was your entire board development.
The rule: Do not spend your only playable card as counter unless you know your remaining hand still has a functional turn.
GENERAL MATCHUP FRAMEWORK
Elijah’s most transferable teaching segment is his framework for determining whether each deck wants the game to be long or short.
EarlyStep One: Compare Early Boards
Ask:
- Which deck develops more stats early?
- Which deck gets more bodies out earlier?
- Which deck gets the first major pressure turn?
- Which deck has the better early attacks?
If your deck has the early stat advantage, you usually want to shorten the game.
LateStep Two: Compare Late-Game Tools
Ask:
- Which deck gains better events with more DON!!?
- Which deck has stronger 10-DON!! turns?
- Which deck has inevitable boss monsters?
- Which deck gets more value from long games?
- Which deck eventually invalidates the other deck’s board?
If the opponent’s late-game package is stronger, you need to pressure before it arrives.
Step Three: Identify the Opponent’s Actual Win Condition
Do not focus only on the visible threat.
Examples:
- Mihawk’s win condition against Sabo is not simply “play Oden.” It is surviving long enough to use Shanks, Decken, Luna, and major stun turns.
- Enel’s win condition against Mihawk is not one 6k attack. It is establishing enough one-drops and removal that Mihawk cannot retain a board.
- Robin’s win condition against Rocks is not merely healing. It is reaching a board where Rocks must turn meaningful characters into Sweet Generals removal.
- Ace Luffy’s win condition is not countering efficiently. It is winning before opponents recognize that it has almost no counter.
Step Four: Make Every Turn Serve That Plan
Once you know whether the game should be fast or slow:
- Do not take lines that only delay losing.
- Do not clear board if it does not help you win.
- Do not play a late-game value line if your deck loses long games.
- Do not race if the opponent cannot beat your endgame.
- Do not overprotect a body that does not enable the next winning turn.
PRACTICAL STUDY GUIDE
Sabo vs Mihawk
- Choose second when possible.
- Do not rush Saul onto the 5-DON!! turn without follow-up.
- Build board with 2-costs first.
- Chip Mihawk with early 5k swings.
- Establish Giant on 7, then create a wide attack turn.
- Save Zoro to survive Shanks plus Decken.
- Be willing to spend large amounts of hand protecting Zoro.
- End the game before Mihawk reaches full Shanks, Decken, Luna control.
Robin vs Rocks
- Choose second.
- Sequence small searches before large searches.
- Preserve cards that enable efficient 6-DON!! ramp.
- Do not assume Smoothie is always the best play.
- Heal and build board while Rocks develops.
- Avoid feeding Rocks unnecessary life.
- Punish rested Rocks engine bodies.
- Play 10-cost Big Mom early enough to matter.
- Track whether Rocks can simply develop through your starvation plan.
Mihawk vs Enel
- Take early 5k and 6k attacks liberally.
- Respect hand-rip Law only when your hand has no redundancy.
- Do not give Enel free Mamaragan on 5k if unused DON!! can create a larger swing.
- Develop Mihawk plus Oden.
- Respect multiple Ohms.
- Samurai doomed bodies rather than letting them die without value.
- Build wide enough that Enel cannot remove every relevant character.
- Keep enough counter for the future lethal turn, not every small attack.
Mihawk vs Ace Luffy
- Attack face.
- Use repeated 7k swings.
- Do not waste turns clearing board.
- Do not assume the deck has normal counter density.
- Yasopp is especially valuable because it can create a free rest and restand.
- Every missed face attack gives Ace Luffy unnecessary time.
- Moderate repeated attacks are better than one overcommitted giant attack.
Robin vs Ace Luffy
- Treat the matchup as highly unfavorable until more testing proves otherwise.
- Do not expect normal banish and heal control to function automatically.
- Be aware that low-play-rate decks can still be severe counterpicks.
- Do not overprepare for this matchup at the cost of core meta matchups unless Ace Luffy is common locally.
FINAL TAKEAWAYS
Elijah’s session is fundamentally about playing the matchup, not playing the card.
The core lessons are:
- Determine who wants the game to be fast and who wants it to be long.
- Do not defend a body that cannot survive the entire turn.
- Use attack sizing to deny the opponent’s best defensive exchange.
- Take early life when future attacks are manageable and life improves your next turn.
- Counter early only when the future math proves that the life matters more than the card.
- Know the opponent’s counter density before choosing attack numbers.
- Build a board that forces the opponent to spend whole turns on interaction.
- Do not mistake a move that delays defeat for a move that creates a win condition.
- Prioritize testing toward popular, hard, and high-stakes matchups instead of spending most of your time on low-play-rate rogues.
A tournament-ready player should be able to explain, before their first attack each turn, whether their objective is to race, stabilize, starve, protect a key body, or force lethal. When that answer is clear, the best line becomes much easier to find.
Il Codex: cosa c'è e dove
Le sei sessioni che il Codex raccoglie. Nel sito: la 1 (Q&A di Impact del 17/09) è nella pagina di Impact; la 4 (Impact, deep dive del 31/08) coincide con gli appunti della video-lezione di Impact; la 5 (samsansOP, 28/08) coincide con le note di samsansOP. Qui ci sono le altre tre, più l'indice originale.
NOTE PREFERITE — THE CODEX (thedojo.gg)
Raccolta delle 6 sessioni della Training Library contrassegnate con il cuoricino (Preferiti). Testo copiato integralmente dalle Session Notes. Estratto il 18 settembre 2026.
INDICE — 1) Theory Session, 17 set 2026 · 2) Vod Review, 9 set 2026 · 3) Ladder Grind, 3 set 2026 · 4) Deck Breakdown, 31 ago 2026 · 5) Deck Breakdown, 28 ago 2026 · 6) Vod Review, 27 ago 2026